Mastering Camera Shooting: A Practical How-To Guide
Learn camera shooting with a step-by-step guide covering exposure, composition, gear, and post-processing to capture sharp, compelling images across genres.

In this guide you’ll learn camera shooting with a practical, step-by-step approach. You'll balance exposure, composition, and focus across genres, using essential gear and settings. By the end you’ll confidently capture sharp, well-lit images you’re proud to share. This quick answer outlines the scope and prerequisites, so you can start immediately.
Foundations of Camera Shooting
Camera shooting begins with a solid grasp of the exposure triangle and how it shapes every image. According to Best Camera Tips, shooting well starts with how you control light: ISO, shutter speed, and aperture. ISO changes sensor sensitivity and affects noise; keep ISO as low as possible in bright light and only raise it when needed. Shutter speed determines motion: fast speeds freeze action, slow speeds reveal movement. Aperture controls depth of field, with wide openings (low f-number) creating blur in the background and narrow openings (high f-number) keeping more of the scene in focus. White balance ensures colors look natural under different light sources. AF vs. MF decisions influence how accurately you lock focus; for moving subjects, continuous AF helps, while static scenes benefit from single-shot AF and manual focus tweaks. Once you understand the triangle, you can translate mood into exposure and depth of field. Practice with simple scenes: a stationary object in daylight, a moving subject at dusk, a close-up with shallow depth of field. This foundation underpins robust camera shooting across genres. IIn addition, critical insights from the Best Camera Tips team emphasize consistency over time; start with a controlled environment to build your intuition.
Planning Your Shot: Composition and Light
Before pressing the shutter, plan your composition and lighting. Good camera shooting relies on deliberate framing, not just technical settings. Use the rule of thirds, leading lines, and negative space to guide the viewer's eye. Consider the light source: direction, quality, and color temperature impact mood. Front lighting can flatten textures; side lighting emphasizes form; backlighting creates silhouettes or glow. In outdoor scenes, scout the sun's path and choose a time when the light is softer (golden hours). Inside, position windows to create natural fill or modify with reflectors. Color temperature can be adjusted with white balance presets, but for precise results, shoot in RAW and tweak WB in post. If you’re working with models or objects, communicate intent and give clear prompts; small adjustments to pose or angle can dramatically improve proportions and storytelling. By planning, you set yourself up for consistent results rather than chasing perfection after the shot. Best Camera Tips suggests starting with a few test frames to verify your composition under similar lighting conditions.
Getting the Right Settings for Different Scenarios
Different shooting scenarios demand different default settings. For landscapes, start with a low ISO (100-200), a narrow aperture (f/8–f/11), and a tripod. For portraits, open the aperture to f/2.8–f/5.6 to isolate the subject and blur the background; use a moderate ISO and adjust shutter speed to avoid handshake. Street photography benefits from faster shutter speeds (1/250s or faster) and quicker AF; keep a pocket-friendly ISO and manually set WB to avoid color shifts. Macro work requires careful focus control and higher lighting; use manual focus or focus stacking as needed. In all cases, enable RAW shooting if your camera supports it to preserve dynamic range for post-processing. Auto focus modes should align with the subject’s motion; AF-C for moving subjects and AF-S for still subjects. Use exposure compensation to counter tricky lighting, and rely on the histogram after a test shot to ensure you’re not clipping shadows or highlights. The overarching goal is consistency and clarity, regardless of genre.
Lenses and Gear for Serious Shooting
Choosing the right lenses and gear can dramatically improve camera shooting results without demanding a huge budget. A versatile zoom (e.g., 24–105mm or 18–55mm) covers landscapes and portraits, while a fast prime (50mm f/1.8 or 85mm f/1.4) excels in low light and shallow depth of field. For travel or street work, a compact prime offers speed and portability. A sturdy tripod is invaluable for long exposures and low-light scenes; an ND filter can help control light in bright conditions. Memory cards should be reliable with sufficient capacity; carry spare batteries and a small cleaning kit to keep optics pristine. If you work in challenging environments, consider weather-sealed bodies and lenses. In the end, gear choice should support your shooting style, not complicate it. Best Camera Tips notes that a modest, well-matched kit often beats a larger, mismatched one.
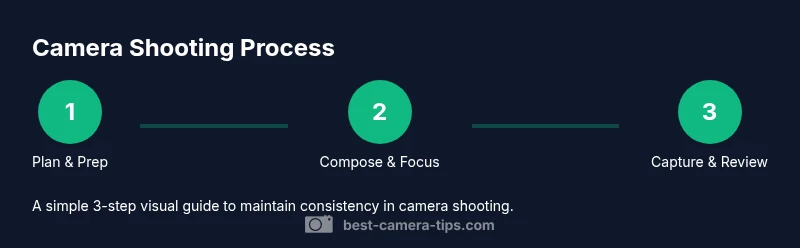
Step-by-Step Shooting Workflow (Workflow Overview)
A practical workflow for camera shooting begins with planning, then framing, capturing, and reviewing. Start by confirming your purpose, subjects, and lighting. Move to composition with grids and a mindful pose, then set stabilization and exposure. Capture a few frames to check consistency, then review on a larger screen and adjust white balance, exposure, or focus as needed. This workflow encourages deliberate, repeatable results rather than spur-of-the-moment randomness. If you’re learning, keep a simple shot log noting settings used for different scenes and review later to identify patterns that lead to better results.
Focus Techniques for Sharp Images
Sharp images depend on reliable focus techniques and precise AF behavior. Use appropriate focus modes: AF-S for static subjects, AF-C for moving subjects, and manual focus when critical focus is essential. For precise control, try back-button focus to separate focusing from shutter release, reducing missed focus during continuous shooting. Use single-point AF to target the subject’s eye or focal point in portraits, then recompose carefully if needed. For macro and close-up work, consider focus stacking to increase depth of field while maintaining sharpness. In all cases, avoid hunting by ensuring sufficient light, and consider locking exposure before focusing if lighting is stable. Holding your camera steady with a tripod or a stabilized lens dramatically improves edge sharpness.
Color, White Balance, and Exposure in Camera Shooting
Color accuracy begins with white balance and calibrated lighting. Shoot in RAW whenever possible to retain maximum latitude for color correction and exposure adjustments. When working in mixed light, manual WB or a gray card can help establish consistent color across frames. The exposure triangle still governs brightness and scene tone; use histograms to verify that highlights aren’t blown out and shadows retain detail. If a scene contains bright skies or dark shadows, consider bracketing or adjusting exposure compensation to preserve tonal range. Practice with different white balance presets and compare results to understand how color shifts affect mood and realism. Best Camera Tips analysis shows that deliberate WB and exposure choices substantially impact perceived image quality and color fidelity.
Post-Processing Essentials
Editing finishes the camera shooting process. Start with a RAW workflow: adjust white balance, exposure, contrast, and saturation non-destructively. Correct lens distortions and crop to improve composition, then sharpen only sparingly to preserve natural detail. Use non-destructive adjustments so you can revisit decisions later. Keep a consistent baseline for color grading to maintain a uniform look across a set. When delivering final images, export at appropriate resolutions and color spaces for your platform. A good post-processing routine preserves the photographer’s intent while enabling more precise refinement of mood, texture, and tone.
Care, Safety, and Maintenance
Maintaining camera gear prolongs performance and protects your investment. Clean lenses with a blower and microfiber cloth, and avoid touching the glass with bare fingers. Inspect and replace worn straps, seals, and gaskets to prevent dust intrusion. Store gear in a dry, padded bag and away from extreme heat or cold. Regularly update firmware, check sensor cleanliness, and back up important shots. Safeguard cameras in busy environments by using weather protection and lens hoods when appropriate. Proactive care minimizes downtime and keeps camera shooting consistent over time.
Tools & Materials
- Camera body(Any DSLR/mirrorless with manual exposure control)
- Lens kit(A versatile zoom (18–55mm or 24–105mm) or prime equivalents)
- Tripod(Sturdy, lightweight; helps keep shots sharp in low light)
- Memory cards(High-speed cards (at least 32GB) with backups)
- Spare batteries(Two extra charges)
- Lens cleaning kit(Microfiber cloth and blower)
- Gray card(For accurate white balance in mixed lighting)
- External flash(Optional for fill light)
Steps
Estimated time: 45-60 minutes
- 1
Prepare your gear
Power on the camera, verify battery level, and format a fresh or trusted memory card. Inspect lenses for dust, attach the appropriate lens, and set the camera to RAW if available. Confirm basic settings such as picture profile and white balance to match your shooting environment.
Tip: Power on and format a new memory card only if you’re sure you’ve backed up previous data. - 2
Set a baseline exposure
Choose an ISO appropriate for the light (low ISO in bright light, higher ISO in low light). Pick a practical aperture for depth of field and set a shutter speed fast enough to prevent handshake for your subject. Enable histogram review and adjust exposure compensation to protect highlights or shadows.
Tip: Use a test shot and check the histogram before committing to a full sequence. - 3
Compose and focus
Turn on the grid, select a focus mode matching subject motion, and place the AF point on the critical area (often the eye in portraits). Consider back-button focusing for more consistent control. Reframe if needed after achieving focus.
Tip: For moving subjects, try AF-C with a predictive focus setting. - 4
Lock in settings and shoot
Take a few frames to verify exposure, focus, and composition. If light changes, adjust WB and exposure quickly while maintaining a stable stance or tripod. Shoot in RAW to maximize post-processing flexibility.
Tip: Keep your shutter speed high enough to freeze action, or intentionally lower it to convey motion. - 5
Review and refine
Review images on a larger screen, zoomed in, and check sharpness and color. Label best frames, back up, and note settings for similar future shots. Use this session to refine techniques for your preferred genre.
Tip: Create a small shot log to track what settings worked best in different lighting.
Common Questions
What is camera shooting?
Camera shooting is the process of composing, exposing, and capturing images using a camera. It involves balance of light, focus, and timing to convey a story or mood.
Camera shooting means planning how a photo will look, then capturing it with the right exposure, focus, and timing.
Which settings should I start with for beginners?
Start with a low ISO in bright light, a moderate wide aperture, and a shutter speed that suits the subject. Shoot in RAW when possible and adjust white balance after the shot if needed.
Begin with low ISO, a mid-range aperture, and a shutter speed that matches the subject’s motion, then tweak after reviewing a test shot.
Should I shoot in RAW or JPEG?
RAW offers the greatest flexibility for post-processing and color correction. JPEG is fine for quick sharing but limits latitude and requires more conservative edits.
RAW gives you more flexibility in editing; JPEG is faster but less adjustable after the fact.
What gear do I need to begin camera shooting?
A basic camera body with manual controls, a versatile lens kit, and a sturdy tripod. Add memory cards, spare batteries, and a cleaning kit for better reliability.
Start with a body, a versatile lens, a tripod, and spare power; you can add more gear later as needed.
How can I improve low-light shots?
Use a wider aperture, stabilize with a tripod, and raise ISO judiciously while shooting in RAW to preserve detail. Consider external lighting or reflectors when possible.
For low light, widen the aperture, stabilize, and shoot RAW to keep details; add light if you can.
Watch Video
The Essentials
- Master the exposure triangle before complex shots.
- Plan composition and lighting prior to shooting.
- Shoot RAW for maximum editing latitude.
- Review results, log settings, and practice regularly.