How to Use a Polaroid Camera: A Practical Beginner's Guide
Learn how to use a Polaroid camera with a step-by-step approach. Load film, compose shots, develop prints, and master quick tips for vibrant instant photos.

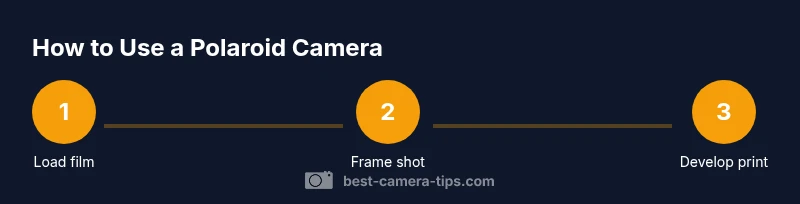
Learn how to use polaroid camera with a simple, hands-on approach. This guide covers loading film, framing, and developing instant prints, plus practical tips to avoid common mistakes. By following these steps, you’ll capture memories in tangible photographs right away. From choosing the right film to keeping prints pristine, you’ll gain confidence quickly.
What is a Polaroid camera and how to use polaroid camera
A Polaroid camera is an instant photography device that prints a photo moments after you take the shot. When you start learning how to use polaroid camera, the first things to understand are the film pack format, the development chemistry, and how light and timing affect the final result. The camera’s internal rollers help spread developing chemicals across the exposed print as it ejects. For beginners, expect a tactile experience: you get a tangible image you can hold within minutes, with colors and tones that feel distinctly instant. Practice with a few frames to understand how different lighting and distances influence the final print, and you’ll begin to predict how your subject looks when the print emerges.
Film options and compatibility for Polaroid cameras
Film choice dramatically shapes color reproduction, contrast, and develop time. Most Polaroid systems use integral film packs designed for specific camera generations; using the wrong film can prevent exposure or yield poor results. When selecting film, consider whether you want vibrant color, muted tones, or classic black-and-white aesthetics. Always verify compatibility with your model and check the production date on the pack. Fresh film generally yields more accurate colors and faster development, while expired film can produce color shifts or frosting. Store film in a cool, dry place and keep packs sealed until you’re ready to shoot.
Understanding camera controls and frame composition
Even basic Polaroid cameras offer valuable control over composition, focusing distance, and sometimes exposure. Learn to align your subject in the viewfinder, use foreground elements for depth, and frame away from harsh light for balanced color. If your model includes flash or exposure compensation, test a few frames to see how light interacts with subjects at varying distances. Remember that instant photography rewards deliberate framing—tight portraits, candid moments, or environmental scenes all produce distinctive prints that feel immediate and personal.
Lighting, shadows, and color in instant photography
Lighting is the primary determinant of the print’s mood. Soft, indirect light minimizes harsh shadows and color clipping, while backlit scenes can yield dramatic silhouettes with bold contrasts. When shooting in bright sun, position the subject slightly away from direct glare and use the camera’s built‑in settings to balance exposure. For indoor shoots, consider using ambient light sources and avoid strong color casts from artificial lighting. If your film supports color shifts, a gentle, natural light setup often yields the most pleasing skin tones and accurate hues.
Color versus black‑and‑white: choosing the look you want
Polaroid film comes in color and black‑and‑white varieties, each with its own tonal range and development characteristics. Color films tend to deliver vivid reds, greens, and blues, with warmer skin tones under tungsten lighting and cooler tones under daylight. Black‑and‑white films emphasize texture and contrast, offering a timeless, documentary feel. If you’re uncertain, start with a neutral lighting scene and shoot both types to observe how each renders the same subject. Your choice will influence mood, genre, and storytelling in instant form.
Handling, storage, and protecting prints after ejecting a shot
After your print ejects, avoid bending or touching the emulsion surface until it has adequately developed. Keep prints flat and out of direct sunlight while developing, typically for several minutes, depending on film type. Store completed photos in a cool, dry place, away from heat and moisture to prevent warping or fading. Treat each print as a physical artifact—handle with clean hands or gloves if you’re archiving a small collection. With careful handling, your instant gallery will endure as a tactile record of moments.
Maintenance tips to extend your Polaroid camera's life
Wipe the exterior with a soft, dry cloth to remove dust after shoots, and avoid moisture around the film area. Check for loose or worn parts and replace batteries if your model requires them. Regularly inspect lens surfaces for fingerprints or smudges and clean with a microfiber cloth. If the camera feels sticky or unresponsive, try a gentle calibration by shooting a test frame in good light. A well‑maintained camera delivers consistent results and longer service life.
Troubleshooting common instant‑photo issues
If frames come out underdeveloped or blank, verify that a fresh film pack is correctly seated and the camera’s back is fully closed. Shaky results can stem from hand movement; use a steady stance or brace your elbows when shooting. Color shifts or muted tones may indicate aging film or suboptimal lighting. When in doubt, test with a known lighting condition and a fresh film pack to separate variable factors. Persistent issues may require model‑specific guidance from the manufacturer or a photography community.
Creative ideas to expand your Polaroid practice
Experiment with daily life scenes—coffee shop moments, street scenes, or reflective textures—and pair portraits with candid details like hands or reflections. Try environmental portraits that include context, such as windows, streets, or walls with texture. Build a mini‑series of color and monochrome prints to tell a story. Create a small gallery wall at home or as a zine project to explore composition, color, and narrative across instant prints.
Tools & Materials
- Polaroid camera(Model with compatible integral film pack; ensure it’s powered or has fresh batteries if required.)
- Polaroid film pack(Check compatibility with your camera; store packs in a cool, dry place before use.)
- Lens cleaning cloth(Use a microfiber cloth; avoid solvents or harsh chemicals.)
- Spare batteries (if applicable)(Only needed for older models with removable power sources.)
- Soft storage bag or sleeve(Protects camera and prints from dust and sunlight when not in use.)
Steps
Estimated time: 15-25 minutes
- 1
Load film pack correctly
Open the film compartment and insert the pack so that the alignment guides engage with the pack’s edges. Close securely and listen for the latch. Ensure the camera recognizes the film by watching for any indicator lights or prompts on the viewfinder.
Tip: Always handle film packs by the edges; avoid touching the emulsion surface. - 2
Power on and check indicators
Turn on the camera (if it has a power switch) and confirm that any status indicators are active. If your model uses electronic confirmation, wait for the ready signal before shooting.
Tip: If the camera won’t power on, replace batteries or check the manual for model-specific steps. - 3
Confirm exposure settings
Most Polaroid cameras auto‑expose; if yours offers exposure compensation, test a frame at different settings to see how light affects color and detail.
Tip: Avoid extreme lighting; mid‑tone scenes often render best in instant film. - 4
Frame your shot
Look through the viewfinder and compose your subject with some space around them. Include an interesting background or texture to add depth to the final print.
Tip: Squat or raise slightly to control perspective and avoid unwanted camera shake. - 5
Press the shutter smoothly
Press the shutter firmly and steadily. Don’t rush the moment; let the composition settle and capture a natural expression.
Tip: Keep elbows tucked to reduce blur; use a light stance with stable footing. - 6
Wait for development
Immediately after exposure, the print will begin to develop outside the camera. Avoid exposing it to direct sun and let it develop in a shaded area.
Tip: Development times vary by film; check the pack for approximate times and avoid touching the emulsion. - 7
Eject and place the print to develop
Gently eject the print and lay it flat on a clean surface. Keep it from bending or folding during development.
Tip: If your camera ejects the print slowly, don’t force it; allow the mechanism to complete its cycle. - 8
Store printed photos safely
Once developed, let prints sit away from heat and direct light. Consider placing them in a folder or album designed for instant prints.
Tip: Label a few prints with location or date to keep memories organized. - 9
Care and maintenance after shoots
Wipe the exterior with a dry cloth, and avoid moisture near the film chamber. Inspect the lens and window for smudges and clean as needed.
Tip: Regular maintenance extends camera life and preserves print quality.
Common Questions
Do I need batteries for a Polaroid camera?
Most current Polaroid cameras rely on film packs for power, but some older models require batteries in the camera. Check your model’s manual to confirm power needs.
Most modern Polaroid cameras don’t need separate batteries if they use integral film; older units may require them.
How do I know the film is loaded correctly?
Ensure the film pack is seated firmly and the camera recognizes it. Look for a ready indicator or color cue from the viewfinder or LED.
Look for a ready indicator after inserting the film pack to confirm it’s loaded properly.
Why are my photos coming out blurry?
Blurriness can come from camera shake, subject movement, or incorrect focus. Use a stable stance, brace your elbows, and shoot at a comfortable distance.
Brace your arms and ensure steady hands to reduce blur; if your subject moves, shoot with a faster stance or ask for a brief pause.
Can I use expired or vintage film?
Expired film can yield unpredictable results, including color shifts and inconsistent development. If you’re curious, test a few frames first.
Expired film may look quirky; test a couple of frames to understand how it behaves.
Is exposure adjustable on Polaroid cameras?
Many Polaroid models are auto-exposure, but some offer exposure compensation or manual modes. Consult your manual to see available options.
Auto exposure works in most cases; manual adjustments are model-dependent.
How should I store developed prints?
Keep prints away from direct sunlight and heat. Store flat in a sleeve or album to prevent curling or damage.
Store prints flat and away from heat so they don’t warp or fade.
Watch Video
The Essentials
- Load the correct film pack before shooting.
- Frame with care and balance lighting for best results.
- Allow prints to develop away from direct sunlight.
- Handle prints gently and store promptly.
- Practice to build intuition for exposure and composition.