How to Use a Disposable Camera: A Practical Guide
Learn how to use a disposable camera from setup to development. This educational guide covers shooting techniques, film handling, and post-processing tips for aspiring photographers.

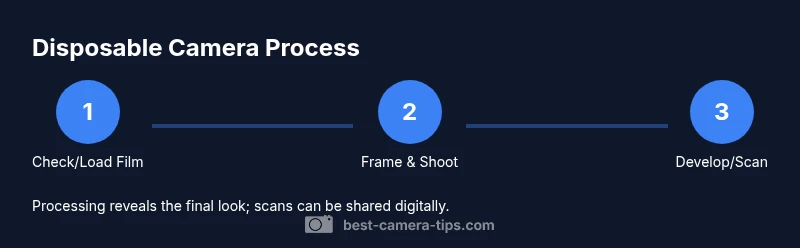
Using a disposable camera is a simple, analogue way to learn fundamentals without digital gear. You shoot with preloaded film, then develop later. This guide covers setup, shooting techniques, and post-processing tips to help beginners capture characterful images on a budget. Expect practical steps, safety reminders, and real-world examples you can try today.
What is a disposable camera and why use one?
A disposable camera is a small, self-contained film camera designed for single use. It ships with a roll of 35mm film and often includes a built-in flash. You shoot, then hand it off for development; results arrive as prints or scans weeks later. For beginners, a disposable camera offers a forgiving way to learn framing, light, and timing without worrying about advanced settings. According to Best Camera Tips, these cameras are approachable, affordable, and great for candid, on-the-go photography. They encourage deliberate composition because you have a limited number of exposures, making each shot count. When you’re ready to explore film photography, a disposable camera provides a gentle first step.
Film basics and exposure on a disposable camera
Disposable cameras use preloaded 35mm film and typically lack manual exposure controls. Light control comes from scene lighting and distance to the subject. The built-in flash adds light in darker situations, but it can wash out close subjects. Since you cannot adjust aperture or shutter speed, the key to good shots is choosing the moment with the right light and avoiding harsh shadows. The camera’s flash can be a helpful tool in mixed lighting, but it’s not a substitute for planning your frame. Best Camera Tips analysis shows that learners become proficient by reading light, color, and tonal range and then anticipating how a negative will look after development.
Shooting tips: composition, lighting, and practicality
Start with a simple plan: identify 3-5 shot ideas before you begin, so you don’t waste frames. Use the viewfinder to frame your subject and consider foregrounds and backgrounds. Move to better lighting when possible, avoid harsh backlight, and get closer for intimate portraits that emphasize detail. The disposable camera format rewards deliberate choices and quick decision-making, so keep your shots varied but purposeful.
After the shot: development options and scanning
After you’ve finished, you’ll need to develop the film to see the images. You can drop the camera at a local photo lab or mail it to a processing service. Once developed, you can request prints or digital scans. If you’re scanning yourself, dedicated film scanners or even smartphone adapters can produce decent results. Expect processing times to vary, typically several days to a couple of weeks depending on the lab. Digital scans let you share your favorite frames quickly, while prints offer a tangible keepsake.
Common myths and how to maximize results
Myth: Disposable cameras are low-quality and only for novelty shots. Reality: With good lighting and thoughtful composition, they deliver characterful images with a distinct film look. Myth: The flash always works perfectly. Reality: In bright sun, flash is often unnecessary; in dim light, test a frame first. Myth: You must shoot everything perfect on the first try. Reality: Treat it as an experiment; the surprise factor is part of the charm.
Creative ideas and experiments
Try a themed shoot: places with strong color or geometric shapes translate well on film. Use nearby subjects and bright daylight for bold contrast. Use environment as your frame: windows, walls, and street scenes create compelling stories. After your roll is developed, pick your best frames for a small print series or a zine.
Tools & Materials
- Disposable camera (35mm film)(Choose a model with a built-in flash if you expect low light)
- Protective sleeve or pouch(Keeps the camera safe during transport)
- Marker or label(Optional for dating shoots on the camera or case)
Steps
Estimated time: 15-60 minutes for shooting, plus 5-14 days for development; scanning can take 10-30 minutes if done at home
- 1
Inspect the camera and film
Check the camera body for damage and confirm there is unexposed film left. If the camera is damaged or the film looks expired, consider using a different unit.
Tip: Handle gently; avoid bending the film or forcing the shutter. - 2
Familiarize yourself with controls
Locate the shutter button, viewfinder, and any flash controls. Know where to press and what each control does before you start shooting.
Tip: If there is a flash, allow time to recharge after several shots. - 3
Frame your shot with the viewfinder
Hold steady and compose with a clear subject and an interesting background. Use depth and rule of thirds where possible within the frame.
Tip: Keep your elbows tucked to minimize camera shake. - 4
Shoot in good lighting
Aim for well-lit scenes; avoid heavy backlighting that can lose detail. Move or adjust your subject for even light when you can.
Tip: If indoors, position near a window for soft, natural light. - 5
Capture a variety of frames
Balance portraits, still lifes, and street scenes to maximize the limited exposures. Think in sequences to tell a mini story.
Tip: Don’t rush; take a moment to consider each frame. - 6
Finish the roll and label the camera
Finish shooting and store the camera safely. Label the date or location on the sleeve if you plan to track shoots.
Tip: Keep an eye on the exposure count if your model shows clear that multiple shots are left. - 7
Develop or scan the film
Finish shooting and store the camera safely. Label the date or location on the sleeve if you plan to track shoots.
Tip: Keep an eye on the exposure count if your model shows clear that multiple shots are left. - 8
Review results and plan the next roll
Review the images when they return. Note what worked and what didn’t to improve your next set of photos.
Tip: Jot down a quick note for future shoots.
Common Questions
What is a disposable camera and how does it work?
A disposable camera is a preloaded film camera designed for single use. After shooting, you develop the film to see the images. They’re simple, affordable, and great for learning basic photography.
A disposable camera is a preloaded film camera you shoot once, then develop to see the photos.
How many exposures does a typical disposable camera have?
Most disposables offer a limited number of exposures. Check the label on the camera for the exact count and consider the limit when planning shots.
Disposable cameras usually have a limited number of exposures; check the label before shooting.
Can you reuse a disposable camera?
Disposable cameras are designed for single use. After development, the camera is no longer a functional option.
They’re meant to be used once and then replaced.
Do disposable cameras work well in low light?
They can work in low light with the built-in flash, but results may vary and noise or blur can occur with longer indoor exposures.
They can work in low light when the flash is used, but results vary.
What should I do if the flash didn’t fire?
If the flash doesn’t fire, switch to the next frame and try again if possible; otherwise rely on natural light or move to brighter conditions.
If the flash doesn’t fire, continue with brighter lighting if possible.
How do I get my photos developed?
Take the camera to a local photo lab or mail it to a processing service. Many labs offer prints or digital scans of your photos.
Take it to a lab or service that develops film for prints or scans.
Watch Video
The Essentials
- Plan your shots before shooting
- Light matters more than settings
- Development reveals the final look
- Disposable cameras are beginner-friendly
- Treat film as a deliberate creative medium