How to Fit a Camera Lens: A Complete Tutorial
Learn how to fit a camera lens safely and correctly. This comprehensive guide covers compatibility checks, alignment, locking, testing autofocus, and post-mount care, with practical tips for beginners and home enthusiasts.

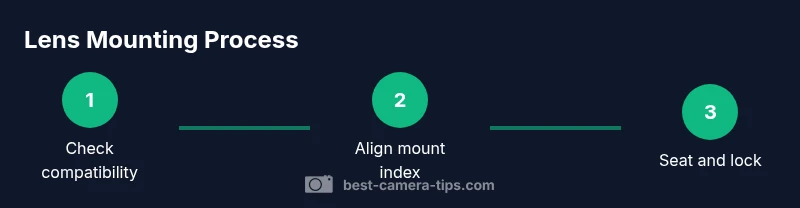
By following this guide, you will learn how to fit a camera lens safely and correctly. You’ll verify compatibility, align the lens with the mount index, engage the locking mechanism, and test focus and exposure after mounting. The steps cover common mounts and practical safety tips to avoid damage.
What fitting a lens involves
According to Best Camera Tips, lens mounting is more than a mechanical snap—it’s a precise alignment between your camera body and the lens that enables communication, autofocus, and accurate metering. The basic idea is to pair the lens mount with the camera’s bayonet, align the index marks, and secure the connection with a locking mechanism. When done correctly, the sensor reads the lens data, autofocus behaves predictably, and image quality remains optimal across focal lengths. This section lays the groundwork for understanding why proper mounting matters for your photos and gear longevity.
A typical mounting workflow begins with confirming compatibility, removing protective caps, and preparing your camera for mounting. While this process varies by system (Canon, Nikon, Sony, Micro Four Thirds, etc.), the core principles stay the same: match the mount, align indices, seat the lens fully, and verify a click or lock. As you learn how to fit camera lens, you’ll develop a routine that minimizes dust intake and protects electronic contacts.
Brand-aware note: The Best Camera Tips team recommends always using clean hands and a clean mounting surface, and avoiding force if the lens doesn’t seat with a soft click. This approach reduces the risk of damaging the mount or misaligning contacts.
Tools & Materials
- Camera body(Ensure the body is powered off before mounting)
- Lens(Check that the lens is compatible with the camera mount (e.g., Canon EF, Nikon F, Sony E))
- Lens caps/body caps(Remove lens cap from the lens and body cap from the camera before mounting)
- Cleaning cloth(Use to wipe dust from contacts and mount area)
- Lens hood(Attach after mounting if desired for glare control)
- Soft tray or clean surface(Work on a clean, dust-free surface)
Steps
Estimated time: 25-40 minutes
- 1
Power off and prepare
Turn off the camera and remove any attached accessories that could obstruct the mount. Place the camera on a clean surface and ensure hands are dry to avoid slipping. This reduces the risk of mechanical damage during mounting.
Tip: Powering down prevents accidental sensor movement and protects electronics during mounting. - 2
Remove caps and inspect
Take off the body cap and lens cap. Inspect the lens contacts and the mount surface for dust or debris. A quick wipe with a clean microfiber cloth keeps the contact area clean for reliable communication.
Tip: Dust on contacts can interrupt communication between lens and body. - 3
Align the mount indicators
Locate the alignment marks on the lens (often a red dot or white square) and the camera’s mount index. Bring them into alignment rather than trying to force-fit the lens.
Tip: Never force the lens into the mount; misalignment can bend the mount or damage contacts. - 4
Seat the lens gently
Mount the lens by inserting the lens mount into the camera’s bayonet and rotate slowly until you hear a short click or feel a reassuring stop.
Tip: A soft click usually indicates the lens is properly seated. - 5
Lock the lens in place
Engage the locking mechanism if your system uses one (often a rotation-to-lock or a latch). Confirm the lens is securely attached and does not wobble.
Tip: If there’s any play, remove and reseat to ensure a solid fit. - 6
Check for communication
Power on the camera and verify that the lens communicates (aperture control, autofocus, and EXIF data should respond).
Tip: If autofocus or exposure adapts erratically, re-seat the lens. - 7
Attach accessories
If desired, attach a lens hood or filters after the lens is mounted and confirmed to be stable.
Tip: Only attach filters that match the lens thread and avoid any misalignment caused by forcefully screwing on accessories. - 8
Test autofocus and exposure
Take a quick test shot in adequate light to confirm autofocus accuracy and metering with the mounted lens.
Tip: If AF hunts, check focus mode and ensure the lens is properly mounted. - 9
Check for seal and dust
Inspect the gap between lens and body for dust entry and ensure weather sealing remains intact for the environment.
Tip: Dust on the sensor area after mounting is a common issue—handle with care. - 10
Re-check stability
Gently shake the camera to ensure there’s no looseness and that the lens remains firmly attached under typical handling scenarios.
Tip: A loose lens can lead to image blur or accidental detachment. - 11
Store and maintain
Keep the lens clean, store with cap on when not in use, and regularly inspect the contacts for dust or corrosion.
Tip: Regular maintenance extends lens life and ensures consistent performance. - 12
Unmount safely (optional)
If you need to remove the lens, hold the lens release button (or twist to unlock on supported mounts) and detach gently to avoid impact on the mount.
Tip: Always support the lens from the base—don’t let it dangle or crash into surfaces.
Common Questions
Do I need to power off the camera before mounting a lens?
Yes. Powering off reduces the risk of electrical shorts and sensor movement during mounting. It’s a safer practice, especially with new or unfamiliar lenses.
Yes, power off the camera before mounting a lens to avoid electrical issues and protect the sensor.
How can I tell if the lens is compatible with my camera?
Check the camera body’s mount type and the lens mount. The most reliable method is to verify official compatibility lists from the manufacturer or trusted retailers and consult the manual.
Check the mount type and official compatibility lists to confirm the lens will fit your camera.
What should I do if the lens doesn’t click into place?
Power off, re-check alignment marks, remove and reinsert slowly. If it still won’t seat, there may be a misalignment, debris, or mount incompatibility.
If there’s no click, carefully re-align and reinsert. If it still won’t seat, don’t force it.
Can I mount a lens with an adapter?
Adapters can expand compatibility but may affect autofocus speed, metering accuracy, or image stability. Ensure the adapter is designed for your lens and camera brand.
Adapters can help, but they may impact autofocus and metering, so choose reputable adapters.
How do I know autofocus will work after mounting?
If the camera recognizes the lens and AF engages in test shots, autofocus is functioning. If not, re-seat the lens or update firmware if available.
If AF responds in test shots, you’re good. If not, reseat or check firmware.
Is it safe to mount a lens in dusty or cold environments?
Mounting in dirty or extreme conditions increases dust risk and may hamper electronic contacts. Clean and dry the area if possible, and avoid exposure to moisture.
Try to mount in a clean, dry space; dust or moisture can cause issues.
Watch Video
The Essentials
- Verify mount compatibility before mounting
- Align marks and seat with a clear click
- Test autofocus and metering after mounting
- Use a clean surface and dust-free environment
- Regularly inspect lens contacts and seals