How to Fit a Camera in a Helmet: A Practical Guide
Learn how to fit a camera in a helmet safely and securely with our detailed guide. Explore mounting options, wiring, testing, and maintenance for helmet-mounted video.

To learn how to fit a camera in a helmet, follow a step-by-step mounting plan that protects balance and safety. You will evaluate helmet compatibility, choose a mount, run cables, secure the power source, and test the system before riding. Essential items include a compact action camera, helmet mount, cable ties, and weatherproof adhesive. Ensure helmet comfort remains uncompromised. how to fit a camera in a helmet
Why helmet-mounted cameras are popular for riders and adventurers
Helmet-mounted cameras have become a staple for outdoor enthusiasts, cyclists, motorcyclists, and action-seekers who want a first-person perspective of their rides. When you consider how to fit a camera in a helmet, the goal is to capture your journey without compromising safety or comfort. A well-mounted camera offers stable footage, hands-free operation, and the ability to review technique and scenery later. The best helmet setups minimize wind noise and vibration while preserving field of view, and they keep the camera out of your line of sight. In this guide, we’ll cover practical mounting strategies, gear choices, and step-by-step procedures you can apply to most common helmet types. According to Best Camera Tips, choosing a lightweight, compact camera and a proven mounting method is the foundation of a successful helmet video setup. This aligns with best practices across photography and security gear to ensure reliability on the trail or track.
How the helmet affects video quality and safety
The helmet’s shape, padding, and attachment points influence both comfort and how stable the camera will be. A helmet that’s too tight can cause discomfort and even affect balance, while a loose helmet may introduce movement that degrades footage. When you plan the fit, consider the helmet’s weight distribution, the camera’s weight, and how long you’ll wear the rig. For best results, test different mounting positions near the crown of the head or slightly forward on the side, ensuring the lens is not blocked by the helmet shell or visor. The camera should sit level with the rider’s line of sight, preventing awkward angles that require post-processing to correct. Best Camera Tips emphasizes that minor shifts in weight can make a big difference in stability, so take time to balance before you ride.
Safety-first mindset and legal considerations
Your primary responsibility is safety. A helmet-mounted camera should not interfere with the helmet’s integrity or alter the impact-absorbing padding. Do not drill into the helmet or modify its structural components unless the manufacturer explicitly allows it. Use non-permanent, reversible mounting solutions whenever possible, and ensure all fasteners are secure but removable in case of a crash or helmet replacement. In many jurisdictions, helmet cameras are allowed on public trails, but local regulations may vary, especially in controlled environments. Verify rules for your riding area and respect others’ privacy when filming in crowded or public spaces.
Planning for durability and climate conditions
Outdoor filming subjects your gear to dust, rain, sweat, and temperature fluctuations. Choose weatherproof housings, seals, or covers for the camera and mounting hardware. If you ride in wet conditions, make sure cables and storage options are protected from moisture, and test the rig in a controlled drizzle before venturing into adverse weather. Durable mounting solutions use resistant adhesives and rugged fasteners, while quick-release mechanisms help you remove the camera rapidly when needed. Planning ahead for durability reduces maintenance and avoids last-minute gear failures on the trail.
How to evaluate mounting options for different helmet styles
Different helmet styles—road, full-face, or off-road—offer distinct mounting challenges. Some helmets have integrated mounting rails or accessory points, while others rely on adhesive pads or strap-based mounts. Assess whether your helmet has rails, flat surfaces, or removable padding that can accommodate a small plate. For every option, verify that the chosen mounting method won’t shift during movement and won’t obstruct the wearer’s vision, ears, or safety straps. When available, use manufacturer-recommended accessories compatible with your helmet model to maximize safety and footage quality.
Matching camera features to riding needs
Choose a camera with a compact form factor, a wide-angle lens, and good image stabilization to cope with helmet movement. Battery life, charging options, and low-light performance are important for longer sessions. If weight is a concern, pick a camera under a certain weight threshold and consider a lightweight mounting plate. Some riders prefer cameras with removable batteries or the ability to swap power packs, which can extend recording times on longer trips. By aligning camera specs with your riding style, you’ll minimize post-production work and maximize reliable footage.
Footage planning and field of view
Before mounting, decide what you want to film: action moments, scenery, or rider technique. A forward-facing angle captures the road ahead, while a slightly downward angle can emphasize posture and wheel movement. A dual-camera setup, with one forward and one rear view, can deliver a more complete story, though it adds weight and complexity. Plan the field of view to avoid barrel distortion and ensure key moments stay within the frame. Practicing a few test laps with the rig will help you dial in the ideal angle and distance from the helmet shell.
Preparation for a quick, secure setup
Having a clear preparation workflow reduces mounting time and mistakes. Gather all gear, wipe down helmet surfaces to ensure adhesive gains grip, and check that the area near the mount is clean and dry. Lay out cables and mounting hardware so you can see everything at once. Use a clean workspace and take photos or notes during mounting so you can replicate steps on future rides. A methodical approach saves time and yields consistent results across sessions.
Quick note on weight and balance
Camera weight adds a load that your helmet must carry without changing balance or comfort. Heavier rigs can cause neck fatigue or increase wind resistance, affecting both safety and footage. If the camera feels heavy, distribute weight evenly and consider using lighter accessories. Always prioritize even distribution and comfort to maintain control and stability during rides.
Tools & Materials
- Compact action camera (lightweight ideally under 80g)(Look for small size, good stabilization, and compatible mounting interfaces)
- Helmet mount kit with quick-release(Choose a mount designed for helmets and compatible with your camera )
- Adhesive mounts or high-strength Velcro straps(Weatherproof adhesive preferred; ensure reversible options if possible)
- Cable ties (zip ties) and Velcro wraps(Used to secure cables along the helmet’s surface and rails)
- Alcohol prep pad and microfiber cloth(Clean surfaces before mounting to maximize adhesion)
- Small screwdriver or hex key (if your mount uses screws)(Only if required by your mounting hardware)
- Auxiliary power option (portable battery pack or USB-C power bank)(Consider for longer shoots; ensure extra weight is minimized)
- Waterproof housing or sealant (optional)(Helpful for rain or dusty environments)
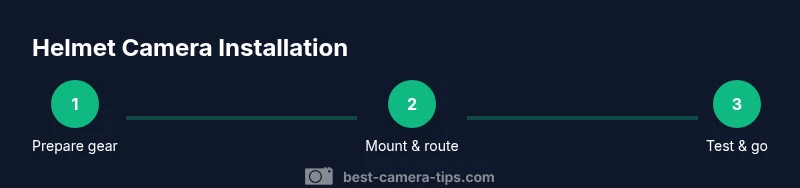
Steps
Estimated time: 30-60 minutes
- 1
Prepare your gear
Gather the camera, helmet, mount kit, and cables. Inspect all parts for damage and ensure you have the necessary tools. Clean the mounting area on the helmet with an alcohol wipe to improve grip and reduce slip during riding.
Tip: Have a clean workspace and lay components in the order you will use them to speed up the mounting process. - 2
Choose the mounting location
Decide between a forward-facing mount, a side-mount, or an integrated helmet-rail setup. Position should keep the lens level with your line of sight and avoid obstructing vision or safety straps.
Tip: Test multiple angles with a mock placement using lightweight tape before committing to adhesive or screws. - 3
Attach the mount to the helmet
Secure the base plate with the provided hardware or high-strength adhesive. If using adhesive, hold the mount in place for the recommended cure time and avoid moving it during set. If using rails, slide the mount into position and tighten all fasteners.
Tip: Double-check clearance around ventilation ports to prevent interference with airflow and cooling. - 4
Mount the camera
Attach the camera to the mount using the appropriate quick-release mechanism. Ensure the camera is level and not twisted. Tighten screws or clamps just enough to prevent slippage yet allow easy removal when needed.
Tip: Use thread locker or friction padding if your mount design calls for it to prevent loosening on rough rides. - 5
Route and secure cabling
Run cables along the helmet’s edge or in designated channels. Securing with cable ties at regular intervals prevents snagging or movement that could pull on the camera. Use Velcro wraps where extra flexibility is needed.
Tip: Keep cable ends away from the ears and avoid sagging that could catch on branches or handlebars. - 6
Power up and test
Power on the camera and perform a quick test recording to verify angle, field of view, and stability. Check audio capture and ensure the lens is clean and free of fog. Re-adjust if necessary before riding.
Tip: Test in similar wind conditions to your actual ride for a realistic performance check. - 7
Final checks and adjustments
Review all fasteners, confirm there is no movement, and ensure the helmet still fits properly. Mark any areas that need additional padding or balancing, then re-pack thinking of future rides.
Tip: Leave a small spare kit with extra fasteners and a mini toolkit for on-the-road maintenance.
Common Questions
Is mounting a camera on a helmet safe for riding?
Yes, when you use proper mounting techniques that do not alter the helmet’s integrity. Avoid drilling and ensure the weight is balanced and secure. Always test the setup in a safe environment before riding at speed.
Yes—when mounted correctly and balanced, helmet cameras are safe for riding. Avoid modifications that affect the helmet’s integrity and test before heading out.
Will mounting a camera void helmet safety certifications?
Most non-invasive mounts do not affect certification, but any permanent modifications can. Follow manufacturer guidelines and use reversible mounts whenever possible to preserve safety guarantees.
Generally, non-invasive mounts won’t void certifications, but permanent changes can. Check the helmet maker’s guidance and use reversible options.
What if my helmet has no rails or flat surface?
Opt for adhesive mounts or strap-based solutions designed for non-rail helmets. Ensure the surface is clean, dry, and smooth, and test the mount’s hold on a dry day before a ride.
If there are no rails, use adhesive or strap mounts designed for non-rail helmets and test the grip first.
How can I maximize battery life for longer rides?
Use a camera with autofocus off and stabilization optimized for your ride. Carry a small power bank or hot-swappable battery if supported by the camera. Turn off features you won’t use to save power.
Choose a model with good battery life, and carry a spare or hot-swappable battery for longer trips.
Are internal pocket mounts safer or more secure?
Internal pockets can reduce exterior weight but are less common for action cameras. They may affect ventilation and comfort. If used, ensure the mount is securely fixed and does not press on the head.
Internal pockets can work, but they’re less common. Make sure it’s secure and comfortable.
Is filming on public roads allowed everywhere?
Filming on public roads is subject to local laws and privacy rules. Always respect others’ privacy and check local regulations before filming extensively in public spaces.
Check local laws and respect privacy before filming in public places.
Watch Video
The Essentials
- Plan mounting location before attachment.
- Choose lightweight gear to preserve balance and safety.
- Test angles and power setup before riding.
- Use reversible mounting methods when possible.
- Maintain tidy cable routing for reliability.