Outdoor Wireless Security Camera Setup: A Practical Guide
Learn how to select, install, and optimize wireless outdoor cameras for reliable home security. This step-by-step guide covers placement, networking, power options, encryption, storage, and maintenance.

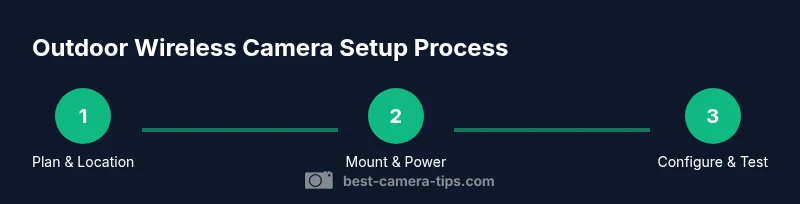
You will implement a wireless outdoor camera security system by selecting weather-rated cameras, planning placement for optimal coverage, and configuring your network for reliability and privacy. This guide covers mounting, power options, encryption, storage, and ongoing maintenance to help you keep an eye on your property year-round.
Why wireless outdoor camera security matters
In modern homes, outdoor cameras are a frontline defense for deterring intruders, monitoring activity around entry points, and documenting events for incident responses. Wireless cameras offer flexibility because they do not require running power or network cables to every device. They can be positioned on eaves, fences, gates, or corners with minimal disruption to the landscape. For aspiring photographers and home-security enthusiasts, understanding how a wireless setup aligns with real-world conditions helps you avoid common pitfalls such as dead zones, battery drainage, and routine privacy concerns.
According to Best Camera Tips, the best wireless systems balance reliability with ease of use. A well-chosen setup integrates robust encryption, automatic firmware updates, and clear notification controls. When you assess your site, think about coverage gaps, potential weather exposure, and accessibility for maintenance. This initial planning stage sets the foundation for a system that remains functional through seasonal changes and power fluctuations. By choosing weather-rated cameras and a scalable network plan, you’ll avoid rework and enjoy consistent footage over time.
Key advantages and trade-offs
Wireless outdoor cameras simplify installation, enable flexible placement, and scale more easily than wired systems. You can reposition cameras after you see real-world coverage, add new units without trenching, and often integrate with existing home networks and smart home platforms. On the downside, wireless cameras depend on battery life, Wi‑Fi coverage, and router performance. Interference from doors, vehicles, or dense foliage can impair signal strength, and some environments demand frequent battery changes or solar charging setups. Another trade-off is camera latency and local storage options, which may affect how quickly you see events. To optimize, select units with efficient sleep modes, long-lasting batteries, and reliable encryption. Regular firmware updates reduce exposure to newly discovered vulnerabilities and help keep features like motion detection, person detection, and alert automation current. By weighing these factors, you can tailor a system that fits your property while staying within budget.
Network planning and bandwidth
A robust wireless system starts with a solid network. Map your property into zones and identify where signals must travel to reach your router or mesh node. If some areas are weak, consider adding a mesh satellite or a dedicated access point to strengthen the path to the cameras. Avoid placing cameras behind thick walls or metal structures that cause dead spots. Enable WPA3 on your router when available and activate device isolation so cameras can talk to the storage hub without exposing your entire network to guests. Use unique, strong passwords for the camera accounts and storage services, and confirm that firmware updates install automatically. Remember that cloud storage adds ongoing costs and depends on your internet connection; local storage preserves footage when connectivity falters. Regularly test the live view from each camera to catch coverage gaps early.
Choosing the right cameras and features
Outdoors demand resilience, so look for weather-rated hardware (IP66/IP67) and lenses that suit your space. A wide field of view reduces the number of cameras needed, while a higher resolution helps identify faces and license plates at range. Night vision should work well in your environment, with infrared or color night modes depending on light conditions. If you need two-way audio, ensure microphones and speakers are weatherproof and secure. Smart features like person or vehicle detection, motion zones, and privacy masking tailor alerts to real events and reduce nuisance notifications. Finally, confirm that the device supports secure boot and encrypted storage so your footage remains protected even if the camera is compromised. Plan for future expansion by choosing cameras with consistent software updates and compatibility with your chosen storage strategy.
Placement and mounting best practices
Start with entry points, driveways, and perimeter lines that maximize coverage while minimizing tampering risk. Mount cameras at a height that balances facial visibility with theft deterrence, typically high enough to avoid tampering but low enough for clear detail in the frame. Use corrosion-resistant hardware and seal any mounting holes to keep out moisture. Tilt cameras slightly downward to capture ground-level details instead of endless sky, and avoid pointing directly at glass windows that can reflect light. Test the field of view from multiple angles and adjust before securing fixtures. Respect privacy boundaries and ensure cameras do not directly surveil neighbors when local laws require signage or consent.
Power options and battery management
Wireless cameras often rely on batteries or solar charging. Evaluate battery type, expected drain, and whether there is an optional hard-powered backup. Solar panels work best in locations with direct sun and should be mounted where they won’t be shaded by trees or structures. Choose cameras with efficient sleep modes and motion-triggered wakeups to extend battery life. If you need constant uptime, consider a compliant hard-wired power option and protect the wiring in a weatherproof conduit. Regularly inspect connectors, seals, and battery health, and set up alerts to notify you when a battery health threshold is reached or a charging issue arises. This proactive approach prevents surprises during adverse weather.
Security and privacy considerations
Protect your system from unauthorized access with strong, unique passwords and enable end-to-end encryption and secure firmware updates. If possible, place cameras on a dedicated network or VLAN to limit exposure in case a camera account is compromised. Review access logs and revoke permissions promptly for any former users. Disable UPnP on the router if not needed and use firewall rules to restrict inbound connections. Install privacy masking where cameras might capture neighboring properties or public sidewalks. Stay aware of local surveillance laws and signage requirements to avoid conflicts with privacy regulations. Document your security settings so you can duplicate them later or during device replacement.
Setup basics and configuration flow
Before mounting hardware, install the camera manufacturer’s app and create an account. Add the device to your network by following the pairing flow, typically involving scanning a QR code on the camera and selecting your Wi-Fi network. Create a strong, unique password and enable two-factor authentication if available. Calibrate the lens using the live view, saving multiple presets for easy repositioning. Configure motion zones to minimize false alarms and tailor notification timing to your schedule. Decide on a storage plan (local SD, cloud, or hybrid) and test alerts by simulating events. After firmware updates or network changes, re-check settings and perform a quick security audit to ensure everything remains aligned with your goals.
Maintenance, updates, and troubleshooting
Outdoor cameras require routine maintenance to stay reliable. Check lenses for dirt and condensation, inspect seals for wear, and verify mounting integrity after storms. Keep firmware up to date to close vulnerabilities and receive new features. If a camera goes offline, power cycle it, verify battery or power supply, and re-test the network connection. If video quality is poor, adjust exposure settings and lens positioning to avoid glare. Review alert rules to reduce false positives and retrain detection models when available. Maintain backups of configurations and important footage, and consider keeping a spare camera or replacement plan to minimize downtime during failures.
Tools & Materials
- Weather-rated outdoor wireless camera(s)(IP66/67 rating preferred; check night vision capability)
- Weatherproof mounting brackets and screws(Use anchors appropriate for your exterior surface)
- Power options: battery pack or solar panel(Verify compatibility with chosen camera model)
- Router with stable Wi-Fi or mesh network(Ensure coverage reaches camera locations)
- Smartphone or computer for configuration(Minimum OS version per camera app)
- Ethernet cable (backup only)(Optional hard-wired link for reliability)
- Weatherproof enclosure or housing(For cameras in harsh environments)
- Drill, screwdriver set, level, and ladder(Safety: have a partner assist when mounting)
- Cable management supplies (clips, conduits)(Keeps wiring secure and tidy)
- Surge protector or UPS for router/storage(Mitigates power outages impacting footage)
Steps
Estimated time: 60-120 minutes
- 1
Assess the area and plan placement
Survey the exterior to identify doors, walkways, and possible vantage points. Note potential obstructions, lighting, and accessibility for maintenance. Create a rough map marking camera positions and expected coverage areas. This planning minimizes the need for rework after cameras are installed.
Tip: Measure site distances and test field of view using a temporary mount before drilling permanent anchors. - 2
Choose cameras and features
Select cameras with weather resistance, adequate resolution, and night vision suited to your environment. Decide on lens field of view and whether you need two-way audio or advanced analytics. Confirm encryption and secure storage compatibility to protect footage.
Tip: Prioritize security features (encrypted storage, secure boot) over extras you may not use. - 3
Test Wi‑Fi coverage at each planned location
Carry a mobile device and check live camera streaming from each mount point. If signals are weak, plan for a mesh extension or relocation of the router. Ensure your network can handle the additional load without affecting other devices.
Tip: Aim for consistent signal strength across all camera zones during typical daily usage. - 4
Mount the cameras and secure mounting hardware
Secure brackets to stable surfaces using appropriate anchors. Ensure cameras are angled to cover entry points while avoiding glare into windows. Tighten fasteners and verify sturdiness against wind loads and vibration.
Tip: Use a level and square to align multiple cameras for uniform framing. - 5
Power the cameras and establish a backup option
Attach batteries or solar panels and connect to a power source if supported. Verify weatherproof seals and cable guards. If you opt for battery power, plan a maintenance schedule for recharging or replacement.
Tip: Label batteries with installation date and expected replacement window. - 6
Pair cameras with the network and configure security
Open the camera app, add the device, and join your Wi‑Fi network. Create strong credentials and enable two‑factor authentication if offered. Enable automatic firmware updates and set up encryption for storage.
Tip: Use unique, long passwords and keep recovery options up to date. - 7
Set up storage and alerts
Choose local storage, cloud storage, or a hybrid approach. Configure motion zones and alert thresholds to minimize false positives. Test push notifications and email alerts for timely awareness.
Tip: Test notification timing during day and night to balance sensitivity with practicality. - 8
Tune exposure, night vision, and privacy masking
Adjust exposure and white balance to reduce glare. If lighting is challenging, enable adaptive IR or color night vision according to ambient light. Add privacy masks to obscure neighboring properties where required by law.
Tip: Review footage in different lighting to ensure consistent detail. - 9
Create a maintenance and update routine
Schedule regular checks for lens cleanliness, weather seals, and mounting integrity. Set reminders for firmware updates and credential audits. Test the entire system quarterly to catch aging components early.
Tip: Maintain a log of checks and changes for quick handovers to other users. - 10
Document and secure your configuration
Save a configuration backup and record the network layout, camera positions, and user permissions. Keep a spare camera or critical component on hand for rapid replacement. Revisit your plan after major renovations or landscaping changes.
Tip: Store backups in a secure location and restrict access to sensitive data.
Common Questions
Do wireless cameras require constant power?
Most wireless cameras run on batteries or solar charging and are designed for autonomous operation. Some models offer optional hard-wired power as a backup. Plan for battery life and charging to avoid downtime.
Most wireless cameras run on batteries or solar charging, with some options for backup power. Plan for battery life and charging to avoid downtime.
How far can wireless signals reach outdoors?
Outdoor signal reach depends on your router, building materials, and nearby interference. If signals are weak, add a mesh node or reposition the router to improve coverage.
Outdoor signal reach varies with your router and environment. If coverage is weak, add a mesh node or adjust placement.
Which storage options are best for outdoor cameras?
A hybrid approach often works well: local storage for reliability plus cloud backup for off-site access. Choose a plan that fits your budget and privacy preferences.
Consider local storage with cloud backup for reliability and access. Pick a plan that fits your budget and privacy needs.
Is it legal to install outdoor cameras?
Privacy laws vary by location. Avoid filming beyond your property and public rights-of-way unless allowed. Check local regulations and signage requirements before installation.
Privacy laws vary by area. Avoid filming beyond your property and check local regulations.
How often should I update firmware?
Enable automatic updates when possible to protect against vulnerabilities. Periodically verify that updates complete successfully.
Turn on automatic updates to stay protected; periodically verify that updates install correctly.
What should I do if a camera goes offline?
Check power, reconnect the device, and test the network path. If needed, reboot the router and camera, then re-run the pairing flow.
If a camera goes offline, check power and network, reboot, and re-pair if needed.
Can I reuse an existing home Wi‑Fi network?
Yes, as long as coverage is sufficient and you can segment camera traffic from other devices for security. Consider a dedicated network or VLAN for added protection.
You can use your existing Wi‑Fi if coverage is good and you segment camera traffic for security.
What privacy controls should I enable?
Use privacy masking where needed, disable features you don’t use, and set strict access permissions. Regularly review who has access to footage.
Enable privacy masking and limit access. Regularly review user permissions.
Watch Video
The Essentials
- Plan coverage before mounting to prevent rework
- Choose weather-rated cameras with secure storage
- Secure your network and manage access diligently
- Maintain cameras and firmware regularly