Why Is Camera Blurry on iPhone? Troubleshooting Guide
Urgent guide to diagnose and fix blurry iPhone photos. Learn quick lens cleaning, focus checks, lighting tweaks, and when to update iOS for sharper results.

Blur on iPhone photos is usually due to a dirty or smudged lens, incorrect focus, motion blur in low light, or processing glitches. Start with a clean lens and reset focus by tapping the screen. Disable digital zoom, ensure autofocus is active, and test in bright light. If blur persists, update iOS or reset camera settings as a last resort.
Why the iPhone camera blur happens
Blur on iPhone photos is rarely due to the sensor itself; more often it's the combination of a dirty lens, misfocused shots, motion blur in low light, or processing quirks introduced by iOS. If you’re asking why is camera blurry on iphone, start here with the basics: clean the lens, verify focus, and test under different lighting. Smudges, fingerprints, or a cracked protective glass over the lens can soften detail. In bright daylight, the camera tends to pick up more texture; in dim light, the phone tries to brighten the scene, which can cause background blur or softness. Another common culprit is excessive digital zoom; stick to 1x and physically move closer when safe. Finally, software glitches or an outdated camera app can create temporary blur; a quick restart or iOS update often clears this up.
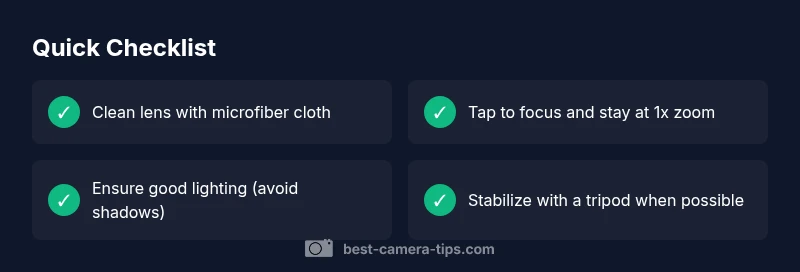
Immediate checks you can perform without tools
Before diving into complex diagnostics, run through a quick checklist that fixes many blur issues. Start by cleaning the lens with a microfiber cloth; even tiny smudges dramatically reduce clarity. Check that nothing is perched over the camera (case, bumper, or screen protector edges) that could partially occlude the lens. Ensure you are on the main camera (1x) and tap to focus on your subject; hold your finger steady for a moment after the shutter to allow auto-focus to lock. Turn off features that can alter sharpness in post-processing, such as excessive HDR or Live Photo when testing. Finally, try a few shots in bright, stable light and compare results against a known sharp photo. These quick checks fix the majority of blur complaints.
Diagnostic considerations: narrowing down the cause
When blur persists after basic cleaning, systematically test potential causes. If all photos remain soft regardless of focus, suspect a misfocus or software issue. Compare photos taken in different apps (Stock Camera vs third-party) to see if the problem is app-specific. If video looks sharp but still photos blur, the issue may be auto-stabilization or a hardware fault. Check for water or moisture around the camera housing and inspect for scratches on the lens surface. If you recently dropped the phone, internal damage or loose lens glue can blur image even when the autofocus seems fine. In low light, the phone uses noise reduction and digital sharpening that can blur fine detail; enable better lighting, use a tripod, or enable Night mode if appropriate.
Lighting and stabilization: impact on sharpness
Lighting and motion are the two biggest enemies of sharp photos on iPhone. Under bright, consistent light, the camera can lock focus more easily and render crisper details. In dim light, the phone increases exposure and may use longer shutter speeds, which invites motion blur. Use a stable stance or a tripod, enable Night mode where appropriate, and avoid panning or quick movements. If you notice blur with moving subjects, switch to Burst mode to capture several frames and pick the sharpest one later.
Prevention and maintenance for future shots
To prevent blur, keep the lens clean, avoid touching the lens area with fingers, and store your iPhone in a case that does not press on the camera. Regularly check for software updates and apply them when available, as camera processing bugs are often addressed in releases. Practice steady hand technique, and when shooting in challenging light, use a tripod, enable correct lighting, and consider switching to the appropriate mode (Portrait, Night, or 1x) to optimize sharpness. Finally, review your photos and note which settings produced the best results, then replicate them.
Steps
Estimated time: 12-20 minutes
- 1
Clean the lens and inspect
Gently wipe the camera glass with a microfiber cloth using straight, light strokes. Look for fingerprint smudges or cracks on the lens cover. Take a quick test shot to compare clarity.
Tip: Use a clean, dry microfiber cloth for best results. - 2
Verify focus and exposure
Tap the screen on your subject to set focus, then wait a moment for the camera to lock. If available, use AE/AF lock to prevent shifting between shots. Take another photo to compare sharpness.
Tip: Tap and hold to lock exposure and focus if your iPhone supports it. - 3
Stabilize the shot
Brace your arms and elbows, or rest the phone on a stable surface or tripod. Avoid quick movements during the shutter press. Use Burst or Live Photo to capture multiple frames for the sharpest result.
Tip: Breathing technique helps reduce hand tremor; shoot between breaths. - 4
Test in varied lighting
Take photos in bright daylight, indoor lighting, and low light to observe how blur changes with conditions. If blur is worse in low light, add illumination or switch to Night mode where appropriate.
Tip: Optimize lighting before increasing ISO; higher ISO increases noise. - 5
Reset or update if needed
If blur remains after the fixes, reset camera settings or perform a software (iOS) update. Back up data before a reset and test again after reboot.
Tip: Backup before making system changes; note settings you customize.
Diagnosis: Photos from iPhone camera appear blurry even when subject is in focus
Possible Causes
- highDirty or smudged lens or camera module
- highMotion blur due to handshake or subject movement
- mediumSoftware glitches or outdated camera app/iOS
- lowLens obstruction from case or screen protector near the camera area
Fixes
- easyClean the lens with a microfiber cloth and inspect for obstruction
- easyTap to focus, then hold the device steady and test with 1x zoom
- easyTest in different lighting and disable features that may worsen sharpness (e.g., excessive HDR or Live Photo)
- mediumIf unresolved, update iOS or reset camera settings
Common Questions
Why are my iPhone photos blurry even in bright light?
Bright-light blur is usually caused by a smudged lens, incorrect focus, or excessive digital zoom. Clean the lens, tap to focus, and keep zoom to 1x. If the problem persists, test in different modes or update iOS.
If your iPhone photos look blurry in bright light, start by cleaning the lens and ensuring sharp focus; reduce zoom and check for software issues.
Will updating iOS fix blurry photos?
Software updates often include camera fixes that can improve sharpness. If blur persists after updating, reset camera settings and test again.
Yes, updates can fix camera issues that cause blur; if not, try other steps.
Should I use Night mode to reduce blur?
Night mode helps in low light by preserving detail with longer exposure. It can reduce blur if used properly with a steady hand or tripod.
Night mode helps in low light; use a tripod for best results.
Can a protective case cause blur?
Cases that press on or cover part of the lens can cause soft focus. Remove or adjust the case and test again.
If a case covers the lens, remove it and test.
When should I seek professional help?
If multiple steps fail and photos remain consistently blurred, there may be hardware damage. Contact an authorized service provider.
If the problem persists after basic fixes, seek professional help.
Watch Video
The Essentials
- Start with a clean lens and confirm focus
- Stabilize your shot and optimize lighting
- Test across lighting conditions to identify patterns
- Update iOS or reset camera settings if needed