When to Clean Camera Lens: A Practical Guide
Learn the right timing and safe methods for cleaning your camera lens. This guide explains when to clean, how to do it properly, and common mistakes to avoid to keep optics sharp and images clear.

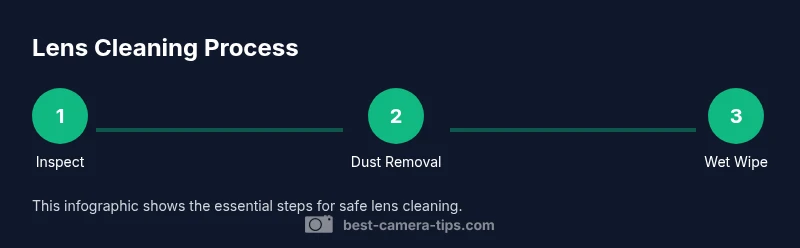
To clean a camera lens safely, start by inspecting for dust and smudges, then use a blower or lens brush to remove loose particles. If needed, apply a small amount of lens cleaner to a microfiber cloth and wipe in gentle circles. Never spray cleaner directly on the glass, avoid rough fabrics, and stop if you detect scratches.
Understanding why lens cleanliness matters
Your camera lens is the gateway to sharp, accurate images. Dust particles, fingerprints, and water droplets can scatter light and degrade contrast, reducing resolution and creating unwanted haze. While some dirt is inevitable in outdoor shoots, excessive grime forces your camera to compensate with higher ISO or longer exposures, which can introduce noise. Knowing when to clean camera lens comes down to recognizing visual cues in your shots and the environment you shoot in. This section explains how dirt affects image quality and why timely maintenance matters for both beginners and seasoned photographers. In the long run, systematic cleaning aligns with your aspiration to capture clean, vivid photos and maintain the longevity of your optics.
How to spot when to clean
In practice, you should clean whenever you notice any sign of dirt on your final image or viewfinder. Common indicators include dull or hazy images, visible smudges on the front element, or streaks near the center of the frame. On the camera’s LCD or live view, you may also see flare around bright light sources, indicating surface contamination. Environmental cues like windy, dusty locations, rain, or sweat during a shoot can deposit particles quickly. Regularly checking after travel or storage is also wise. Remember: if the dirt is inside the lens assembly or on the filter, the fix is different; keep the front element clean to maximize image quality.
The safest tools for cleaning
Choose tools that are designed for optics: an air blower, a soft lens brush, a lint-free microfiber cloth, and an optics-safe cleaning solution. Avoid saliva, household cleaners, and rough fabrics; these can scratch coatings or push debris into crevices. Always work in a clean, well-lit space and handle the front element with care. If you’re unsure about your tools, start with the simplest kit and add specialized items later. Keeping your tools clean and dedicated to lens care is essential for maintaining image clarity over time.
Step-by-step practical method
The safest cleaning sequence starts dry and ends with a damp wipe, minimizing moisture around internal camera components. Begin by inspecting the surface under good lighting, then remove loose particles with a blower. Gently brush along the edge to dislodge stubborn specks. If smudges remain, lightly dampen a microfiber cloth with optics-safe cleaner and wipe in a circular motion from the center outward. Finish with a dry wipe to remove any residual moisture and recheck under light. This approach reduces the chance of scratching and distributes cleaning effort evenly across the surface.
Cleaning frequency: how often should you clean
Frequency depends on how and where you shoot. In dusty or windy environments, dirt accumulates quickly and you may clean before each shoot or after, depending on image quality. In stable, indoor settings, a light wipe every few weeks may be sufficient. The goal is not to over-clean, which can wear lens coatings, but to maintain clear optics when you really notice issues like haze or obvious smudges. Establish a routine that fits your workflow and climate while keeping a dedicated cleaning kit.
Special cases: filters, front element, and sensor
If you use protective UV or clear filters, clean both the filter and the front element of the lens with the same care. If you suspect contamination inside the lens housing or on the sensor, resist DIY scrubbing and seek professional service. Sensor cleaning is delicate and can cause more harm than good if done improperly. When in doubt, consult the manufacturer guidelines or a qualified technician and avoid aggressive techniques that can damage sensor coatings or diaphragms.
Common mistakes and how to avoid them
Avoid spraying cleaner directly on the glass or using household liquids. Do not wipe with paper towels or fabric that isn’t designed for optics, and never press hard or scrub in a single spot. Keep your lens cap on when not using the lens to limit dust exposure. Always use a clean, dedicated cloth for one element and rotate cloth sections to prevent re-depositing dirt. Regular, gentle maintenance beats deep, risky cleanings.
On-location cleaning tips
When shooting outdoors, carry a small, organized kit in a protective pouch. Shield the lens from windblown dust by using a light barrier or taking breaks in sheltered areas. If you need to clean on-site, use a blower first, then a microfiber cloth with a tiny amount of cleaner, and avoid spraying liquids near the camera’s electronics. After returning indoors, perform a thorough check under bright light to ensure no residue remains.
Maintenance habits to minimize dirt
Develop a routine that includes cleaning before storage, using a dedicated microfiber cloth only for the lens, and keeping your kit separate from other camera gear. Store lenses in a clean environment with caps on and use lens filters to reduce front-element contamination in harsh environments. Practicing careful handling and regular checks can dramatically reduce the need for aggressive cleaning and preserve image quality over time.
Quick diagnostics after cleaning
After any cleaning, recheck the frame under bright light or live view and compare a test shot at different focal lengths. If you still notice haze, ghosting, or unusual color shifts, re-clean carefully or consider a professional inspection. Quick, honest diagnostics help you decide whether the issue is surface contamination or a more serious coating problem.
When to replace a lens
If you repeatedly clean without achieving a noticeably cleaner image, or if the front element shows scratches or coating damage that cannot be mitigated by cleaning, it may be time to consider replacing the lens. Coatings degrade with time, and a damaged front element can permanently affect image quality. Always weigh the cost of professional repair against replacing the lens.
Tools & Materials
- Air blower (non-pressurized)(Gentle bursts to dislodge dust; avoid liquids)
- Optics brush (lens brush)(Soft bristles, designed for optics)
- Lint-free microfiber cloth(One side for dry wipe, one for damp wipe)
- Optics-safe lens cleaning solution(Specifically formulated for coated front elements)
- Lens cleaning pen (optional)(Carbon tip for stubborn smudges)
Steps
Estimated time: Total time: 8-12 minutes
- 1
Inspect the front element
In good light, check the front element for visible dust, fingerprints, or smears. This determines the cleaning approach and helps you avoid unnecessary steps.
Tip: Use a loupe or magnifier to spot micro-scratches before touching the glass. - 2
Remove loose particles with a blower
Hold the camera securely and gently direct a stream of air to the center of the glass, then to the edges to lift debris away. Do not shake or squeeze the blower.
Tip: Keep the nozzle several inches away to avoid moisture transfer. - 3
Brush away stubborn debris
Lightly sweep the edge of the lens with a clean optics brush to dislodge stubborn particles. Do not scrub the glass with force.
Tip: Only brush when you see particles on the surface, not to remove dust from the surrounding bezel. - 4
Prepare the cleaning cloth
Dampen a microfiber cloth with a small amount of optics-safe cleaner. Do not saturate the cloth; moisture should be minimal at the center.
Tip: Use a fresh section of the cloth for each wipe to prevent redepositing dirt. - 5
Wipe in gentle circular motions
Starting from the center, wipe in concentric circles toward the edge. Maintain light pressure to avoid micro-scratches and evenly distribute cleaning agent.
Tip: Always keep the cloth moving to prevent circular scratches from static buildup. - 6
Dry and recheck
Use a dry microfiber section to remove any remaining moisture. Inspect the element under strong light to confirm a clean, smear-free surface.
Tip: If any residue remains, repeat the damp wipe with a fresh cloth section. - 7
Cap and store properly
Place the lens cap back on when not in use and store the lens in a clean, dust-free environment to minimize future cleaning needs.
Tip: Avoid leaving the lens in dusty bags or pockets without protection.
Common Questions
When should I clean my camera lens?
Clean when you notice visible smudges, fingerprints, or hazy images. Environmental exposure, like dust or rain, also signals cleaning. Avoid cleaning too often unless necessary.
Clean when you see visible smudges or haze, especially after exposure to dust or moisture.
Can I use household cleaners on my lens?
No. Household cleaners can damage coatings. Use optics-safe lens cleaning solutions and dedicated cloths.
Avoid household cleaners; they can damage lens coatings.
Is cleaning the sensor the same as cleaning the lens?
No. Sensor cleaning is delicate and often requires professional service. Lens cleaning is safer for DIY with proper care.
Sensor cleaning is riskier—consider professional help if you’re unsure.
What should I bring for on-location cleaning?
A compact blower, microfiber cloth, and optics-safe cleaner. Avoid liquids near electronics and keep a sheltered setup if possible.
Bring a small blower and microfiber cloth; stay in shade when cleaning outside.
How often should I perform a full cleaning routine?
Frequency depends on environment. In dusty or humid environments, increase cleaning frequency; indoors, monitor and clean as needed.
Clean as needed based on dust and image quality, not on a fixed schedule.
What indicates I should replace a lens?
If repeated cleaning doesn’t improve image quality or you see coating scratches, firmware or mechanical issues, replacement may be warranted.
If cleaning doesn’t help, and you see coating damage, consider replacement.
Watch Video
The Essentials
- Inspect before cleaning to avoid unnecessary steps
- Use optics-safe tools and minimal moisture
- Never spray cleaner on the lens surface
- Clean in a clean environment to avoid re-contamination
- Inspect again after cleaning for any remaining residue