How to Clean a Camera Sensor: Safe Step-by-Step Guide
Learn how to clean a camera sensor safely using dry and wet methods, essential tools, and a step-by-step process designed for beginners with safety tips.

Learn how to clean a camera sensor safely to remove dust and smudges without scratching the surface. This guide shows when to clean, which tools to use, and a careful step-by-step method for both dry and wet techniques. By following manufacturer guidance and working in a clean area, you can inspect results before finishing.
Why Sensor Cleaning Matters
Dust, smudges, and micro-particles on the sensor can appear as dark specks in your images, especially at small apertures and long exposures. A dirty sensor reduces contrast and can dull color accuracy. Regular, careful sensor cleaning helps maintain image quality and reduces post-processing work. According to Best Camera Tips, sensor cleaning should be performed in a clean, dust-free environment with careful handling to minimize risk to the sensor coatings. Understanding how to clean a camera sensor properly is a foundational skill for photographers who want to keep gear at peak performance. In this section, we’ll cover what constitutes contamination, why it matters, and how to decide if cleaning is necessary.
When You Should Clean Your Sensor
You should consider cleaning your sensor when you begin to see visible dust balls or spots in test shots taken at small apertures, or when post-processing shows despeckling is insufficient. Some specks are normal and may not affect everyday photography, especially at mid-range apertures. In contrast, persistent spots that don’t disappear after a blower session likely warrant a more thorough cleaning. The decision also depends on your camera type (DSLR vs mirrorless) and the sensor size; larger sensors often reveal dust differently. Regular inspections after lens changes help you catch issues early and avoid carrying dust into critical shoots. If you’re unsure, err on the side of cautious cleaning with the proper tools to minimize risk to the sensor.
Cleaning Methods: Dry, Wet, and If Necessary
Dry cleaning is the first line of defense: a hand‑held air blower or a brush designed for camera work can dislodge loose dust. Avoid harsh methods that push debris across the sensor. Wet cleaning is reserved for stuck particles or smudges that refuse to move with air; it uses specialized sensor swabs and a sensor-safe cleaning solution. Do not spray liquids directly onto the sensor; apply a few drops to the swab and sweep gently in a single direction. If you’re in a bright environment, use a clean, well-lit workspace to prevent accidental contact with the sensor’s surface. Best Camera Tips analysis shows that using the wrong solvents or rough swabs can damage sensor coatings, so choose dedicated sensor cleaners and soft, lint-free swabs only.
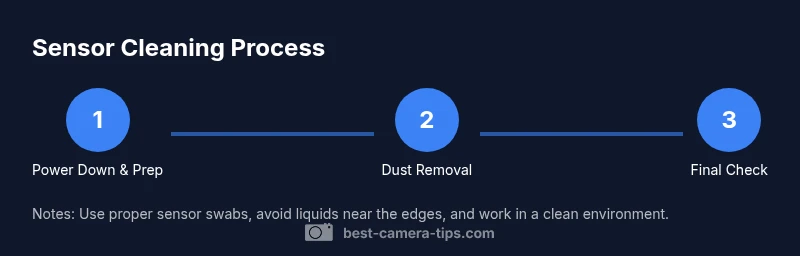
Step-by-Step Safe Sensor Cleaning Procedure
This section provides a practical overview of the process. Always power down the camera, remove the lens, and access the sensor with care. Start with a blower to remove loose dust, then inspect the surface under bright, diffused light. If dust remains, use a sensor swab with a small amount of sensor cleaner and wipe in a single, steady direction from center to edge. Let the sensor dry completely before reattaching the lens and powering the camera back on. Finally, take a test shot at a high f-stop and inspect for any remaining particles against a plain, light-colored background.
Common Mistakes and How to Avoid Them
Common mistakes include using canned air that shoots propellant onto the sensor, rubbing the surface with a rough cloth, or applying liquid cleaner directly to the sensor. Never reuse a swab across multiple passes if it shows signs of contamination. Always keep your workspace clean and free of dust, and avoid cleaning if you’re unsure about the procedure. If you’re nervous, take breaks and re-check in a well-lit mirrorless or DSLR view for any missed spots. Practicing with a cheap body cap on a used body can help you become proficient without risking an actual sensor.
Post-Cleaning Check: Verifying Results
After cleaning, reassemble the camera and perform a controlled test to verify success. Shoot a uniform gray or white background at small aperture, then review at 100% magnification on a bright monitor. Look for any recurring specks or smudges; if found, repeat a targeted dry-cleaning step using a fresh swab. Ensure there are no liquid residues and that the sensor surface remains undamaged. If you notice coatings peeling or scratches, stop cleaning and consult a professional service. A thorough check ensures you won’t waste time chasing ghost specks in future shoots.
Maintaining a Clean Sensor Long-Term
Develop a routine to minimize contamination: keep lenses capped during changes, use a body cap when swapping lenses, and store gear in clean environments. Regularly inspect the sensor area after lens changes and consider a protective UV or clear glass filter if you frequently work in dusty conditions. Avoid touching the sensor area with bare hands and ensure your cleaning tools are dedicated to camera work to reduce cross-contamination. By embedding these habits into your workflow, you’ll minimize the frequency of deep cleanings and preserve sensor integrity over time.
Tools & Materials
- Air blower (dust blower)(Manual bulb-style preferred; avoid canned air due to propellant.)
- Sensor cleaning swabs(Use one swab per pass; pencils or cotton swabs can scratch.)
- Sensor cleaning solution(Only solutions labeled for camera sensors; follow label directions.)
- Lint-free microfiber cloth(Optional for exterior dusting, not for sensor surface.)
- Isopropyl alcohol (optional)(Only if labeled for sensor use; avoid using on coatings without guidance.)
- Gloves or finger cicks (optional)(Helps keep hands clean; not required if you’re careful.)
- Lens cap and body cap(Prevent dust exposure when lenses are removed.)
- Bright light or loupe(Improves dust visibility during inspection.)
Steps
Estimated time: 20-40 minutes
- 1
Power down and prep workspace
Power off the camera and remove the battery if possible. Prepare a clean, dust-free workspace with good lighting and a soft surface to lay the camera on. This minimizes the risk of accidental contact with the sensor.
Tip: Work slowly and keep all tools organized to avoid cross-contamination. - 2
Remove lens and access sensor
Detach the lens and, if you’re using a DSLR, open the mirror box or access the sensor area as per your model’s instructions. Handle the camera body with clean hands and avoid pressing on the sensor area.
Tip: Do not touch the sensor or place fingers near it. - 3
First, attempt dry cleaning
Use a manual air blower to dislodge loose dust. If dust remains, switch to a sensor cleaning swab but avoid rubbing vigorously. Inspect under bright light to decide if a wet cleaning is needed.
Tip: Never spray air directly at the sensor. Hold the blower gently and avoid prolonged pulses. - 4
Proceed with wet cleaning when needed
Moisten a sensor swab with the recommended cleaner; wipe in one direction from center outward. Do not return to the center area after starting a stroke. Allow the surface to dry before proceeding.
Tip: Always use a fresh swab and avoid pooling any liquid on the sensor. - 5
Final inspection and reassembly
Recheck the sensor after cleaning and ensure no residue remains. Reattach the lens, reseat the camera, and take a test shot against a simple background to confirm cleanliness.
Tip: Take multiple test shots at different apertures to ensure consistent results. - 6
Document results and storage
Note what area was cleaned and what tools were used for future reference. Return the camera to a dust-free environment and store tools in a dedicated box.
Tip: Keep a simple log; it helps with routine maintenance.
Common Questions
Do I need to clean my sensor myself or take it to a pro?
For minor dust, DIY cleaning with proper tools is often safe. Severe contamination or unusual coatings may require professional service.
DIY cleaning works for light dust, but consult a pro for heavy contamination.
Can I damage my sensor by cleaning?
Yes, using improper techniques or solvents can scratch or smear the sensor. Always follow manufacturer guidelines and use dedicated sensor tools.
Improper technique can damage the sensor; use proper tools.
What is the difference between sensor cleaning and lens cleaning?
Sensor cleaning targets the sensor surface, while lens cleaning targets the glass and optics. Do not apply lens cleaning methods to the sensor.
Sensor cleaning and lens cleaning are different; use the right tools for each.
What tools are safest for beginners?
Start with a manual air blower, sensor cleaning swabs, and a sensor-safe cleaner. Avoid improvised tools and household liquids.
Begin with a blower and sensor swabs for safety.
How often should I clean the sensor?
Clean only when you notice dust or smudges affecting images. Normal dust is common and may not require cleaning.
Clean when dust shows up in shots; otherwise, it’s often not necessary.
Watch Video
The Essentials
- Follow safe procedures to protect sensor coatings.
- Use only sensor-designated tools and cleaners.
- Dry cleaning first, wet cleaning only when needed.
- Inspect results carefully before reassembling.
- Maintain a dust-free workflow to minimize future cleanings.