What Should Camera Settings Be on iPhone: A Practical Guide
Learn the best iPhone camera settings for photos and videos. This guide covers exposure, focus, HDR, Night mode, ProRAW, and quick workflows to improve everyday iPhone photography.

By default, start with Photo mode, enable Grid, set exposure manually, and turn on HDR where appropriate. For most scenes, lock focus and exposure, use Night mode in low light, and switch to Portrait or Pano as needed. This guide shows a simple, repeatable workflow to optimize iPhone shots across lighting conditions.
Understanding why camera settings matter on iPhone
According to Best Camera Tips, the iPhone camera is powerful but only as good as the settings you apply. Small changes—like whether you shoot in HDR, how you lock exposure, or when you enable Night mode—can dramatically impact sharpness, color accuracy, and dynamic range. The beauty of iPhone photography is its ability to adapt quickly; the trick is to know which knobs to turn in different situations. This section lays the groundwork for a repeatable workflow: recognizing scene needs, choosing the right shooting mode, and knowing which settings to tweak for consistent results across devices and iOS versions.
You’ll notice that experts emphasize consistency. A predictable routine reduces missed shots, especially in fast-changing environments like concerts, street photography, or family gatherings. By understanding the intent behind each setting, you can apply a clear, workflow-driven approach rather than ad hoc tweaks.
Throughout this guide, you’ll see references to everyday scenarios, practical tips, and quick checks you can perform before you press the shutter. The goal is not to overwhelm you with options but to empower you to capture better images with confidence, using settings that are both accessible and effective for beginners and experienced photographers alike.
Core iPhone camera settings you should know (Photo mode)
When you open the Camera app, you’ll encounter essential controls that influence the look of your photos. Start with the Scene you’re photographing, then prepare a few baseline settings: enable gridlines to improve composition, lock exposure for stable brightness, and consider HDR for backlit scenes. HDR (High Dynamic Range) helps balance bright highlights and dark shadows, especially in landscapes and backlit portraits. Pro camera enthusiasts may explore ProRAW on supported devices for greater post-processing latitude, while casual users can rely on standard JPEG for quick sharing. Understanding when to toggle Live Photo, Flash, and Night mode will give you a strong starting point for most everyday shots.
In this section, we outline practical defaults and when to override them. The objective is to maintain a cadence you can repeat, so you’re not hunting for settings in the heat of the moment. Remember: the best camera settings are the ones you actually use consistently, not the ones you rarely touch.
Scene-specific tips: daylight, low light, portraits, and HDR
Different scenes demand different settings. In bright daylight, keep exposure balanced by tapping to focus and sliding to adjust brightness, then consider turning on Gridlines for composition. In low light, Night mode automatically engages on supported models; ensure you’re using a stable stance, a longer exposure time if needed, and avoid heavy digital zoom that degrades sharpness. Portrait mode excels with good lighting but can soften edges in tricky backdrops; use a steady stance or tripod, and consider lighting adjustments before capturing. HDR should be enabled for scenes with strong contrast, like a sunset behind a silhouette, to preserve detail in both highlights and shadows. Each scenario benefits from a quick pre-shoot review: check the foreground and background separation, confirm white balance feels natural, and ensure your subject is properly lit.
The key is to recognize which mode best serves the moment and to lean on automatic features when they reliably deliver, while stepping in with manual tweaks for critical moments.
Exposure, focus, and white balance: manual tweaks you can apply quickly
Locking focus and exposure ensures the camera doesn’t reframe brightness mid-shot. On iPhone, you tap and hold on the subject until you see the AE/AF Lock indicator, then adjust the exposure slider that appears to fine-tune brightness. White balance can be guided by lighting conditions: warm light in sunrise or sunset calls for a slight cool shift if necessary, while shaded environments benefit from a warmer balance. For color accuracy, consider shooting in RAW if your device supports it and you plan to edit later; otherwise, rely on standard JPEG with a good exposure baseline. Remember that composition and subject distance affect depth of field and perceived sharpness, so align your framing before capturing to minimize post-processing fixes.
These adjustments don’t require special tools—your finger and a calm workflow are enough to achieve consistent results across different lighting conditions.
Advanced controls: ProRAW, ProRes, Live Photos, and long-exposure tricks
ProRAW gives you greater flexibility in post-processing, preserving more tonal data for precise edits. ProRAW is most beneficial when you plan significant color and exposure adjustments. ProRes is more relevant for video workflows that require high-fidelity editing later on, but it consumes more storage; choose it when you’re planning a high-quality video project and have space to spare. Live Photos capture motion and audio, which is great for storytelling but may require more post-processing if you want a still frame without motion. For long exposure-like effects, use a tripod and enable Night mode where available; some iPhone models support long exposure-like captures with specific gestures. Always balance quality against storage use, especially when shooting in RAW or ProRAW.
Experiment with these features in controlled sessions to learn how they affect your final results. If you don’t plan intensive editing, standard JPEG with smart exposure adjustments is often sufficient for most social sharing.
Common mistakes and quick fix checklist
Even experienced shooters fall into a few traps: relying solely on Auto mode, neglecting gridlines, overusing digital zoom, and posting underexposed images. A quick fix checklist helps you avoid these pitfalls: enable Gridlines for composition; lock exposure before shooting; avoid heavy zoom that reduces detail; review the shot on a larger screen if possible; and tweak white balance in challenging lighting. If your photos look flat, increase contrast and midtone presence in post-processing, not just in camera settings. If colors appear oversaturated, switch to a calmer white balance and reframe the scene with proper lighting. Finally, periodically clean your lens and ensure iPhone software is up to date to benefit from the latest camera improvements.
Practical workflow for field shooting with iPhone
Adopt a simple, repeatable workflow: prepare the scene, select the shooting mode, lock focus and exposure, adjust exposure for brightness, and verify composition with gridlines. After each shot, review on a larger screen and note any adjustments needed for future frames. For video work, plan a preview shot to check focus and exposure, then proceed with your main take. Maintain a minimal yet consistent set of steps to avoid friction during real-world shoots.
By following a standardized process, you’ll improve consistency over time and reduce post-processing time, enabling you to capture more moments with confidence.
Summary of recommended settings by scenario
Below is a quick reference you can print or save to your phone:
- Daylight photos: Auto HDR on, gridlines enabled, exposure balanced by tapping subject; stabilize with a steady stance.
- Low light: Night mode on, longer exposure where supported, avoid digital zoom, consider a tripod for stability.
- Portraits: Use Portrait mode with good lighting; adjust lighting effects if available to enhance subject separation.
- Scenery/landscape: Use HDR, keep horizon straight, and apply a small amount of exposure compensation if highlights blow out.
- RAW workflow: For serious editing, shoot ProRAW on supported devices and batch-edit later; ensure storage is sufficient.
Practice with different scenes to tailor these defaults to your preferred style and device capabilities.
Quick pre-shoot checklist
- Clean the camera lens and ensure the screen is free of smudges.
- Enable Gridlines in Settings > Camera > Grid.
- Decide on shooting mode (Photo, Portrait, Night, etc.).
- Prepare lighting: avoid harsh backlight or shadows on the subject.
- Confirm storage availability if you plan RAW or ProRAW captures.
Tools & Materials
- iPhone with latest iOS installed(Ensure you have the latest camera features and bug fixes.)
- Clean camera lens(Lint-free microfiber cloth; wipe before shooting.)
- Gridlines enabled in Settings(Settings > Camera > Grid; improves composition.)
- Stable surface or tripod(Helpful for low-light or long-exposure shots.)
- External storage (optional for RAW)(ProRAW or ProRes workflows can consume space quickly.)
Steps
Estimated time: 20-30 minutes
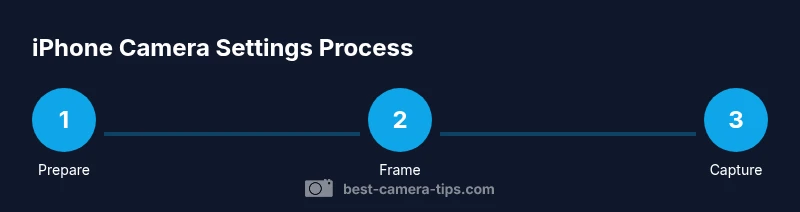
- 1
Prepare the device
Unlock the iPhone and open the Camera app. Ensure Gridlines are enabled and you know which mode you’ll use for the scene. Prepare lighting and composition before you press the shutter to minimize adjustments mid-shot.
Tip: Turning on Grids helps with rule-of-thirds composition and framing; check the subject distance beforehand. - 2
Choose shooting mode and frame
Select Photo for general shots, Portrait for subjects with depth, or Night mode for low-light scenes. Frame the shot with your subject off-center for more dynamic composition and ensure the horizon is level.
Tip: Portrait mode can alter background blur; adjust distance to keep the subject sharp. - 3
Lock focus and exposure
Tap and hold the subject until AE/AF Lock appears, then drag the exposure slider up or down to fine-tune brightness. Locking focus prevents abrupt shifts if the subject moves.
Tip: Use exposure lock for consistent brightness across a sequence of shots. - 4
Enable HDR when needed
HDR balances highlights and shadows in scenes with strong contrast. If you’re capturing backlit subjects, enable HDR; if lighting is uniform, you may leave it off to keep colors natural.
Tip: Check the result on a larger screen to ensure highlights aren’t clipped. - 5
Consider Night mode and tripod use
In low light, Night mode engages automatically on supported models. If possible, stabilize with a tripod or a steady surface; longer exposure increases brightness without introducing blur.
Tip: Hold still during the capture and avoid touching the phone mid-exposure. - 6
Experiment with ProRAW and RAW (where available)
If you plan significant edits, shoot in ProRAW for more latitude in post-processing. This consumes more storage and requires a compatible workflow.
Tip: Only enable ProRAW when you have editing plans; otherwise standard JPEG is simpler. - 7
Review and adjust
After capturing, review on a larger screen if possible. Note any exposure, composition, or color tweaks you’d apply next time, and adjust settings for the next shot.
Tip: Create a quick checklist you can reference on future shoots.
Common Questions
How do I switch from Photo to Portrait mode on iPhone?
Open the Camera app and swipe to Portrait mode. Frame your subject and tap the shutter. Portrait mode requires good lighting for the best depth effect, and you can adjust lighting effects afterward if your device supports it.
To switch, just swipe to Portrait mode in the Camera app and capture. Good lighting helps Portrait mode separate the subject from the background.
Is ProRAW worth using for everyday photos?
ProRAW provides more latitude in editing, especially for challenging lighting. It consumes more storage and requires post-processing. If you value flexibility and have a workflow for editing, it’s worth enabling on supported devices.
If you edit photos often and need more control, ProRAW is worth enabling; otherwise, standard JPEG is usually sufficient.
What is Night mode and when should I use it?
Night mode automatically activates in low light. Use it to brighten scenes without increasing ISO excessively. Hold steady, and avoid moving subjects during the capture for best results.
Night mode helps in dim environments; keep your phone steady for crisp results.
How can I manually adjust exposure on iPhone?
Tap to focus, then slide the exposure control (the sun icon) to brighten or darken the scene. Lock AE/AF if you plan a series of shots and you don’t want the camera to reframe exposure.
Tap to focus, adjust exposure with the slider, and consider locking exposure for consistency.
Should I always use HDR for every shot?
HDR is beneficial for scenes with bright skies and dark foregrounds, but not necessary for all shots. If your camera already balances exposure well, you can leave HDR off to preserve natural tones and reduce processing time.
HDR isn’t always needed; use it when scenes have high contrast to preserve detail.
Watch Video
The Essentials
- Define scene needs and choose the right mode first.
- Lock focus and exposure to keep brightness stable.
- Enable HDR in high-contrast scenes for balanced detail.
- Use Night mode and stabilization for low light when available.
- Consider RAW/ProRAW only if you plan post-processing.