What Causes a Camera to Fail? A Practical Troubleshooting Guide
A practical troubleshooting guide to diagnose and fix camera failures fast. Learn common causes, diagnostic steps, and prevention tips for photographers and home security setups.

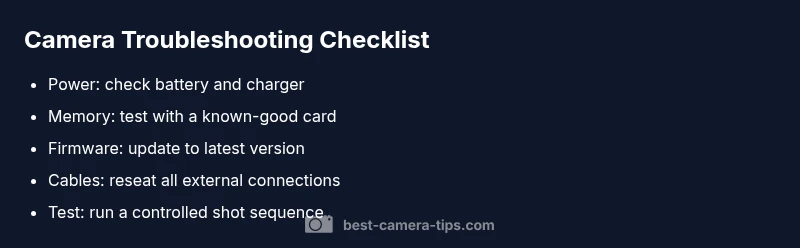
Most camera failures stem from power issues, faulty sensors, or corrupted firmware. Start by confirming fresh batteries or a charged power source, then reset or update firmware, and test with a different memory card. If errors persist, check cables and connections, or consult a professional. This quick check helps you triage common failure modes fast.
Why cameras fail: what causes camera to fail
Cameras fail for a few core reasons, and understanding them speeds up repair. When people ask what causes camera to fail, you’ll find it’s usually a mix of power problems, software glitches, storage faults, and physical wear. According to Best Camera Tips, the most frequent culprits fall into four buckets: power and battery performance, firmware or software corruption, memory or storage faults, and physical damage or wear on critical components. The consequence is usually an inability to boot, failure to capture or save images, unexpected shutdowns, or error messages that repeat. The good news is that most failures are diagnosed with a small checklist that starts with obvious, reversible problems before moving to deeper hardware testing. By framing the problem around the four buckets, you can rapidly pinpoint the broad category and tailor your next steps.
Power, Battery, and Charging Issues
Power is the most obvious defect sink for many cameras. If the battery cannot sustain voltage, the camera may shut down mid-shot or fail to boot at all. In practice, confirm the battery is charged, inspect the charger and cable for wear, and try a known-good battery. Temperature can also affect performance; if the unit heats quickly, power management may throttle or shut the device down to protect internal components. Always rule out simple causes first: a depleted battery, a loose charger connection, or a faulty charging port. According to Best Camera Tips, a quick swap to a fresh power source often resolves what appears to be a catastrophic failure. If you’re using an external grip or battery pack, unplug and test the core camera body alone to determine where the fault lies.
Storage and Memory Card Problems
A corrupt or incompatible memory card can mimic more serious failures, including failure to save images or error messages during write operations. Always verify the card is formatted for the camera, use the recommended file system, and test with a known-good card. If you suspect a card problem, run the built-in format tool, then perform a quick capture test in a controlled environment. Some cameras include a diagnostic feature that checks card health; if available, run it. Extreme temperatures, dirt in the slot, or bent contacts can also cause intermittent failures. Remember: if storage fails, the images don’t save, which feels catastrophic but is often fixable with a simple card swap.
Firmware, Software, and Settings Glitches
Firmware bugs or corrupted settings can cause boot failures, intermittent freezing, or improper exposure handling. Ensure your camera runs the latest firmware and reset to factory defaults if you suspect a software issue. If a firmware update is unavailable or fails, try a clean reinstall or rollback if the option exists. Settings like picture profile, white balance, or drive mode can also create instability if misconfigured. Regularly check for official updates and avoid non-authentic firmware, which may brick the device. In many cases, updating firmware or restoring defaults resolves what appears to be a hardware fault, reinforcing the importance of software hygiene.
Sensor, Shutter, and Image Chain Failures
Problems in the image path—from the sensor to the storage path—can manifest as blank frames, corrupted files, or banding in images. This includes shutter mechanism faults, dust on the sensor, or damage to the insulation that affects signal integrity. If you notice inconsistent exposure or unexpected artifacts, perform a sensor clean (carefully, following manufacturer instructions) and test with multiple lenses if applicable. A failing shutter may make noises or fail to expose correctly; professional diagnosis is needed for mechanical failures. Early signs include unusual noise, longer-than-normal readout times, or complete image blackouts.
Environmental and Physical Damage
Extremes of heat, cold, moisture, or rough handling accelerate wear and cause electronic drift. Inspect for water ingress, condensation, or corrosion on connectors. Protective cases and proper storage reduce risk. If you’ve dropped the body or lens, components – including the sensor assembly or internal cables – may have shifted or loosened. Visual inspection plus a controlled test shot sequence can reveal subtle mechanical issues that aren’t obvious in idle tests. If damage is suspected, avoid powering the device further to prevent cascading failures and seek professional service.
Cables, Connectors, and External Hardware
Bad connections often masquerade as device failures. Check all external cables, battery grips, and any third-party accessories for wear, bent pins, or loose contacts. Disconnect nonessential peripherals to isolate the root cause. A simple power-cycle with only essential components helps determine if the fault lies with the camera body or an external device. If you replaced a cable and the error persists, test with a different compatible component.
How to Test Your Setup: Quick Diagnostics
A structured approach helps you isolate issues quickly. Start with the power source, then test with a known-good memory card, perform a factory reset, and finally update firmware. Capture several test shots under controlled lighting to observe behavior. If you still see errors, document the exact sequence that triggers the fault and consult the manufacturer’s troubleshooting guide. This disciplined approach reduces downtime and helps you communicate clearly with support.
Preventive Maintenance and Safe Practices
Prevention beats repair. Regular firmware updates, careful storage, and gentle handling reduce the risk of future failures. Create a simple maintenance routine: weekly power tests, monthly sensor cleanings, and quarterly firmware checks. Maintain a clean, dry storage environment and use protective bags when transporting the gear. Avoid exposing cameras to extreme temperatures or moisture without protection. Finally, back up important settings and keep a spare memory card to minimize downtime when failures occur.
Steps
Estimated time: 45-60 minutes
- 1
Check power source
Power off the camera, remove the battery, and inspect for swelling or corrosion. Reinstall a fully charged battery and try a different charger if available. Confirm the camera boots normally before proceeding.
Tip: Keep a spare battery on hand for quick swaps during troubleshooting. - 2
Reset firmware and settings
Perform a soft reset if your model supports it; otherwise, restore to factory defaults. Ensure you backup custom settings first. After reset, boot and test basic functions like autofocus and exposure.
Tip: Note the default settings you changed for easy reapplication after the reset. - 3
Test memory card
Remove the current card and format it in-camera, if supported. If issues persist, test with a known-good card. Run a few captures to confirm write stability and verify file integrity.
Tip: Always use a card recommended by the manufacturer. - 4
Update firmware
Check the manufacturer's site for the latest firmware version. Update via USB or card as directed. Do not interrupt the process once started.
Tip: Back up settings before updating to avoid loss of custom profiles. - 5
Inspect connectors and external gear
Disconnect nonessential peripherals and reseat all cables. Inspect lens contacts, battery contacts, and hot-shoe connections for oxidation or damage. Reconnect and test.
Tip: Work in a clean, dry area to prevent static or dust contamination. - 6
Monitor temperature and behavior
Operate the camera within normal environmental temperatures and avoid prolonged use in high heat. If overheating occurs, power down and allow cooling; repeat tests after a cool-down period.
Tip: Consider a vented bag or fan-assisted enclosure for extended shoots in warm environments. - 7
Document symptoms and test results
Keep a log of symptoms, actions taken, and outcomes. This helps you or a professional identify patterns and escalate to service faster.
Tip: Include model, firmware version, and card type in your notes. - 8
Seek professional help when needed
If the issue persists after all checks, contact an authorized service center. Some failures require specialist diagnostics or internal component replacement.
Tip: Request a written diagnosis and cost estimate before approving repair.
Diagnosis: Camera powers on but shows blank screen, error messages during boot, or cannot save images
Possible Causes
- highDead or weak battery / faulty charger
- mediumFirmware corruption or outdated software
- highMemory card failure or formatting issues
- lowLoose connections or damaged cables
- lowOverheating or thermal throttling
Fixes
- easyReplace or recharge the battery and test with the original charger
- easyPerform a soft reset and install the latest firmware; revert if available
- easyFormat or replace the memory card and re-run a test shoot
- mediumReseat internal connectors or take the unit for professional check if you suspect a loose cable
- mediumAllow cooling, apply firmware recovery steps or contact service if overheating persists
Common Questions
What is the most common cause of camera failure?
Power, firmware, and storage failures top the list. Start by ruling out power and update firmware.
Power, firmware, and storage issues are the most common causes.
Can a firmware update fix camera failures?
Yes. Updating to the latest firmware often resolves bugs that cause crashes or boot problems.
Yes, firmware updates can fix many failures.
My camera won't power on; what should I do first?
Check the battery, charger, and power switch. If available, try a different battery to rule out a faulty cell.
First, check the power and battery.
My memory card is failing; how can I test it?
Format the card in-camera if supported, then test with a known-good card. Run a few captures to verify stability.
Test with a known-good card to confirm.
Should I take it to a professional?
If issues persist after power and firmware checks, seek certified service. Some failures require specialist diagnostics.
If it still fails, consider professional service.
How can I prevent camera failures in the future?
Keep firmware updated, store gear properly, and handle components with care to reduce risk.
Keep it updated and well maintained.
Watch Video
The Essentials
- Start with power and firmware first
- Test with known-good memory and cables
- Keep software up to date to prevent faults
- Document symptoms for faster service
- Prevent failures with routine maintenance