What If Camera Is Not Working? Immediate Troubleshooting Guide
Urgent, step-by-step troubleshooting for cameras that won't power on or display. Learn practical checks, fast fixes, and when to seek help to restore your camera's performance.

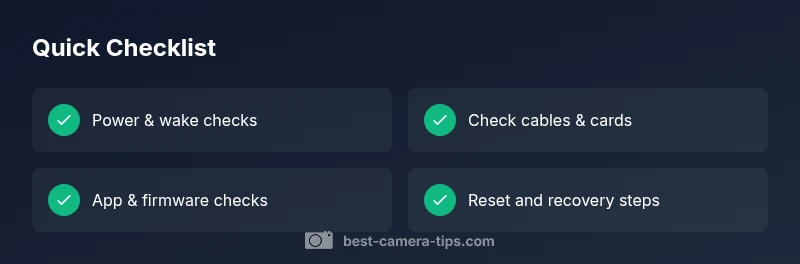
If your camera isn’t working, the quickest path is to start with the basics and work upward. When you ask what if camera is not working, first confirm power (battery or outlet), then check cables, SD card or internal storage, and whether the device is awake. Next, inspect the app or display for error messages, and update firmware or perform a safe reset if needed.
Quick Power Checks
In emergencies, you can often restore function by confirming the basics are solid. Start with the simplest checks: ensure the device is powered, the battery is seated, and any external power adapter is plugged in. If your model uses sleep or auto-wake modes, press the power button or tap the screen to wake it. For security cameras, verify the power source and USB cables are secure, and that any backup battery is charged. If a charger or battery was recently replaced, re-seat all connections. Clear indicators like a lights or a display can tell you immediately whether the unit is receiving power. Keeping a log of power events helps spot recurring issues, especially if you’re troubleshooting multiple cameras in a system.
Check Power, Battery, and On/Off State
Power problems are by far the most common cause of a non-working camera. Start by verifying the main power source and battery health. Swap in a known-good battery or try a different outlet or USB port. Make sure the device is switched on and not stuck in a low-power or sleep mode. If you’re using an integrated battery, inspect for swelling or corrosion—these are signs the battery needs replacement. For cameras with external power, ensure the adapter’s output matches the required voltage and current. Finally, check built-in indicators: a blinking LED or on-screen icon can indicate charging, standby, or fault conditions that guide your next steps.
Inspect Cables, Cards, and Lenses
Loose or damaged cables are a frequent culprit. Unplug and re-seat all power and data cables, including any HDMI or USB connections. If your camera uses a removable memory card, remove it, inspect for dust or damage, and reinsert after a gentle clean. For cameras with interchangeable lenses, ensure the lens is properly mounted and locked. A dirty lens can also appear as a non-responsive camera if the image is constantly out of focus or grayscale. If your device allows, format or reformat the card after backing up essential footage to restore performance. Extreme wear on ports or mounts typically signals replacement is due.
Software, Apps, and Firmware
Software glitches can mimic hardware failures. Check the camera’s display or companion app for error messages, updates, or compatibility notices. Confirm your firmware is up to date and that the app version on your phone or computer is current. Bluetooth or Wi-Fi pairing issues can prevent control—re-pair the device and forget/reconnect it in the app. If you recently updated software and the problem started afterward, consider rolling back or performing a factory reset after backing up settings. Remember to review calibration options, such as white balance or exposure presets, which can affect perceived image quality even when the camera powers up.
Interpreting Error Messages and Status Lights
When the screen shows an error code or the LEDs blink in a pattern, use the manufacturer’s guide to interpret it. Common messages often indicate insufficient power, storage errors, or misconfigured settings. If the error code persists after basic fixes, search the official support resources for your model and check for known issues. Keeping a photo log of the times and conditions when errors occur helps with diagnostics. If your camera uses a cloud service, verify service status and your account permissions, as outages or access problems can masquerade as device failures.
Safe Reset and Recovery Steps
If the issue remains, perform a safe reset to restore default settings without erasing critical data. Start with a soft reset or reboot, then attempt a factory reset only after backing up footage and configuration. Some cameras support a partial reset that preserves user presets while clearing software glitches. If a reset didn’t fix the problem, you may need to update drivers or firmware from the manufacturer’s site, or re-flash the internal memory if the option exists. After any reset, reconfigure essential settings, and test the camera with minimal peripherals to isolate the fault.
Prevention: Keep Your Camera Reliable
Routine maintenance prevents many failures. Regularly inspect power sources, clean ports with a gentle burst of compressed air, and schedule firmware updates during low-usage times. Create a backup plan for critical footage, maintain a simple spare battery or adapter kit, and store memory cards with proper write-protect settings. Document any recurring symptoms to expedite future troubleshooting, and consider a maintenance checklist for each camera in your system. Finally, set realistic expectations about environmental factors like heat, moisture, and dust, which can affect performance over time.
Steps
Estimated time: 20-60 minutes
- 1
Confirm power & wake state
Check battery, adapters, and ensure the camera is fully powered on or awake. If it’s a wired camera, verify the outlet and cable connections. Listen for boot sounds or look for indicator LEDs as proof of power.
Tip: Keep a spare battery handy for quick swaps. - 2
Inspect cables & memory card
Unplug all power and data cables, re-seat firmly. Remove the memory card, inspect for damage, and reinsert or replace with a known-good card. For lenses, ensure secure mounting and alignment.
Tip: Power off before removing cards to prevent data corruption. - 3
Check app connectivity
Open the camera’s companion app, verify device appears online, and check for error messages. Re-pair Bluetooth/Wi‑Fi if needed and confirm permissions on your mobile device.
Tip: Test with another device to rule out phone issues. - 4
Update firmware
Check for and install the latest firmware from the manufacturer’s site or app. Restart the camera after the update to ensure all components boot correctly.
Tip: Verify the update completed before use. - 5
Perform a soft reset
Use the on-device menu or button combination to reboot the camera. Do not erase data during a soft reset. Confirm the device backs up before any reset if possible.
Tip: Document settings before resetting. - 6
Factory reset if needed
If nothing else works, perform a factory reset to restore default factory settings. Back up footage and configuration first, then reconfigure from scratch.
Tip: Only use this as a last resort. - 7
Test with minimal setup
Connect only essential components (camera, power, minimal network) to see if it functions. Gradually reintroduce features to identify the fault.
Tip: This helps isolate the faulty component. - 8
Seek professional help
If the camera still doesn’t work after resets and firmware updates, there may be a hardware fault. Contact support or a repair service.
Tip: Document serial number and evidence of failure for faster help.
Diagnosis: Camera won’t power on or display image
Possible Causes
- highPower supply issue (dead battery, unplugged adapter)
- mediumFirmware crash or corrupted memory card
- lowHardware failure (sensor or mainboard)
Fixes
- easyCheck power source, replace battery, try a different outlet or USB power
- easyRemove and reinsert memory card, format if necessary after backup
- easyPerform firmware update or factory reset, then reconfigure settings
Common Questions
Why won't my camera turn on?
There are a few common culprits: power supply issues, a drained battery, or a failed adapter. Start by swapping in a known-good battery and trying a new outlet. If the device still won’t power, inspect for firmware issues or hardware faults.
Check power and battery first, then look for firmware or hardware faults. If it still won’t power, seek expert help.
What does an error code on my display mean?
Error codes indicate specific problems, such as storage or connectivity failures. Refer to the owner’s manual or official support to translate the code and apply the recommended fix.
An error code points to a specific issue. Check the manual or support site for the exact meaning and fixes.
Can a reset erase my settings?
A soft reset preserves most settings, while a factory reset returns the camera to default. Back up settings before a factory reset to avoid losing preferences.
A soft reset keeps your settings; a factory reset clears them. Always back up first.
What’s the difference between a soft reset and a factory reset?
A soft reset restarts the camera and clears temporary glitches without affecting data. A factory reset wipes all user data and restores default settings, which is useful if the device is unresponsive.
Soft reset restarts without data loss; factory reset clears personal data and resets settings.
When should I replace my camera?
If persistent hardware faults persist after resets and updates, or if reliability has declined, replacement is often the best option. Consider warranty coverage and cost of repairs versus a new model.
If hardware faults persist after fixes and maintenance, consider replacement.
Do I need professional help for hardware failure?
Yes, hardware failures—like sensor or mainboard issues—usually require expert troubleshooting or repair services. Check warranty status and contact official support for guidance.
Yes. Hardware failures typically need professional help and possible repair or replacement.
Watch Video
The Essentials
- Start with power and wake checks
- Inspect cables, cards, and lens securely
- Update firmware and test with minimal setup
- Seek professional help for suspected hardware faults