How to Tell If a Camera Is Recording
Learn how to verify whether your camera is recording, including indicators, app status, storage checks, and testing techniques. A clear, step-by-step method for homeowners, renters, and security enthusiasts.

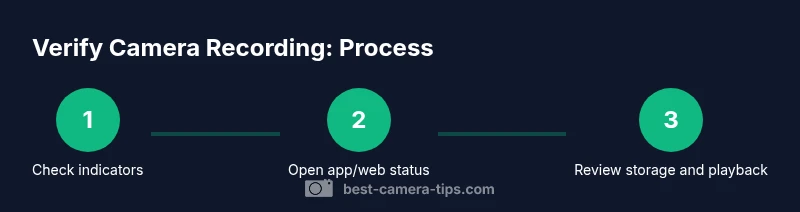
According to Best Camera Tips, to tell if a camera is recording, start by checking any visible recording indicators (LEDs or on-screen icons). Then open the companion app or web interface to verify status and storage location (local DVR/NVR or cloud). Review recent events or playback to confirm ongoing activity. If in doubt, test by triggering a known motion and observing the indicator.
What recording means for cameras
Recording can refer to saving video footage to local storage (microSD cards, NVRs) or to cloud servers, and it can happen continuously or only when triggered by motion or alarms. Some cameras also maintain a temporary buffer that captures events before they are written to storage. In practice, many consumer cameras default to recording only when motion is detected, while others run a continuous recording schedule. The distinction matters: if you want to prove that a camera was actively recording during a time window, you must understand where footage gets stored and under which conditions recording is enabled. For example, if a camera is configured to store only motion-triggered clips, a quiet period may yield no footage, even though the device is functioning correctly. Failing to recognize the difference can lead to mistaken conclusions about whether the camera captured activity. Throughout this guide, we will emphasize testing and cross-checking with multiple sources to avoid false positives. Best Camera Tips analysis notes that many devices support flexible storage options to meet different security needs, with 2026 as a key reference point.
Visual indicators you can trust
Visual cues vary by device. LEDs or on-screen icons often signal that recording is active, but privacy modes, low-power settings, or firmware quirks can hide or delay these indicators. Some cameras display status within the app only, not on the unit itself. Network latency can also affect how quickly indicators update. Because indicators can fail under certain conditions, corroborate with the app's status page and the device's storage log. Time alignment between indicators and footage is critical; misaligned clocks can lead to misinterpretation of when events occurred. When sharing access, ensure everyone can see the same indicators to prevent confusion.
How to check in the mobile app or web interface
Open the camera’s official app or login to its web interface. Navigate to the device status or live view section and look for: (1) Recording status (is recording enabled/paused?), (2) Storage status (space left and where footage is saved), and (3) Last activity (the most recent recording timestamp). A visible recording label or a recent timestamp in playback confirms activity. If the interface offers a calendar or timeline, use it to jump to specific times. If you cannot locate a clear indicator, consult the support resources for your model or review firmware release notes for interface changes.
Understanding storage locations: local vs cloud
Footage may be stored locally (microSD in the camera or an attached NVR/DVR) or remotely to a cloud service. Local storage is accessible directly from the device head or through a local network, but can be lost if the device fails or is stolen. Cloud storage relies on subscription and reliable network connectivity, with the benefit of remote access across devices. Best Camera Tips Analysis, 2026 indicates that many modern cameras offer both storage options or dynamic switching depending on network status and user preferences. To confirm where recordings live, check the storage section in the app and review retention settings.
Verifying by playback: testing a recording
Playback is the most reliable way to confirm recording. Access the playback or timeline and locate footage around a known event window. For testing, trigger a controlled motion (e.g., walk in front of the camera) and verify that a recording appears with a matching timestamp. Inspect the frame rate and duration to ensure footage is saved in real time and not merely a live stream. If playback lacks expected clips, investigate storage permissions, ongoing writes, or scheduled recording rules.
Checking network activity and data usage
Monitoring network activity during suspected recording can help separate live streaming from stored footage. Use your router’s analytics or a network monitoring tool to observe data flows to the camera’s IP. A continuous stream to the camera often indicates live viewing or recording to cloud/storage, whereas bursts may reflect occasional events. If you notice consistent data in the absence of live viewing, your camera is likely recording. This cross-check is especially helpful when indicators are ambiguous or when you share access with others.
Common reasons a camera might not show recording
If you don’t see footage, several factors could be at play: privacy or masking modes enabled, storage full or write-protected, recording schedules disabled, time misalignment, or offline status due to power/network issues. Firmware updates can also alter UI cues or reset recording rules. Always re-check power, network connectivity, storage health, and clock sync after changes. A robust setup with redundant storage and explicit recording rules reduces confusion during verification.
Privacy and ethical considerations
Recording in private spaces or without consent may violate laws or policies. Always inform occupants when cameras are active and review local regulations before enabling continuous surveillance. If you manage cameras in a shared or rental environment, obtain written consent where required and limit access to footage to authorized users. When sharing recordings, use secure channels and ensure proper labeling with time and location to support accountability.
Quick testing checklist
- Confirm power and network connectivity; ensure the camera is online. - Read indicators (LEDs or app icons) to verify status. - Open the app and confirm recording state and storage space. - Trigger a motion event and check for matching playback. - Verify timestamps align with the real-time clock. - Review privacy settings and confirm you are allowed to record. - Document results for future reference.
Tools & Materials
- Smartphone or computer with internet access(To access the camera app or web interface.)
- Camera power supply or charged battery(Ensure the camera is powered during verification.)
- Camera app or web interface login credentials(Username and password for status checks.)
- NVR/DVR or cloud service account (optional)(Use if you store recordings there.)
- Time reference and notebook for logs(Helpful to note timestamps and test results.)
Steps
Estimated time: 15-25 minutes
- 1
Check power and network
Verify the camera is powered on and connected to the network. Confirm the power indicator is lit and there is a stable network link so data can be written to storage or cloud as required.
Tip: If battery powered, ensure charge > 20% before testing. - 2
Open app or web interface
Launch the official app or login to the camera's web interface. Navigate to the device status or live view page to access status indicators and storage details.
Tip: Bookmark the status page for quick future checks. - 3
Find the recording status
Look for explicit recording state (recording/paused) and verify the last event timestamp. Confirm whether recording is enabled for the current schedule.
Tip: If there is a separate 'Records' tab, inspect any recent clips there. - 4
Check storage location and space
Identify where footage is stored (local vs cloud) and confirm available space. Note any retention rules that could affect visibility of clips.
Tip: Low storage can cause new clips to fail to write. - 5
Test a motion event
Trigger a controlled motion cue (step in front of the camera) and observe whether a new recording is created with a matching timestamp.
Tip: Perform only authorized tests and avoid causing nuisance alerts. - 6
Review playback
Open playback or timeline view and locate the test clip. Confirm footage starts at the expected time and that playback controls function normally.
Tip: Cross-check the frame rate and duration for accuracy. - 7
Check clock and time zone
Ensure the camera’s clock is synchronized with real time (NTP is preferred) to avoid timestamp drift in recordings.
Tip: Enable automatic time updates if available. - 8
Evaluate privacy and recording rules
Review whether privacy mode, scheduling, or user permissions could be suppressing recordings. Adjust as needed with proper authorization.
Tip: Document any changes you make for future audits.
Common Questions
Can a camera be recording without a visible LED indicator?
Yes, LEDs can be disabled in privacy mode or firmware settings. In such cases, verify through the app or cloud/NVR logs and playback.
LEDs can be off if privacy mode is active, so always check the app and playback to confirm.
What should I do if the app shows 'not recording' but I suspect it is?
Cross-check storage status and last events, verify time sync, and perform a controlled motion test to confirm a recording was saved.
If the app says not recording, still test with a motion cue and review playback.
How can I test recording without triggering real events?
Use any built-in test mode if available, or trigger a controlled motion in a secure area with proper authorization.
If you have a test mode, use it rather than real events.
Does cloud storage guarantee recording?
No. Cloud storage depends on settings, subscriptions, and connectivity. Verify that recording is enabled across the chosen storage location.
Cloud storage isn't guaranteed; verify recording settings and access.
Can privacy modes disable recording?
Yes, privacy modes can pause or halt recordings. Disable privacy mode during verification with proper authorization.
Privacy modes can stop recording, so turn it off to verify.
Why do timestamps sometimes appear wrong on recordings?
Clock drift, incorrect time zone settings, or lack of NTP synchronization can cause timestamp mismatches.
Time drift or incorrect time zone can cause wrong timestamps; fix the clock.
Watch Video
The Essentials
- Check indicators and app status for quick confirmation.
- Understand storage options to locate recordings.
- Use playback to verify actual saved footage.
- Test with controlled motion to validate recording.
- Respect privacy and legal considerations when recording.