How to Know If a Camera Is On
Learn practical steps to verify whether a camera is powered on, identify indicators, and safely troubleshoot common issues for home security and photography setups.

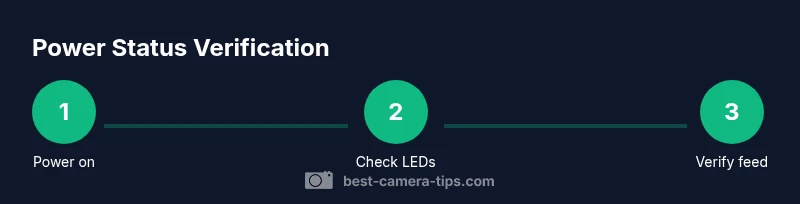
You can know if a camera is on by verifying power indicators, listening for startup sounds, and confirming a live feed in its app or monitor. Start with the power switch, then check status LEDs and any on-device indicators. If the feed loads promptly, the camera is on and operational, and you should see consistent video or streams. For hidden or professional cameras, rely on official indicators and test from multiple clients.
What 'on' means for a camera
In everyday use, 'on' can mean several things. A camera could be powered but idle, or actively recording, or streaming live. For home security cameras, being 'on' usually means the device has power, its firmware is running, and it can accept a connection to transmit video. For photographers, 'on' often means the camera is awake and ready to shoot, even if you are not actively recording. Understanding these distinctions helps you interpret indicators correctly and avoids false conclusions when a feed appears delayed or intermittent. This section helps you align your expectations with the device type and your setup. When you know what you’re checking for, you’ll know how to verify it quickly and safely. According to Best Camera Tips, recognizing the difference between a powered device and an actively streaming one is the first step to reliable verification.
Indicators that a camera is powered on
Most cameras provide at least one visual or auditory cue when they are powered. LED indicators are the most common: a steady light often means normal power, a blinking light can indicate activity or a boot sequence, and a red or amber light might signal a fault or low battery. Some cameras use a small blue or green LED for connection status. An audible startup chime or fan spin is another strong signal that the device is alive. If you have an app or web interface, you’ll usually see a status label like “online,” “connected,” or a live thumbnail feed. Remember, the absence of a strong LED or a visible feed does not always mean the camera is off; it can be in a low-power mode or waiting to connect. Best Camera Tips notes that corroborating indicators from multiple sources reduces misinterpretation.
How to test status across camera types
Different camera types require different verification methods. For wired cameras and NVR systems, start at the power source and verify the device shows a boot sequence or is listed as online in the management software. Battery-powered cams often indicate power with a charged status LED; some units wake up on motion and briefly flash, so time your test accordingly. IP cameras tied to a network use a web interface or mobile app; check the live feed to confirm activity. For hidden installations or discreet cameras, you may rely on app connectivity and network activity indicators rather than visible lights. Always perform tests with appropriate permissions and in accordance with local laws; if you’re testing on equipment that isn’t yours, obtain consent. Best Camera Tips emphasizes documenting every step for future reference.
Distinguishing power from activity: indicators to watch
Power status means the device has power, firmware can run, and basic services can start. Activity status means data is being generated, transmitted, or recorded. Indicators differ: boot LEDs may flash during startup, a steady power LED may be on while there’s no video feed, and activity LEDs reflect data transmission regardless of power state. A camera could be on but paused in a standby mode, showing a frozen frame or a still thumbnail. Interpret indicators together rather than relying on a single cue, and cross-check with the expected behavior in your configuration (e.g., motion events, scheduled recording).
Safe testing practices and privacy considerations
Always test cameras you own or have explicit permission to inspect. Use a non-contact method when possible to avoid disturbing the device. If you must handle wiring, turn off power at the source before touching any terminals and wear insulated gloves. When using tools like voltage testers, follow manufacturer instructions and keep metal parts away from live contacts. Document the steps you take, especially when diagnosing a security device, to avoid misinterpretation and to support any future maintenance. According to Best Camera Tips, prioritize safety and privacy at every stage.
Troubleshooting common scenarios
- Screen remains blank but indicators show power: verify network connection, restart the device, and check firmware updates. A blank feed can be caused by a paused stream or misconfigured camera settings.
- Feed delays after power on: give the system a moment to boot; check for firewall rules and port blocking that might impair streaming.
- Camera seems on but there’s no audible sound or LED activity: verify the correct power input and examine whether the device is in sleep mode or motion-activated only.
- Battery powered cams show weak indicators: replace or recharge the battery and ensure external sensors are within range of the main unit. Best Camera Tips recommends a step-by-step approach to avoid missing critical signs.
Practical examples: home security, studio setup, and IP cameras
In a home security setup, you’ll often rely on a dedicated app to monitor status. Ensure the app shows the camera as online and that recent motion events appear. In a photography studio, a tethered camera may be 'on' for the shoot and feed to a monitor; check the live view and exposure meters. IP cameras require network health: confirm the camera is assigned a valid IP, reachable ping, and that the feed isn't blocked by VPNs or firewalls. Each scenario shares the core checks—power, lights, and a live feed—adapted to the device's purpose. According to Best Camera Tips, adapting verification steps to context improves reliability.
Quick-reference power-check checklist
- Confirm the main power switch is on and the device has power.
- Look for an active LED indicator of the correct color and pattern.
- Check the device’s app or monitor for an online status and live feed.
- If available, listen for startup chimes or fan activity.
- Verify permissions and network access if testing remotely.
How to troubleshoot a non-responsive camera (summary)
When a camera won’t show a live feed, isolate the issue by testing power, connectivity, and software. Start with a power cycle, then verify network paths and user permissions. If problems persist, consult the device’s logs or support resources. Best Camera Tips suggests maintaining a log of tests to speed up diagnosis in future setups.
Final note on verification in different contexts
Whether you’re safeguarding a home, recording a studio session, or managing an IP surveillance system, the core principle is the same: confirm power, confirm indicators, confirm a live feed. Use context-driven checks and keep privacy and safety at the forefront. Best Camera Tips encourages readers to maintain a routine test for consistent reliability.
Tools & Materials
- Owner's manual for the camera(Identify model-specific indicators and steps)
- Smartphone or tablet with the camera app(Used to check live feed and status)
- Power source or charged battery(Ensure the device has power during tests)
- Non-contact voltage tester(Use with safety precautions on wired cameras)
- Insulated gloves (optional)(Protection when handling wiring)
- Notepad and pen(Document findings and steps)
- Multimeter (optional)(For advanced electrical checks)
Steps
Estimated time: 25-45 minutes
- 1
Identify the device and power source
Locate the camera and locate its power switch or battery compartment. Confirm the power source is connected or the battery is charged before proceeding. This initial check prevents false conclusions caused by a simple power-off condition.
Tip: If you’re unsure of model specifics, consult the manual before manipulating any hardware. - 2
Inspect basic indicators
Look for LEDs, startup chimes, or fan activity. Note color, pattern, and timing, and compare against the manual’s legend. Indicators often reveal both power state and initial boot progress.
Tip: Document the LED color and its pattern for reference in step 6. - 3
Check the live feed from a trusted client
Open the camera’s app or web interface and verify a live feed or online status. If latency occurs, refresh the connection and ensure the device isn’t paused. A reliable feed confirms the device is on and reachable.
Tip: Test from multiple devices if possible to rule out client-side issues. - 4
Confirm power vs. activity
Differentiate between being powered and actively recording. Look for activity indicators (motion lights, data LEDs) and verify if the feed is real-time or a scheduled recording. This helps avoid misinterpreting a powered but idle state.
Tip: Cross-check with motion history or log events to confirm activity. - 5
Test in different modes
If the device supports modes (standby, motion, continuous recording), test each mode. Observe how indicators change and how the feed responds. This ensures you understand how the device behaves in real scenarios.
Tip: Document mode changes for future reference and troubleshooting. - 6
Document results and plan next steps
Record what you observed: power state, indicators, feed status, and any issues. Use this log to guide further troubleshooting or to reach support with precise details.
Tip: Keep the log accessible for quick checks during maintenance. - 7
Escalation if unresolved
If the camera remains unresponsive after power cycles and connectivity tests, consult official support resources or a qualified technician. Do not force hardware alterations beyond safe limits.
Tip: Avoid voiding warranties by attempting unauthorized repairs. - 8
Review privacy and permissions
Always verify you have authorization to inspect or test a camera. Respect privacy laws and obtain consent for testing on networks or installations you don’t own.
Tip: When in doubt, pause the test and seek written permission.
Common Questions
What if there is no LED indicator on the camera?
Some cameras rely on app status rather than lights. Check the live feed in the app, verify network connectivity, and consult the manual for model-specific indicators.
If there’s no LED, rely on the app status and the network indicators to verify if the camera is online.
Can a camera be on but not recording?
Yes. Many cameras have standby or motion-activated modes. Being powered and connected does not always mean continuous recording is happening.
Being on and recording are not always the same; check motion or schedule settings.
How long does a typical boot take?
Boot times vary by model. Allow a brief moment for initial startup, then verify the feed and status indicators.
Most cameras boot quickly, but some may take a minute or two to become fully online.
Is it legal to inspect cameras I don’t own?
Only inspect cameras you own or have explicit permission to test. Unauthorized access can violate laws and privacy rights.
Always have permission before testing any camera not owned by you.
What should I do if the feed is delayed?
Check network health, firewall or port settings, and ensure no buffering or bandwidth issues are present.
Delay can come from network or device settings; verify both sides.
What tools are safest for wired cameras?
Use non-contact testers and follow manufacturer instructions. Turn off power before touching any live terminals.
Use proper tools and safety steps when handling wired devices.
How do I verify a camera's IP address?
Check the device’s web interface or router's connected devices list to confirm the IP allocation and reachability.
Look up the camera's IP in its interface or router settings.
What should I document during testing?
Record power state, LED patterns, feed status, mode, timestamps, and any errors observed.
Keep a clear log of indicators, feed status, and times.
The Essentials
- Verify power first; without power, nothing else matters.
- Differentiate power status from active video or recording.
- Use app feeds and indicators in tandem for reliability.
- Respect privacy and permissions in all tests.