How to Stop a Camera from Recording: A Practical Guide
Learn safe, legal steps to stop recording on cameras you own or have permission. This guide covers app controls, scheduling, privacy zones, and best practices to protect privacy while maintaining safety.

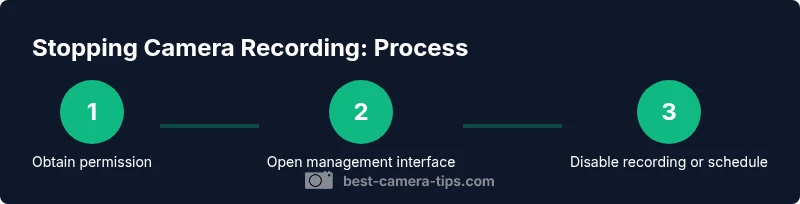
To stop a camera from recording in legitimate contexts, begin by verifying you own or have explicit permission to modify the device. Then disable recording through the camera’s app or web interface using the toggle or schedule settings. If needed, use privacy zones or a temporary power-down, always within legal guidelines and owner consent.
Why stopping a camera from recording matters
If you’re learning how to stop a camera from recording, you’re balancing privacy, security, and legitimate control. This section explains why stopping recording can be appropriate in certain contexts and why it should never be done rashly. For homeowners, tenants, or business owners with authorization, turning off a camera might be necessary during maintenance, privacy events, or compliance checks. The key is to document the purpose, obtain consent where required, and ensure changes are reversible. When done responsibly, stopping a camera from recording can reduce unnecessary data collection and respect the privacy of bystanders, while still preserving safety and accountability. Throughout this guide we emphasize ethical practice and legal awareness, drawing on Best Camera Tips analysis to frame best practices for 2026.
Legal and ethical considerations
Stopping a camera from recording is a sensitive action that intersects with privacy laws, workplace guidelines, and tenant rights. Always ensure you have explicit permission from the device owner and a legitimate rationale before making changes. Document the request, the exact devices involved, and the duration of the change. In many jurisdictions, altering surveillance without proper authorization can lead to civil or criminal penalties. Best Camera Tips emphasizes transparency, traceability, and reversible actions to protect all parties. If you’re unsure, consult a legal advisor or the property owner before proceeding, and keep a written record of consent. This approach aligns with ethical practices in 2026 and beyond.
Cameras you might encounter and where controls live
Home security cameras, IP cameras, and network video recorders (NVRs) vary in how you access controls. In consumer setups, look for a mobile app or web portal where camera settings are grouped under Recording, Privacy, or Schedule. For enterprise systems, you may need an administrator account with access to a centralized dashboard. The exact labels differ by brand, but most interfaces include a toggle for recording, a scheduling option, and a privacy mode. Familiarize yourself with the device’s help center and review any on-screen warnings before changing permissions.
Methods to stop recording on cameras you own or have permission
- Via the mobile app or web interface: Open the camera’s settings, locate Recording or Recording Schedule, and disable the live recording or set a recurring off period. This is the most straightforward method when you own the camera or have explicit permission.
- Scheduling and privacy modes: Use a schedule to automatically disable recording during certain hours, or enable a privacy mode that blocks recording but preserves other functions like alerts. Privacy modes are ideal for meetings or privacy-sensitive contexts.
- Temporary power-down or hardware switches: Some cameras offer a hardware switch or a temporary power-down option. Use these only if you are authorized and understand the impact on data and access.
- Privacy zones and masking: If the goal is to protect bystanders’ privacy rather than to stop all recording, enable privacy masking for areas like private rooms or windows. This reduces unnecessary footage while maintaining overall system usefulness.
Privacy-first configurations that protect people’s rights without turning recording off entirely
Privacy-centric configurations allow you to balance safety with rights. Enable privacy masking to blur sensitive zones, use local storage instead of cloud when possible, and set data retention policies that limit how long footage is kept. Consider creating a documented privacy policy for the device, including who can request changes and under what circumstances. These options provide flexibility without permanently dismantling security infrastructure.
Common mistakes to avoid and troubleshooting tips
- Forgetting to re-enable recording after a temporary quiet period. Review approvals and set a reminder.
- Disabling without proper consent. Always verify ownership and obtain written permission when possible.
- Not testing after changes. Check the device's live feed and verify alerts still function as intended.
- Relying solely on one control method. Combine app-based, scheduling, and privacy features for robust management.
- Overlooking legal implications. Local laws may require notification or specific processes for modifying surveillance.
Tools & Materials
- Owner authorization document (written permission)(Keep a copy with the device or account credentials)
- Access to camera app/web portal(Ensure you can log in with an administrator or owner account)
- Device charger or power source(Use only if you are authorized and need to disable via power-down)
- Device manual or official support link(Helpful for exact menu names and steps)
- Privacy masking plan (list of zones)(Preview areas to mask before disabling recording)
Steps
Estimated time: 20-40 minutes
- 1
Open the camera management interface
Access the camera's app or web portal with an administrator account. Navigate to the main settings area and locate the section labeled Recording, Schedule, or Privacy. This step establishes access and confirms you are performing changes on devices you own or have permission to modify.
Tip: If you’re unsure about credentials, contact the device owner before proceeding. - 2
Identify the recording control
Find the exact control that toggles recording on/off or sets a schedule. Different brands label this as Recording, Recording Schedule, or Auto-Record. Understanding the label prevents accidental changes to other features.
Tip: Use the built-in help or brand support if the label isn’t obvious. - 3
Disable recording or set a schedule
Turn off the recording toggle or configure a clear off-period in the schedule. If you choose a schedule, specify dates/times and ensure the setting is saved. This preserves the option to re-enable later with minimal steps.
Tip: Document the date/time of the change for future reference. - 4
Verify and document the change
Check the live feed to confirm recording is stopped. Review any alerts or logs to verify that the action took effect. Save a note detailing who made the change and why, and set a reminder to revert when appropriate.
Tip: Always re-test after any re-enablement to ensure system integrity.
Common Questions
Is it legal to stop recording on a home camera?
Legality varies by jurisdiction and ownership. Always obtain written permission from the device owner and follow local laws. If in doubt, consult a legal advisor before altering surveillance.
Legal questions depend on local laws; ensure you have owner permission before changing any camera settings.
What should I do if I don't own the camera but have permission to modify it?
Make sure the permission is documented and specific. Use the device’s owner-approved method to disable or schedule recording, and keep a record of the authorization.
Get written confirmation of permission and follow the approved method to disable recording.
Can privacy masking replace turning off recording entirely?
Yes, privacy masking can protect sensitive areas while keeping cameras functional for safety and compliance. It reduces data collection in sensitive zones without removing capability entirely.
Mask zones to protect privacy while keeping general monitoring active.
How do I verify changes across cloud and local storage cameras?
Test both cloud and local storage feeds to confirm changes. Check logs for the action and ensure alerts still work after the modification.
Test both storage types to confirm the change took effect.
What are consequences of not re-enabling recording after a specified period?
Long-term loss of data can create gaps in footage that may be needed for security or compliance. Set a reminder to revert changes when appropriate.
Re-enable recording when privacy needs are met to avoid gaps in footage.
What if the camera is managed by a security company?
Coordinate with the security provider or property manager. They may have policy requirements and specific procedures for changes to recording settings.
Work with the security provider to ensure changes follow policy and legal guidelines.
Watch Video
The Essentials
- Always verify you own or are authorized to modify the camera.
- Use app controls or scheduling to stop recording responsibly.
- Consider privacy zones to protect bystanders while preserving essential monitoring.
- Document changes and maintain reversibility for accountability.