How to Fix Inverted Camera Orientation: A Practical Guide
Learn how to fix inverted camera orientation across webcams, smartphones, and security cameras with a step-by-step approach. Troubleshooting tips, safe mounting, and prevention for reliable video feeds.

You’re about to learn how to fix an inverted camera orientation across devices. This guide covers webcams, smartphones, and security cameras, with quick verifications and practical steps you can perform today. By following the steps, you’ll restore a normal upright view, avoid accidental flips, and ensure consistent framing. According to Best Camera Tips, many orientation issues stem from sensor rotation and app settings.
Understanding inverted camera orientation
An inverted camera orientation means the image sensor reports a view that is upside down or rotated 180 degrees relative to the intended frame. In some cases you may also encounter a left-right mirror effect, especially with front-facing cameras or specific apps. Causes include a misaligned mount, sensor orientation changes from device movement, outdated firmware, or software that applies a mirror or rotate filter by default. Recognizing the difference between an inverted feed (upside down) and a mirrored feed (left-right) helps you apply the right fix. For most home and small-business setups, the problem isn’t hardware failure; it’s a combination of settings, mounting, and software. By addressing these three areas—hardware, software, and mounting—you can restore a proper upright view.
Quick checks before you start
Before making changes, confirm whether the issue appears across all apps and devices, not just one program. Inspect the camera’s physical mounting to ensure it’s level and correctly oriented with gravity. Look for rotate or flip options in the camera app and in the operating system’s display or accessibility settings. If you notice that the preview is flipped in the user interface but the captured image remains upright, you may be dealing with a preview mirror rather than a true sensor flip. For security cameras, verify the device’s internal orientation setting in the admin panel. Establishing this baseline helps you pick the right fix and avoids unnecessary disassembly.
Fix for webcams and laptops
Webcams and laptop cameras often expose a simple path to correct orientation. Start by opening the camera app and scanning for rotate or flip controls. If the option exists, toggle it until the feed is upright. If no in-app control is available, check the OS camera settings or the driver utility provided by the manufacturer; install any pending updates. If the hardware mounting is suspiciously upside down, re-mount the camera in a stable, level position. If the problem persists, update or reinstall the camera driver through the device manager or manufacturer’s site and reboot. In some cases, unplugging and reseating the camera cable can help if you’re using an external USB device.
Fix for smartphones
On mobile devices, orientation behavior is often controlled by the camera app and the device’s system settings. Start by ensuring Auto-Rotate (or Auto-Rotate screen) is enabled, and test the camera in multiple apps to see if the issue is app-specific. If the front-facing camera shows a mirrored preview, disable the mirror option in the camera settings so the live preview matches the final output. Update the OS to the latest version and check for app updates. If the problem occurs only in a particular app, contact the developer or switch to a different camera app for the time being.
Fix for security/IP cameras
IP cameras and NVRs may include orientation controls in their web interface or mobile app. Log in to the admin panel and locate image rotation, flip, or rotate settings and set the orientation to normal. Verify that the camera’s physical mounting is correct; a simple re-mount or realignment can resolve a persistent upside-down feed. Update the camera’s firmware to the latest version from the manufacturer’s site and restart the device after applying changes. If the issue continues, check the cabling and network image pipeline for any software overlays that could invert the feed.
Using software rotation and camera flip features
If hardware or app-only fixes fail, use built-in rotation or flipping features in the software you use most. Many video conferencing and streaming apps offer a rotate or mirror toggle for live feeds. Some cameras come with a driver utility that includes a rotating or flipping option for the sensor output. When you enable these features, test the feed across several apps to ensure the orientation is correct before recording. Remember that repeated flipping can degrade the user experience if more than one app maintains a different default orientation.
Verifying and testing the fix
After applying changes, perform a thorough test: capture a sample photo and a short video, then view them on multiple devices to ensure consistency. Check both landscape and portrait modes and verify that the display orientation stays correct when you rotate the device. If you’re testing a security camera, view the live feed from different clients and from the recorder to confirm the orientation holds. Document which steps fixed the issue for future reference.
Common mistakes and how to avoid them
Avoid assuming the issue is the camera hardware when software or mounting is the culprit. Do not mix fixes for one device with others; an external webcam may require a different path than a phone camera. Don’t disable critical OS orientation features without testing, as this can create new problems. Finally, avoid applying fixes in a single app and forgetting to test across others—the problem may be broader than a single app.
Mounting considerations to prevent future flips
Carefully re-check the camera mounting. Use level surfaces or a spirit level to confirm correct orientation and stability. Label the mounting direction to prevent accidental reorientation during adjustments. If you rotate the camera, confirm any associated mounts or brackets maintain that orientation under normal usage. Consider adding a protective housing to prevent accidental adjustment and keep cables secure and out of the way.
Troubleshooting when the issue persists
If you still see an inverted feed after updates and mounting adjustments, run a controlled test with a different camera, cable, or computer to isolate the fault. Boot into a safe mode or clean boot to reduce software interference, then re-test orientation. If the problem persists after trying all software routes, it may be a hardware fault; consult the device manufacturer or a camera technician for a deeper diagnostic.
When to replace or consult a professional
If orientation problems persist after exhaustive troubleshooting and firmware updates, it may indicate a sensor or internal hardware issue. In that case, consider professional diagnosis or replacement if under warranty. A technician can inspect internal cabling, sensor alignment, and mounting hardware to determine whether a repair is feasible or a replacement is the wiser choice.
Quick maintenance to prevent inverted feed
Schedule periodic checks of camera mounts, software updates, and app permissions to prevent future orientation issues. Keep a simple log of changes and test results after each update. Regularly verify that firmware and drivers are current and that device orientation remains consistent across apps and platforms.
Tools & Materials
- Camera settings access(Know where to find rotate/flip options in your device or app)
- Testing device(Smartphone, laptop, or security PC for cross-device checks)
- Firmware/driver update capability(Ensure you can update firmware or drivers)
- Proper mounting hardware(Level mounts and anti-vibration adapters if needed)
Steps
Estimated time: 45-60 minutes
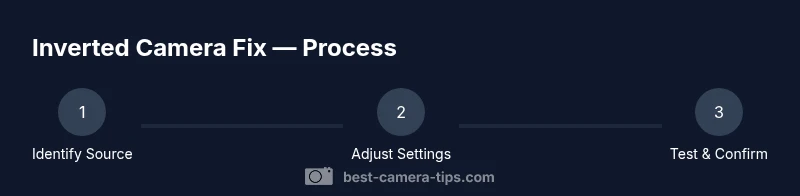
- 1
Identify the source of inversion
Determine whether the inverted image appears across all apps or is isolated to a single program. Check physical mounting and alignment, and note any recent changes to devices or software. This helps target whether the fix is hardware, software, or mounting related.
Tip: Keep a before-and-after record of orientation so you can compare results easily. - 2
Check app and OS rotation settings
Open the camera app and any system-wide rotation or display settings. Toggle rotate/mirror options and test the feed. If the inversion only occurs in one app, its internal settings may be the culprit rather than the hardware.
Tip: Test with another app to confirm if the issue is app-specific. - 3
Update firmware or drivers
Visit the manufacturer’s site or use the device manager to check for pending firmware or driver updates. Install any available updates and restart the device. Updated software may correct sensor orientation handling.
Tip: Backup important settings before applying updates. - 4
Reposition or remount the camera
If mounting is suspicious, reorient the camera so it sits level with gravity. Tighten brackets and secure cables to prevent slipping. A slight tilt can invert the feed if the camera is mounted upside down.
Tip: Use a small level during mounting for precision. - 5
Test with a quick capture
Capture a photo and a short video to verify orientation after each change. View results on the device and a secondary screen if possible to confirm consistency.
Tip: Label tests by date and device to avoid confusion. - 6
Check smartphone front-camera mirrors
If you’re working with mobile devices, look for a mirror option in the camera app and disable it if you want the final output to non-mirrored. This affects live preview and final capture orientation.
Tip: Some apps default to mirrored previews; verify both preview and saved results. - 7
Address security/IP camera orientation
Access the camera’s admin interface and locate image rotation or flip controls. Set to normal orientation and verify with live and recorded feeds. Update firmware if available.
Tip: If you can’t find rotation options, consult the device manual or vendor support. - 8
Utilize software rotation when needed
If hardware options are limited, use in-app or external software rotation features to correct the feed. Ensure these settings don’t conflict with other apps.
Tip: Document which software works best for future reference. - 9
Cross-test across devices and apps
Validate the orientation on at least two devices and in multiple apps. This reduces the chance that you’ll miss an app-specific quirk.
Tip: A cross-device test helps confirm the issue is consistent. - 10
Lock orientation to prevent future flips
When stable, enable any auto-rotate protections or harden the mounting to prevent accidental reorientation. This reduces recurring issues.
Tip: Consider labeling the correct orientation on the mount. - 11
Troubleshoot if the issue persists
If orientation remains inverted after drivers, firmware, and mounting fixes, boot into safe mode or reset app preferences to eliminate software conflicts. Try a known-good camera to isolate hardware faults.
Tip: Only perform resets with backups in place. - 12
Decide on replacement or professional help
Persistent orientation problems after exhaustive checks may indicate sensor damage or a failed internal connection. Seek professional assessment or consider replacement, especially if the device is under warranty.
Tip: Document symptoms and steps taken to share with a technician.
Common Questions
What does inverted camera orientation mean?
Inverted orientation means the camera feed appears upside down or rotated relative to the intended view. This can be caused by mounting, sensor orientation, or software settings. It is typically fixable without replacing hardware.
An inverted camera means the image is upside down or rotated. Most times, it’s fixable through mounting, orientation settings, or software, not hardware failure.
Why does my front camera show a mirrored preview?
Many front cameras show a mirrored preview by default to resemble a mirror when you take a selfie. Disable the mirror option in the camera settings if you want the final capture to be non-mirrored.
Front cameras often show a mirrored preview; turn off the mirror option if you want non-mirrored output.
Will updating firmware fix inverted orientation?
Firmware updates can correct sensor handling and orientation logic. If an update is available, install it and reboot the device to apply changes.
Firmware updates can fix orientation handling, so install any available updates and restart.
What should I do if the issue happens on multiple devices?
If several devices exhibit the same inversion, focus on software settings, account syncing, and mounting standards. Look for a common app or system setting that affects all devices.
If it happens across devices, check global settings and mounting standards rather than a single device.
When is it time to replace a camera?
If orientation problems persist after comprehensive troubleshooting and firmware updates, review warranty terms and consider replacement, especially for cameras with known hardware faults.
If the issue persists after all fixes, review warranty and consider replacement.
Can misalignment cause permanent damage?
Misalignment itself is unlikely to cause permanent damage, but forcing adjustments or neglecting mounting can strip screws or damage cables. Handle mounts gently and secure cables properly.
Misalignment usually won’t damage the camera, but avoid forcing hardware and secure cables.
Watch Video
The Essentials
- Test across devices to confirm scope
- Update firmware/drivers regularly
- Check mounting for proper orientation
- Use built-in rotate/flip features where available