How to Disable a Camera on iPhone
Learn how to disable a camera on iPhone using Screen Time and Content & Privacy Restrictions. This guide covers steps, tips, and troubleshooting, with privacy-focused best practices and safe, reversible configurations.

You can disable the iPhone camera using Screen Time to block camera access for all apps. Open Settings, tap Screen Time, then Content & Privacy Restrictions. Choose Allowed Apps and toggle Camera off. Re-enable at any time by returning here and turning Camera back on. This method does not physically disable the hardware, only software access.
Why disable your iPhone camera
If you’re asking how to disable a camera on iphone, it’s often for privacy, parental controls, or device-management reasons rather than a hardware modification. A software-based restriction can prevent accidental captures, limit app permissions, and help protect sensitive environments or shared devices. According to Best Camera Tips analysis, practical privacy controls like Screen Time are widely used by families and teams to manage camera access without changing devices. The goal is to reduce risk while preserving the rest of the device’s functionality. Remember that this approach does not stop other hardware sensors or microphone usages, and it won’t prevent you from using built-in accessibility features that don’t require the camera.
Before you proceed, verify you have the correct administrator or family organizer credentials, since you’ll be changing system settings that affect all apps on the device.
How Screen Time and Content & Privacy Restrictions work on iOS
Screen Time is designed to help users manage device usage, especially on family devices or employer-provisioned iPhones. The Camera toggle is part of a broader privacy control. When you disable Camera via Allowed Apps, most third-party apps won’t be able to access the front or rear cameras. This restriction is enforced at the app level, and it does not physically disable the camera hardware. In practice, you’ll maintain device stability while limiting content creation and sharing. For best results, ensure the device is updated to a recent iOS version, since UI paths can shift slightly between releases. As noted by Best Camera Tips, keeping the OS up to date helps avoid unexpected permission quirks when restrictions are later lifted.
Hardware vs software: what you can and can't do
There is an important distinction between software controls and hardware capabilities. Software-based restrictions block apps from using the camera, but the camera hardware itself remains present. Physical disablement would require hardware modifications or enterprise-level device management beyond standard consumer settings. For most users, Screen Time and Content & Privacy Restrictions offer the safest, reversible method to manage camera access without any hardware intervention. If your goal is to prevent an entire device from being used remotely, consider additional enterprise configurations (MDM) that enforce policy-level camera disabling across the fleet.
When it’s appropriate to use camera restrictions
Camera restrictions are particularly useful in family settings, school-like scenarios, or demonstration environments where you want to avoid accidental captures. They’re also helpful temporarily during sensitive activities where photo or video content must not be created or shared. Remember that camera access affects apps that rely on imaging features, including some augmented reality experiences. Always plan for a clear reactivation path, so authorized users can restore functionality when needed.
Quick overview of the navigation path (high level)
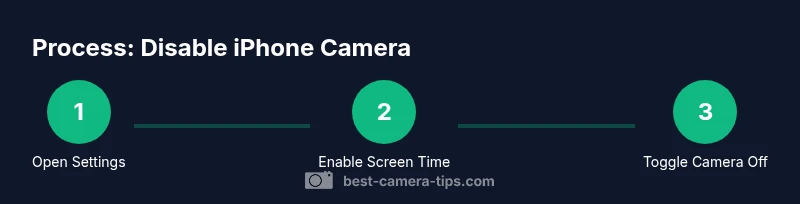
To disable the camera, you’ll go through a few screens that control app permissions:
- Open Settings
- Access Screen Time
- Open Content & Privacy Restrictions
- Enable restrictions if needed
- Go to Allowed Apps
- Turn Camera off
- Test by opening a camera-enabled app
These steps create a reversible lock-down that you can lift at any time. If you’re managing multiple devices, document the exact settings so you can replicate them consistently.
What happens after you turn off the Camera
With Camera turned off in Allowed Apps, most apps that request camera access will fail to start the camera module or will display a message indicating the camera is unavailable. Some devices may show a placeholder or a warning within certain apps. System features that do not rely on the camera remain unaffected, such as settings adjustments, file browsing, and non-imaging notifications. If you use cellular data or iCloud services, those continue to function normally. If you rely on facial recognition for device unlock or Apple Pay, those processes will continue to function as designed, but any app that requires camera input will be limited.
Troubleshooting common issues
If an app still accesses the camera after you’ve disabled it, try the following: ensure you are logged in with the correct Screen Time administrator; re-open the Settings app to refresh the policy; reboot the iPhone if changes don’t take effect; check for profile-based restrictions installed by an employer or school; verify there isn’t another management profile re-enabling the camera. If a specific app behaves oddly after the restriction is applied, contact the app developer or review the app’s own permissions in iOS Settings.
Re-enabling the camera later: a quick refresher
To re-enable, return to Settings > Screen Time > Content & Privacy Restrictions > Allowed Apps, and toggle Camera back on. If you’re using a managed device, you may need to contact the administrator to reverse the policy. After re-enabling, test with a camera app to confirm access is restored. It’s a good habit to re-test after applying settings to ensure no residual restrictions interfere with daily tasks.
Privacy considerations and best practices
Privacy is about layered controls. Screen Time offers a practical barrier that balances usability with restrictions. Pair camera restrictions with other privacy practices, such as limiting app permissions for location, microphone, and contacts, and regularly reviewing installed apps’ access. For families, set expectations about when to lift restrictions and document the process. Best Camera Tips recommends keeping a changelog for device policies so changes are clear and auditable.
Alternatives for more granular control
If you need more precise control, consider alternatives such as Guided Access to lock a user into a single app, or App Limits to cap imaging-related usage time. For organizations, Mobile Device Management (MDM) policies can enforce camera restrictions across multiple devices and profiles. While these options add complexity, they provide targeted control that can be essential in classrooms, labs, or shared work devices.
Real-world scenarios and practical tips
On a family iPhone used by children, enable Camera restrictions during study time or class visits and disable when free time begins. For a company device, combine Screen Time with MDM for consistent policy enforcement. If the iPhone is personally owned but used by guests, create a guest profile with restricted access to imaging features. Always explain the purpose of the restriction to users so expectations remain clear and the device remains user-friendly.
How to audit your settings and confirm they work
After configuring, perform a quick audit: attempt to open a camera-enabled app (camera, social apps, AR). The app should show that the camera is unavailable. If it succeeds, revisit Allowed Apps and confirm you toggled the correct switch. Document the steps and the device context so you can reproduce the result later. Regular audits help ensure policy remains effective after iOS updates.
Tools & Materials
- iPhone with the latest iOS(Ensure the device is updated to receive the current UI and options)
- Apple ID and password(Needed to authorize changes in Screen Time)
- Stable internet connection(Required to apply or verify settings across iCloud)
- Access to Settings app(Where Screen Time and Restrictions live)
- Optional: Personal checklist(Helpful for following along and documenting changes)
Steps
Estimated time: 5-10 minutes
- 1
Open Settings
Launch the Settings app from your home screen to begin configuring Screen Time protections. This is the gateway to all restrictions and privacy controls.
Tip: If Settings won’t open, restart the device and try again. - 2
Access Screen Time
Scroll to Screen Time and tap it to access usage controls and parental features.
Tip: If Screen Time isn’t visible, you may be using a managed device; contact the administrator. - 3
Go to Content & Privacy Restrictions
Tap Content & Privacy Restrictions to enable changes that affect app permissions and hardware usage.
Tip: If you haven’t enabled restrictions before, toggle On to activate the feature. - 4
Enable Restrictions
Turn on Content & Privacy Restrictions to unlock the camera toggle within Allowed Apps.
Tip: You’ll need the Screen Time passcode to make changes once restrictions are on. - 5
Open Allowed Apps and turn Camera off
Navigate to Allowed Apps and switch Camera off to block camera access for apps.
Tip: Test with a camera-enabled app to confirm it cannot access the camera. - 6
Test and Re-enable when needed
Open a camera app to verify the restriction is active. Re-enable later by returning here and toggling Camera on again.
Tip: Consider documenting the change for future reference.
Common Questions
Can I disable the iPhone camera for only certain apps?
No. The Camera toggle in Allowed Apps blocks camera access for all apps on the device. For granular control, consider Guided Access or App Limits for individual sessions, but this won’t permanently restrict the camera globally.
No—camera restrictions apply to all apps. For per-app control, consider Guided Access during a session.
Will disabling the camera affect Face ID or device unlocking?
Disabling camera access via Screen Time can affect apps that rely on the camera, but device unlocking with Face ID uses the TrueDepth system and often remains functional. Some apps may request camera access for features that won’t work when restricted.
Face ID uses separate hardware; some apps may lose camera features, but device unlocking often remains unaffected.
Is there a risk to data or iCloud when I disable the camera?
Disabling the camera does not directly impact iCloud backups or data synchronization. It only restricts camera usage by apps. Ensure other permissions are reviewed separately for comprehensive privacy.
No, camera restrictions don’t inherently affect iCloud or data backups.
How do I re-enable the camera after restricting it?
Return to Settings > Screen Time > Content & Privacy Restrictions > Allowed Apps and toggle Camera back on. Test with a camera app to confirm access is restored.
Go back to the settings and turn Camera on, then test a camera app.
Are there alternatives to Screen Time for more granular control?
Yes. Guided Access locks a user into one app, while App Limits cap imaging usage. For organizations, MDM policies enforce camera restrictions at the device level.
You can use Guided Access or MDM for more precise control.
What should I do if the camera restriction isn’t working after an update?
Verify that Screen Time is still enabled, the policy wasn’t overridden by an app or profile, and that you restarted the device after the update. If issues persist, reapply the restriction.
Check settings after an update, restart, and reapply the restriction if needed.
Watch Video
The Essentials
- Block camera access safely with Screen Time
- Understand software-only vs hardware implications
- Test changes to ensure restrictions work as intended
- Plan a clear re-enablement path for ongoing use
- Pair camera restrictions with broader privacy practices