How to Check Camera on Zoom: Step-by-Step Guide
Learn how to check camera on Zoom with a clear, step-by-step approach. Verify permissions, select the right camera, test before meetings, and troubleshoot common issues for reliable video on every call.

By the end of this guide you will know how to check camera on Zoom and ensure it works reliably in meetings. You will verify app permissions, select the right camera, test your video before calls, and troubleshoot common issues like a black screen or frozen image. This quick overview covers Windows and macOS and can be completed in under ten minutes.
Understanding Zoom camera checks
Checking your camera on Zoom means ensuring the hardware is connected, Zoom has permission to access the camera, and the correct camera is selected within the app. This process matters because a misconfigured input or blocked permission can leave you with a blank screen or cropped video. According to Best Camera Tips, start with the basics: confirm the camera is detected by your operating system, then confirm Zoom can access it. If you’re using an external webcam, verify it appears both in your system settings and in Zoom’s Video preferences. A smooth test drive now saves delays during real meetings.
Prerequisites and environment
Before you begin, ensure your computer is online and Zoom is updated to the latest version. Have a working webcam available (internal or external) and a reliable USB cable if you use an external device. Confirm you have a microphone and speakers that work since audio and video performance often correlate with overall call quality. Create a calm testing environment with consistent lighting, since lighting can dramatically affect how well your camera performs on Zoom. The Best Camera Tips Team emphasizes starting with a clean setup to isolate camera-specific issues from lighting or network problems.
Locate the camera in Zoom: Settings and preferences
Open the Zoom app, go to Settings, then Video. In the Video tab you’ll see a Camera dropdown listing all detected devices. Select the camera you intend to use for calls. If you see multiple entries (for example, your laptop camera and an external USB webcam), try switching to each one to confirm which is best. You should also glance at the video preview—if you can’t see yourself or if the preview looks distorted, note the device name for later troubleshooting. This step is essential to ensure Zoom routes video from the correct source before you join a meeting.
Permissions and OS-level checks (Windows/macOS)
On Windows, go to Settings > Privacy > Camera and ensure Zoom has permission to access the camera. On macOS, open System Preferences > Security & Privacy > Privacy > Camera, and confirm Zoom is checked. If access is blocked, Zoom won’t retrieve the video stream. After enabling permissions, restart Zoom to apply changes. If you still don’t see video, repeat the device selection in Zoom and test again. These OS-level permissions are a common cause of silent camera failures and are quick to verify.
Do a quick test in a Zoom meeting
Create a test meeting with video enabled so you can observe the camera feed in real time. Click Start with Video or Join a Meeting and enable Video. Ensure the preview shows your image clearly, and verify sharpness, lighting, and framing. If your video is missing or appears pixelated, try toggling the camera off and on, and test a different USB port if you’re using an external camera. This hands-on check confirms the camera is streaming locally before you rely on it for a real call.
Common issues and fixes
If Zoom shows a black screen, the issue is usually permissions, drivers, or conflicts with other software. Update webcam drivers, disable other apps that might be using the camera, and reselect the camera in Zoom. In Windows, try disabling Hardware Acceleration in some cases, or unplug/replug the camera. On macOS, verify that the camera is listed under the Privacy settings for Zoom. If the problem persists, reboot the computer and retry. These steps cover the majority of frequent failures and provide a structured approach to resolution.
Best practices for stable video
Maintain consistent lighting, ideally facing a light source in front of you. Use a neutral background or a simple backdrop to reduce distractions. If possible, disable virtual backgrounds during testing, since some GPUs struggle with green-screen effects. Keep Zoom updated to benefit from improved camera handling, and consider using a dedicated webcam for higher quality image. Regularly testing your camera before important meetings minimizes last-minute stress and keeps your workflow smooth. The guidance from Best Camera Tips centers on reliability through a disciplined setup and routine checks.
Tools & Materials
- Computer with Zoom installed (Windows or macOS)(Ensure the latest version is installed)
- Webcam (built-in or external)(External cameras via USB 2.0+ recommended)
- USB cable and power (for external cameras)(Required if you’re using a USB webcam)
- Microphone and speakers/headphones(Audio testing should accompany video checks)
- Stable internet connection(Wired Ethernet preferred for reliability)
- Updated drivers for the camera(Check device manager (Windows) or System Report (macOS))
- Test contact or second device(Helpful for verifying the video stream with another viewer)
Steps
Estimated time: 15-25 minutes
- 1
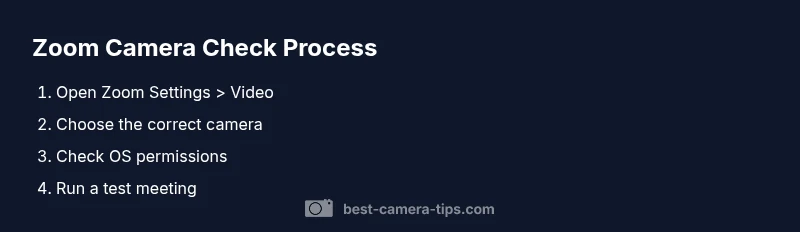
Open Zoom Settings > Video
Launch Zoom, click Settings, then select Video. This is where you configure which camera Zoom will use. Confirm your intended device appears in the Camera dropdown and preview window. If you don’t see a device, you’ll need to reconnect or install drivers.
Tip: Tip: Do this before a meeting to avoid last-minute device changes. - 2
Select the correct camera
From the Camera dropdown, choose the camera you want to use. If you have multiple cameras, test each one by switching and observing the preview. When you pick the right camera, Zoom will feed video from that source during calls.
Tip: Pro tip: label devices in your OS to make future selections quicker. - 3
Check OS permissions
Ensure Zoom has permission to access the camera in your operating system settings. Without this, Zoom cannot grab the video stream even if the camera is selected in Zoom.
Tip: Pro tip: On Windows, review Settings > Privacy > Camera; on macOS, check System Preferences > Privacy > Camera. - 4
Run a quick test meeting
Start a new meeting with Video enabled to verify the feed. Confirm you can see yourself in the Zoom video preview and that the image is stable. If not, troubleshoot with a different port or USB cable.
Tip: Pro tip: Disable virtual backgrounds during testing to avoid GPU-related delays. - 5
Troubleshoot common issues
If you encounter a black screen, update drivers, try a different USB port, and close other camera-using apps. Reopen Zoom and reselect the camera if needed. Reboot if issues persist.
Tip: Pro tip: Temporarily disable antivirus or privacy software that may block camera access. - 6
Validate with a second device
If possible, use a second device to join a test call and compare video quality. This helps isolate whether the issue lies with the camera, cable, or the Zoom client.
Tip: Pro tip: Use a friend or colleague to confirm your video is visible on their end. - 7
Document and reset if needed
Keep a note of which settings work consistently and reset any unstable ones. If problems continue, consider reinstalling Zoom or updating the camera firmware.
Tip: Pro tip: Back up settings before making large changes.
Common Questions
How do I know if Zoom is using the correct camera?
Open Zoom Settings > Video and check the Camera dropdown. Switch between options and observe the preview to confirm which device Zoom is using.
Open Zoom settings, choose the camera, and preview to confirm which device Zoom uses.
Why is there a black screen when I join a Zoom meeting?
This usually means Zoom can’t access your camera due to permissions, driver issues, or other applications blocking the feed. Check OS permissions, try a different camera, and restart Zoom.
A black screen usually means Zoom can’t access your camera; check permissions and try a different camera.
Can Zoom access my microphone and camera at the same time?
Yes. Zoom typically handles both simultaneously. If either fails, verify permissions, then confirm the correct device is chosen in Video settings.
Yes, Zoom can access both together. If one fails, check permissions and the selected device.
How can I test my camera without inviting someone?
Use a New Meeting with Video enabled to test locally. You’ll be able to see your video in the preview before inviting participants.
Start a new meeting with video on to test your camera in private.
What should I do if Zoom still can’t access the camera after trying steps?
Reinstall Zoom, update camera drivers, try a different USB port, and reset OS privacy settings if needed. If problems persist, consult Zoom support.
If it still won’t work, reinstall Zoom and update drivers, then seek support.
Watch Video
The Essentials
- Verify Zoom camera permissions before testing.
- Select the correct camera in Zoom settings.
- Run a test meeting to confirm video works.
- Troubleshoot permissions, drivers, and hardware if issues arise.