How to Camera Track in After Effects: Step-by-Step
Learn how to camera track in After Effects with a practical, step-by-step guide. From tracking points to final composite, this article helps beginners and enthusiasts.

You can learn how to camera track in after effects by using the built-in Camera Tracker to solve motion, then attach a layer to a 3D null. Start with stable footage, a consistent frame rate, and clean tracking points. This guide from Best Camera Tips covers setup, solving, and refinement steps.
Why Camera Tracking Matters for Video Compositing
Camera tracking is a foundational technique for placing 3D objects, text, or effects into live-action footage with convincing perspective. If you’re learning how to camera track in after effects, you’ll appreciate how the tracking data creates the illusion that digital elements exist in the filmed world. In this guide, we explore practical workflows, common mistakes, and tips that help aspiring photographers and videographers produce seamless composites. According to Best Camera Tips, mastering tracking leads to faster workflows and higher-quality results, especially for beginners who want to build confidence quickly. The Camera Tracker analyzes motion, identifies parallax cues, and generates a solve that translates 2D motion into a 3D scene. For best results, shoot with stable framing, plan your moves, and maintain a consistent frame rate. With a solid track, you can attach objects, apply lighting, and align shadows to real-world lighting conditions. This section sets the stage for practical tasks and real-world examples.
Core Concepts: Parallax, Solve, and Track Points
To master the technique, you should understand three core ideas: parallax cues, the solve process, and high-quality track points. Parallax is the apparent shift of objects between frames; the camera tracker uses these differences to reconstruct camera motion. The solve step computes a virtual camera position in 3D space that matches the observed motion. Track points are features that remain in place across frames; more stable points produce a cleaner solve. In practice, you’ll often see jitter if points are ambiguous or if there’s motion blur. When you’re learning how to camera track in after effects, expect to adjust a handful of points, refine the solve, and re-check the overall motion. Best Camera Tips notes that planning your shot with strong, distinct features makes the tracker’s job easier. Keep in mind the project’s unit scale; inconsistent units can lead to misalignment when you place 3D elements.
Prerequisites and Setup Assumptions
Before you start, ensure you have the latest After Effects installed and a project ready for tracking. Use footage that is well-lit, with visible features across frames, and a stable frame rate. Avoid clips with extreme rolling shutter, heavy motion blur, or abrupt cuts; these conditions degrade tracking accuracy. Export your sequence in a lossless or lightly compressed format to preserve detail. In addition, ensure your composition is set to 3D and that you understand the project’s scale. As you practice, you’ll notice that consistent exposure and high contrast help the tracker find robust features. The Best Camera Tips team recommends recording test footage at the intended output size to gauge performance before committing to a full render.
The 2-Path Workflow: 2D vs 3D Tracking and When to Use Them
There are two broad approaches to motion capture in After Effects: 2D tracking to stabilize or extract motion, and 3D camera tracking to create a virtual camera in space. For shots with movement in depth, 3D tracking is essential to maintain perspective for overlays and CGI elements. For flat overlays or screen replacements, 2D tracking can be enough, especially if you’re unsure about parallax. When you’re learning how to camera track in after effects, you’ll likely start with 2D tracking to learn the control surfaces, then graduate to 3D tracking as your scenes become more complex. Best Camera Tips emphasizes building a clear mental map of the shot: identify static geometry, dynamic motion, and lighting direction before you begin tracking.
Importing Footage and Preparing Layers for Tracking
Start by importing your clip into a new composition and setting the correct frame rate. Trim any unusable sections and ensure there’s sufficient feature detail across the timeline. If your footage is short, you may still complete a tracking pass by selecting frames with distinct features. It’s often helpful to precompose the footage to a smaller layer for faster interaction while you place points. Then, lock the source panel and prepare an output layer for the tracking results. As you proceed, keep an eye on the track points: consistent spacing and well-distributed points tend to produce a cleaner solve.
Using the Camera Tracker: Key Steps in After Effects
With your footage ready, apply the Camera Tracker effect to begin the solve. After Effects analyzes the motion and identifies a camera path based on the visible features. You’ll typically click to place track points and let the solver compute the 3D solution. A successful solve yields a virtual camera and a set of 3D space coordinates that you can use to align new elements. Remember to choose a good region of interest and avoid areas with repetitive textures that can confuse the solver. In practice, you’ll verify the track by comparing the projected point on a known plane against your footage.
Attaching Objects with a Null Object and Parenting
To place a CGI object or 2D graphic in the scene, create a 3D null object and use it as a parent for your layer. Link the null to the solved camera and adjust position, rotation, and scale so that the overlay sits correctly in depth. This is where careful reference to lighting and perspective matters; you want shadows and highlights to align with the scene. If your object is not perfectly anchored, subtler tweaks such as anchor point adjustments can help achieve better integration. Through this concept, you’ll see how a simple null helps manage complex transforms and keeps your track organized.
Troubleshooting Common Issues and Refinements
Jitter, drift, or scale mismatches are common when learning how to camera track in after effects. To fix jitter, refine the track points by removing outliers and re-solving with a tighter region of interest. Drift can occur if points wander across frames; re-select points on stable features and re-run the solver. For scale, ensure all layers share a consistent unit reference and use the same composition settings. Lighting and reflections should be matched by adjusting the environment lighting in your render. It’s helpful to test with simpler shots first and gradually introduce more challenging footage, evaluating the result after each pass.
Real-World Example: Compositing a CGI Object into a Shot
In a typical scene, you’ll track the camera on a handheld shot, create a 3D null, and attach a CGI object that follows the camera motion. The result should feel integrated: the object sits on the same plane as the scene, with consistent perspective and parallax as the camera moves. Lighting is critical; approximate HDRI or matched key lights help. The Best Camera Tips team recommends working from a controlled set-up or a stabilized shot before attempting complex composites. Practice with multiple shots to understand how changes in focal length and motion affect the solve and the final appearance.
Tools & Materials
- Adobe After Effects (latest version)(Ensure Camera Tracker is available and up to date)
- Stable source footage (1080p+ preferred)(Well-lit with clear features across frames)
- High-performance computer (recommended 16 GB RAM or more)(Faster previews and solves)
- External drive for backups (optional)(Keep project backups safe)
- Keyboard and mouse (shortcuts handy)(Speeds up workflow)
- Color checker or gray card (optional)(Helpful for lighting consistency)
Steps
Estimated time: 45-60 minutes
- 1
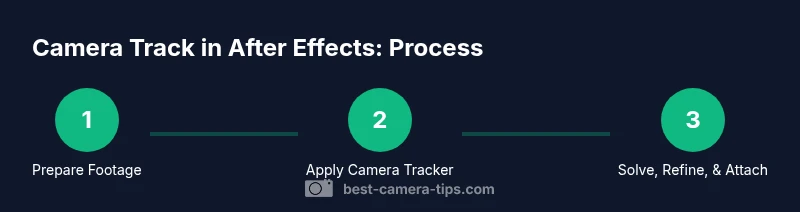
Prepare your project
Create a new composition with the correct frame rate and resolution. Import your clip and trim away unusable sections. Verify that the footage has visible features across frames to support tracking.
Tip: Choose a clip with clear texture; avoid ultra-smooth, featureless shots. - 2
Apply the Camera Tracker
With the footage layer selected, apply the Camera Tracker effect. Let After Effects analyze the frames and identify candidate track points. Use a region of interest that contains strong features.
Tip: Start with a small ROI to speed up the first pass. - 3
Solve the camera motion
Place track points on well-defined features and trigger the solver. Review the camera solve to ensure parallax behaves as expected and the virtual camera aligns with scene perspective.
Tip: Avoid points on repetitive textures. - 4
Create a null object
Once the solve looks good, create a 3D null to hold additional elements. This null will capture the camera motion and serve as the parent for overlays.
Tip: Name the null clearly and organize layers. - 5
Attach and align elements
Parent your 2D or 3D layers to the null, then adjust position, rotation, and scale to sit correctly in space. Check shadows and lighting for realism.
Tip: Use local coordinate controls to fine-tune alignment. - 6
Refine and test
Play back the sequence and confirm that overlays maintain correct perspective. If misalignments appear, reselect track points and re-solve.
Tip: Iterative refinement yields the best results.
Common Questions
What is camera tracking in After Effects?
Camera tracking reconstructs camera motion from 2D footage to place 3D elements in a scene. It creates a virtual camera path that matches real-world movement.
Camera tracking creates a 3D camera path from your video, letting you add objects that move with the scene.
Why is my track not solving correctly?
Common causes are few reliable features, motion blur, or rolling shutter artifacts. Improve results by selecting clearer features and re-solving.
If the track doesn’t solve, try better features and re-run the solver.
Can I track 360-degree footage?
AE supports standard camera tracking; 360 footage requires projecting to a plane or using specialized workflows. Expect extra setup.
360 footage needs special handling and projection to a usable plane.
Do I need 3D objects for tracking?
No—start with 2D overlays or flat textures. 3D tracking benefits more complex composites.
You can start with 2D overlays and add 3D later if needed.
How do I export or render the tracked data?
Tracked data lives in your After Effects project as layer transforms. Render the composite to output your final shot.
Just render your composition; the tracking data is baked into the layers.
What common mistakes do beginners make?
Choosing weak features, ignoring lighting, and rushing the solve. Plan, test, and refine for best results.
Avoid weak features and lighting mistakes by taking your time.
Watch Video
The Essentials
- Plan your shot before tracking.
- Use stable footage for a clean solve.
- Attach tracked data to a 3D null for easy manipulation.
- Verify alignment with test overlays and lighting.