How to Camera Track in CapCut: A Practical Step-by-Step Guide
Learn how to camera track in CapCut with a detailed, beginner-friendly method. This guide covers prerequisites, tracking types, prepping your footage, step-by-step instructions, troubleshooting, and best practices for clean, professional overlays.

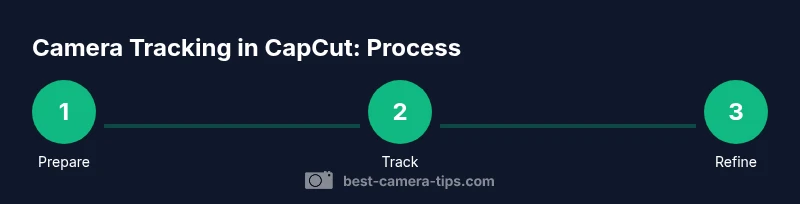
This guide teaches you how to camera track in CapCut, from preparing your clip to attaching motion-following overlays. You’ll learn when to use tracking, how to choose the right type, and how to refine the motion path for precise results. A clear shot, CapCut on a compatible device, and organized layers are all you need to get started.
What camera tracking is and why it matters
Camera tracking is the process of analyzing motion in a video and attaching a digital element (like a sticker, text, or 3D object) so it follows the subject's movement frame by frame. In CapCut, tracking helps you keep overlays aligned with a moving subject, whether you're highlighting a product, guiding viewer attention, or adding motion graphics to a scene. For aspiring photographers and home security enthusiasts, tracking opens creative possibilities for reviews, tutorials, and surveillance overlays. According to Best Camera Tips, mastering basic tracking dramatically improves perceived quality and viewer engagement. Key benefits include consistent alignment, reduced post-production time, and smoother visual storytelling. In practice, you’ll learn to choose the right tracking type, prep your footage, and refine the data with fine-tuning tools. This section sets the stage for practical use across photography, videography, and security setups. You’ll see examples like labeling a moving subject in a product demo or tracing a path for a HUD-style graphic in a home camera walkthrough.
CapCut prerequisites and setup
Before you begin, confirm you’re using a compatible device (mobile or desktop) with CapCut updated to a recent version. Prepare a clip where the subject moves predictably and remains relatively in frame; erratic movement can complicate tracking. For home security or product demos, shoot with adequate lighting and minimal motion blur to maximize tracking accuracy. Enable project settings for the chosen aspect ratio, and consider exporting a short test clip to practice. If you plan to attach multiple overlays, organize layers so you can adjust timing independently. Best Camera Tips Analysis, 2026 notes that consistent practice helps users become proficient faster, and recommends starting with simple scenes to confirm the tracker behaves as expected.
Understanding tracking types in CapCut
CapCut typically offers several tracking options, designed to follow different kinds of motion. In practice, you’ll usually choose a tracking mode that targets a visible feature (a logo, a bright point, or a defined edge). The right choice depends on the shot: high-contrast, well-lit subjects are easier to lock onto; complex textures or rapid movement may require manual keyframes after automated tracking. Start with the simplest track that covers the majority of the shot, then test on a few seconds of footage to assess drift. As you gain experience, you’ll learn which scenarios benefit most from each tracking approach and how to combine multiple tracks for a composite overlay.
Preparing your clip for tracking
Trim unnecessary parts at the start and end, and stabilize footage if it’s shaky to improve tracking accuracy. Ensure the subject remains clearly visible for a minimum window of several seconds; occlusions or brief disappearances can ruin the track. Create a clear anchor by marking a distinctive feature on the subject (like a logo, badge, or bright spot) that stays in frame. If the scene becomes crowded, consider masking other elements to prevent the tracker from jumping to the wrong object. A well-prepared clip reduces the amount of manual correction needed later, saving time and keeping the motion path clean.
Step-by-step: applying tracking in CapCut
- Import your clip into the CapCut timeline and ensure it’s the active track. 2) Select the clip and open the Motion or Tracking tool. 3) Choose the tracking type that matches your subject (point, object, or planar). 4) Place the anchor on a distinctive, high-contrast point. 5) Start tracking; CapCut will generate keyframes along the motion path. 6) Review the track; adjust the anchor, sensitivity, or track range if drift occurs. 7) Attach your overlay or effect to the tracked path and calibrate its timing. 8) Add additional keyframes to refine fast or subtle movements. Time required: about 10-15 minutes for a short clip, longer for complex motion. Why: automatic tracking saves time, but manual tweaks ensure accuracy.
Refining tracking with keyframes and overlays
Even after automatic tracking, you’ll likely need to fine-tune. Use keyframes to adjust position, rotation, and scale when the subject changes direction or exits frame briefly. If the overlay seems misaligned, temporarily disable the track, adjust the anchor point, and re-enable tracking. For multiple overlays, manage each element’s timeline separately to avoid drift. When applying text or labels, consider subtle shadows or outlines to improve legibility on busy backgrounds. A small amount of drift can be corrected with targeted keyframes rather than redoing the entire track.
Common issues and troubleshooting
Tracking drift: the overlay gradually lags behind. Solution: tighten smoothing and re-anchor on sturdy features. Subject leaving frame: reframe and re-tack; you can reset the track and re-anchor on a new feature. Low-contrast subjects: increase exposure or adjust contrast within CapCut before tracking. Occlusions: if the subject is blocked, pause tracking and resume when visible again. Performance: on mobile devices, keep footage at 720p or 1080p and avoid high frame rates for long clips to reduce processing load.
Exporting and sharing your tracked video
Once you’re satisfied with the tracking, export your project at the target resolution and frame rate. If you plan to share on social platforms, consider square or vertical formats and ensure the overlay remains legible on small screens. CapCut supports rendering with transparent backgrounds for layered overlays in some workflows; use this feature if you intend to composite in another editor. Finally, review the exported video on a fresh device to confirm tracking remains accurate across devices and screen sizes.
Real-world examples and use cases
- Product demos: track a product as you annotate features with floating labels that follow the motion.
- Tutorials: keep an on-screen pointer aligned with the subject during a step-by-step guide.
- Home security overlays: show a motion alert badge that follows a moving person around a room. For creators, pairing tracking with lower-thirds and subtle glows can elevate production value. The practical takeaway is practice with varied clips to learn how CapCut responds to different motion patterns.
Tools & Materials
- CapCut app(Install latest version on iOS, Android, or desktop; ensure cloud sync is enabled if you work across devices)
- Compatible device(Phone, tablet, or computer with adequate RAM for video editing)
- Source footage(Clip with a clearly moving subject and good lighting)
- Overlay graphics(Text, logos, or sticker graphics to attach to the track)
- Tripod or stabilizer(Helpful for smoother source footage to improve tracking accuracy)
Steps
Estimated time: 20-40 minutes
- 1
Import clip and prepare timeline
Open CapCut, start a new project, and import your clip into the timeline. Confirm the clip starts with the action you want to track and ensure the subject stays in frame for a clear initial anchor. Name the project and save frequently to prevent data loss.
Tip: Use a short test segment (5-10 seconds) to verify tracking behavior before committing to the full clip. - 2
Select tracking target and anchor
Choose the tracking type that matches your subject (point, object, or planar) and place the anchor on a distinctive, high-contrast feature. A stable anchor reduces drift and improves accuracy across frames.
Tip: Prefer a feature that remains visible even as the subject moves (e.g., a logo or a bright badge). - 3
Apply automatic tracking
Activate the tracking process to generate keyframes along the motion path. Let CapCut analyze the movement for the majority of the clip before reviewing the result.
Tip: If the track fails early, reset and re-anchor on a stronger feature. - 4
Attach the overlay
Add your graphic, text, or effect and attach it to the tracked path. Align the overlay’s anchor point with the tracked anchor so it follows movement smoothly.
Tip: For complex overlays, use a separate track to control timing independently. - 5
Refine with keyframes
Use keyframes to adjust position, rotation, and scale where the subject changes direction or overlaps occlusions. This step ensures precise alignment when automatic tracking isn’t perfect.
Tip: Keep keyframes tight; avoid excessive smoothing that overshoots motion. - 6
Test and export
Play back the clip to verify tracking accuracy across the entire duration. If satisfied, export at the desired resolution and frame rate. Review the exported video on different devices to confirm consistency.
Tip: Export a small version first to confirm quality before final rendering.
Common Questions
What is tracking in CapCut and how does it differ from keyframing?
Tracking automatically follows a chosen subject with an overlay. Keyframing manually adjusts position, rotation, and scale frame-by-frame when tracking isn’t perfect. Tracking speeds up workflows, while keyframes offer precise control.
Tracking automatically follows the subject; keyframes give you manual control when needed.
Do I need CapCut Pro to track effectively?
CapCut basic tracking can handle most standard tasks. Pro features may offer additional effects and export options, but they aren’t strictly required for basic camera tracking.
Basic tracking is available without Pro; advanced features may require a paid plan.
Can CapCut track multiple objects at once?
CapCut can track single anchors per overlay efficiently. For multiple tracked elements, you’ll typically add separate overlays and tracks, then synchronize their timing manually.
You generally track one anchor per overlay; use multiple overlays for several trackers.
Why does tracking drift, and how can I fix it?
Drift happens when the anchor loses contrast or the subject changes appearance. Re-anchor on a clearer feature, adjust sensitivity, or add keyframes to correct drift in problematic frames.
Drift is common; re-anchor and fine-tune with keyframes to fix it.
What are best practices for exporting tracked overlays?
Export at the target resolution and frame rate, and test playback on a few devices to ensure the overlay remains clear. If you plan multi-platform sharing, consider aspect ratio adjustments and legibility on small screens.
Export in your target resolution and test on multiple devices.
Watch Video
The Essentials
- Plan your anchor point before tracking.
- Choose the simplest tracking type that fits the shot.
- Use keyframes to perfect difficult motion.
- Test on short clips to save time.