Where Is the Camera Tool in After Effects: Find & Use
Learn where to find the camera tool in After Effects, how to create and animate a camera, and tips for orbiting, panning, and dollying in 3D space. A practical guide for beginners and improving camera workflows.

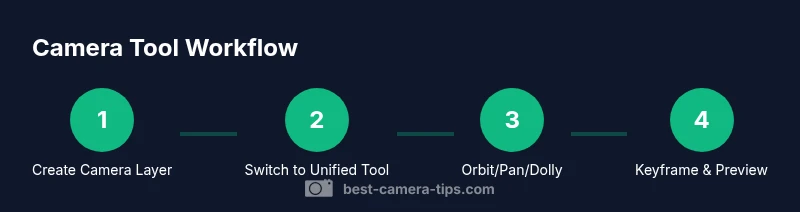
Accessing the camera tool in After Effects starts with creating a Camera layer and selecting the Unified Camera Tool in the toolbar. Press C to cycle through Orbit, Pan, and Dolly modes, or hold Space to pan while orbiting. In active 3D space, move the camera to frame your scene and keyframe motion as needed.
What the Camera Tool Does and How It Fits in After Effects
If you're wondering where is the camera tool in after effects, you're not alone. The camera tool is the key to moving through a 3D scene, letting you orbit, pan, and dolly to reveal depth and perspective. In After Effects, you work in a 3D space by turning layers into 3D and adding a Camera layer to define the viewer's position. Once created, the Camera tool in the toolbar (Unified Camera Tool) becomes your primary interface for navigating that space. According to Best Camera Tips, building a solid camera rig starts with understanding 3D space, switching between camera modes, and keeping your look consistent as you animate. This section sets the stage for practical steps that follow, so you can visualize how each action affects depth and motion.
Tools & Materials
- Computer with After Effects installed(Minimum RAM 8GB; recommended 16GB for smoother previews)
- After Effects project file(Have a ready composition or footage to work with)
- 3D-capable layers/footage(Enable 3D for layers you want to move with the camera)
- Null object (optional)(Useful for complex camera rigs or look-at targets)
- Keyboard shortcuts cheat sheet(Helps speed up your camera workflow)
Steps
Estimated time: 30-45 minutes
- 1
Open or create your composition
Launch After Effects and open an existing project or create a new composition. Ensure you have footage or layers ready to test camera motion. This initial setup sets the stage for 3D navigation.
Tip: Tip: Use a project with varied depth to better see camera movement. - 2
Enable 3D on your layers
Select the layers you want to move with the camera and toggle the 3D switch. Without 3D layers, the camera won’t affect depth or perspective.
Tip: Tip: 3D is per-layer; you may only need a few key layers to start. - 3
Create a Camera layer
Go to Layer > New > Camera and choose a lens preset (50mm is a common starting point). The camera defines the viewer position in 3D space.
Tip: Tip: Start with a basic 50mm lens and adjust later. - 4
Switch to the Unified Camera Tool
In the toolbar, select the Camera Tool. You can press C to cycle to the Unified Camera Tool, which lets you orbit, pan, and dolly seamlessly.
Tip: Tip: Use V (Selection) to select objects when needed. - 5
Orbit around the anchor point
Click and drag in the composition to orbit the camera around its anchor. Orbit keeps your subject centered while altering perspective.
Tip: Tip: Hold Alt/Option for constrained orbit if needed. - 6
Pan to reframe the shot
With the Camera Tool, drag to pan the camera left/right or up/down. Panning adjusts framing without changing distance to the scene.
Tip: Tip: Combine small pans with subtle easing to feel natural. - 7
Dolly to adjust distance
Dolly moves the camera forward or backward along its z-axis, changing perceived depth and scale of foreground and background.
Tip: Tip: Use dolly to approach a focal object gradually. - 8
Preview in a second view
Enable a second view (e.g., 2 Views) to see camera motion from different angles and prevent unexpected flips.
Tip: Tip: Look for distortions in parallax across views. - 9
Add LookAt or target alignment
If you want the camera to follow a moving subject, parent the camera to a Null object or use a LookAt setup to keep the subject centered.
Tip: Tip: Null-based rigs simplify complex camera moves. - 10
Animate with keyframes
Set keyframes for Position and Point of Interest (or for the camera’s transform). Use ease-in/ease-out to smooth motion.
Tip: Tip: Use spatial and temporal interpolation to favor natural movement. - 11
Refine timing and pacing
Scrub through the timeline, adjust keyframe timing, and apply easing to achieve the desired pace.
Tip: Tip: Small timing tweaks can dramatically improve perceived motion. - 12
Save and review in RAM Preview
Save your project, then RAM Preview to see how the camera motion feels in real-time. Iterate as needed.
Tip: Tip: Check motion against the soundtrack or action beats.
Common Questions
Where is the after effects camera tool located?
The camera tool is accessed by creating a Camera layer (Layer > New > Camera) and selecting the Unified Camera Tool in the toolbar. You can switch between orbit, pan, and dolly modes with the C key or by cycling through tools. This gives you real-time control over 3D space.
In After Effects, create a camera layer and use the Unified Camera Tool to orbit, pan, or dolly. Press C to switch modes and use it in a 3D scene.
Do I need 3D layers before using the camera?
Yes. To move a scene with a camera, the layers you want to photograph must be 3D. Convert layers to 3D via the 3D switch, otherwise the camera cannot affect depth and perspective.
Yes. Make layers 3D so the camera can move them and change perspective.
What is the Unified Camera Tool?
The Unified Camera Tool combines orbiting, panning, and dollying in one mode. It simplifies camera movement by letting you switch actions with mouse gestures while holding modifier keys.
The Unified Camera Tool lets you orbit, pan, or dolly from one tool, making camera work quicker.
How do I animate camera movement effectively?
Set keyframes for Position and Point of Interest, or parent the camera to a Null object for complex paths. Apply easing to keyframes to smooth motion and adjust pacing.
Add keyframes for position and look-at, or use a Null for complex paths, and ease the motion.
Why isn’t my camera moving in the composition?
Check that you are in a 3D composition with a Camera layer, and that the layers you expect to move are 3D-enabled. Also verify you’re viewing the Active Camera and not a different view.
If nothing moves, confirm 3D layers, an active camera, and that you’re in the correct view.
Watch Video
The Essentials
- Create a Camera layer to enable 3D navigation.
- Use the Unified Camera Tool for orbit, pan, and dolly moves.
- Animate with keyframes and ease to achieve cinematic motion.
- Preview frequently in Active Camera to verify depth and pacing.