How to Camera Lock in Roblox: A Step-by-Step Guide
Learn how to camera lock in Roblox with a practical, stepwise guide. Explore camera types, implementation tips, and testing for a stable, guided experience.

To lock the camera in Roblox, you’ll switch the camera to Scriptable mode and fix its offset relative to the player character. This prevents free camera rotation during play and helps you create controlled tutorials, obstacle courses, or guided demonstrations. Follow these step-by-step techniques, with safe scripting practices and testing tips to ensure consistent behavior across games.
What does camera lock mean in Roblox?
In Roblox, camera lock means preventing the game's camera from freely orbiting around the player. This is commonly achieved by switching the camera to Scriptable (or Custom) mode and applying a fixed offset relative to the character. Locking the camera is useful for guided experiences, obstacle courses, and tutorials where you want players to view the scene from a consistent angle. When you search for how to camera lock in roblox, you’ll find that the approach depends on whether you’re scripting in Roblox Studio or applying a temporary, in-game fix.
This concept is central to designing controlled demonstrations and ensuring players perceive scenes from the intended perspective, which is especially helpful for beginner tutorials and security-focused walkthroughs in a game environment.
Tip: If you’re unsure, start with a simple fixed offset (e.g., 0, 5, -10) and scale up after testing.
Why you would want to lock the camera in Roblox
Locking the camera can improve focus, readability, and pacing in a Roblox game. For obstacle courses, simulators, or storytelling experiences, a fixed viewpoint ensures players see key details and avoid disorientation. It also helps creators demonstrate specific camera angles for tutorials on camera controls, gear, or movement. However, overusing camera lock can irritate players who expect freedom to explore. Balance is key: consider offering a toggle to unlock, or provide alternate camera modes for accessibility. In practice, many creators start with a locked view during the intro and then gradually reintroduce player control. As you plan your project, map out where a stable camera benefits learning and where it should be flexible. This is where the keyword how to camera lock in roblox becomes a guiding question that shapes your design choices.
Roblox camera control basics: Camera types and properties
Roblox exposes a few camera modes like Scriptable, Custom, and Classic. Scriptable gives you full control over the camera’s position and orientation, ideal for fixed angles. Custom keeps some player input while allowing code-based adjustments. Classic is the default camera that follows the player with automatic adjustments. To lock the view, you’ll typically switch to Scriptable and continuously set the camera’s CFrame to a chosen offset from the character. You can also tweak MouseBehavior to prevent dragging, and you should manage the CameraSubject so the camera doesn’t jump as the character moves. For reference, the Camera object exposes properties such as CameraType, CFrame, and CameraSubject that you’ll manipulate in a LocalScript.
Safety and player experience considerations
A locked camera should not make the game feel unresponsive or claustrophobic. Always provide an option to unlock, especially for accessibility users who rely on keyboard and joystick navigation. Test across devices to ensure the offset works with different character sizes. When scripting, avoid abrupt jumps in camera position; instead interpolate smoothly to reduce motion sickness. Document your camera behavior in-game so players understand how to interact with the scene. Remember to check your implementation in both Studio Play mode and live game builds to catch edge cases early.
Step-by-step: Locking the camera as a developer in Roblox Studio (LocalScript)
- Plan the fixed viewpoint: Decide on an offset (e.g., 0, 5, -10) from the character to set a comfortable angle.
- Create a LocalScript: Place it under StarterPlayerScripts so it runs for every client.
- Reference the current camera: Access workspace.CurrentCamera and UserInputService if you’ll modify input.
- Enable Scriptable mode: Set camera.CameraType = Enum.CameraType.Scriptable to disable automatic camera motion.
- Bind the offset: In a RunService.RenderStepped loop, set camera.CFrame = character.PrimaryPart.CFrame * offset to maintain the fixed view.
- Lock inputs: Use UserInputService.MouseBehavior = Enum.MouseBehavior.LockCenter to prevent dragging.
- Test and refine: Run Play mode, adjust offset and interpolation if needed. This ensures consistency across frames.
- Add a reset path: Provide a condition to revert to default camera when the scene ends or a player opts out.
- Document your approach: Comment the code and create quick in-game notes so teammates understand the behavior.
- Review performance: Ensure the loop isn’t heavy and runs smoothly on all devices.
Step-by-step: Lock camera in-game for players using a LocalScript (toggle)
In a live game you may want a camera lock that players can enable or disable. Start by exposing a UI toggle (e.g., a ScreenGui Button). When the toggle is activated, run a LocalScript that sets CameraType to Scriptable and starts updating CFrame with a fixed offset. When disabled, revert CameraType to Custom and re-enable MouseBehavior. This approach provides both control and flexibility, keeping a smooth player experience.
Common pitfalls and how to test
Some frequent errors include forgetting to reference the correct character part, causing the camera to snap, or not handling the case when the player respawns. Always test with different avatar sizes, multiple players, and when the character re-spawns. Use Play mode and simulate cutscenes or mid-game scenarios to see how the camera behaves under stress. Check the performance impact of the update loop and ensure no memory leaks exist from accumulating connections.
Accessibility considerations and input options
Offer an unlock option and provide a clear explanation in the UI about how to switch between locked and free camera modes. Ensure keyboard navigation and screen readers can describe the current camera state. Provide alternative fixed viewpoints for colorblind or motion-sensitive players and allow highlighting of important objects in the scene independent of camera orientation.
Examples and variations: fixed vs follow camera
Fixed camera is anchored to a point in space, providing a cinematic view regardless of player movement. Follow-camera variations keep the camera behind or above the player but still allow limited user input. In Roblox, you can create hybrid modes that fix the camera during tutorials but revert to follow mode during exploration. This flexibility helps you tailor learning curves and sharing your how-to camera lock in roblox knowledge effectively.
Tools & Materials
- Roblox Studio(Install the latest version for best scripting support)
- LocalScript(Place under StarterPlayerScripts to run for every client)
- Play Mode Testing(Test in Studio Play and live server as applicable)
- Camera API reference(Docs for Camera properties and enums)
Steps
Estimated time: 20-30 minutes
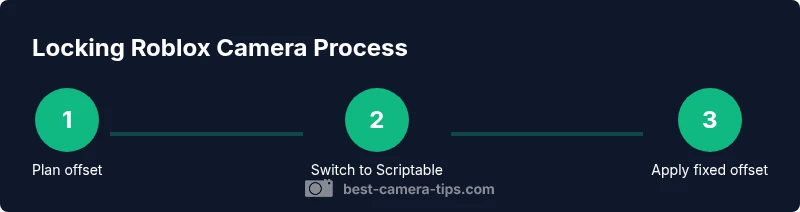
- 1
Plan the fixed viewpoint
Decide on a specific offset from the character to achieve the desired viewing angle. Document how this will look in different avatars and with varying environments.
Tip: Start with a modest offset (0,5,-10) and adjust after a few test runs. - 2
Create a LocalScript
Add a LocalScript under StarterPlayerScripts so every client runs the lock logic. This ensures consistent camera behavior across players.
Tip: Name the script clearly, e.g., CameraLock_LS, for team readability. - 3
Switch to Scriptable mode
Set the camera type to Scriptable to disable default Roblox camera motion and make your own control loop possible.
Tip: Avoid mixing Scriptable with automatic camera transitions. - 4
Apply a fixed offset in a render loop
In a RenderStepped loop, update the camera CFrame to your chosen offset from the character’s parts so the view remains fixed.
Tip: Use interpolation if the offset causes jitter. - 5
Lock the mouse input
Set MouseBehavior to LockCenter to prevent players from manually dragging the camera during the lock period.
Tip: Provide a user option to unlock if needed. - 6
Test across scenarios
Run Play mode, respawn scenarios, and different avatars to ensure stability and no camera glitches.
Tip: Test on different devices if available. - 7
Add reset behavior
Create a fail-safe to revert to the default camera when the scene ends or when players opt out.
Tip: Ensure a smooth transition back to normal gameplay. - 8
Document the approach
Comment the code and include in-game notes so teammates understand how the lock works.
Tip: Keep a short changelog for future updates. - 9
Validate performance
Check CPU load and memory usage of the update loop to prevent lags on lower-end devices.
Tip: Consider throttling updates if needed. - 10
Review accessibility
Offer a clear unlock option and consider alternate viewpoints for players needing accessibility adjustments.
Tip: Accessibility first improves user experience for a broader audience.
Common Questions
What does locking the Roblox camera do?
Locking the Roblox camera fixes its position and orientation, preventing free rotation. This is useful for tutorials, obstacle courses, and cinematic moments where a consistent view is desired.
Locking the camera fixes where you see things, which helps tutorials and guided parts of a game.
Can I lock the camera without Roblox Studio?
Yes. You can implement a camera lock with in-game LocalScripts during play, but you’ll typically need Studio to write and test the initial logic. In-game locks depend on the same scripting concepts.
You can do it in-game with scripts, but you’ll often start in Studio to test first.
Is camera locking the same as changing CameraType?
Camera locking usually involves setting CameraType to Scriptable so the game stops adjusting the camera automatically. You then apply a fixed offset to achieve the locked view.
Locking often means changing to Scriptable camera type and using a fixed offset.
How do I test camera lock safely?
Test in Studio Play mode under various avatar sizes and with respawns to confirm stability. Also test on different devices if possible to catch performance issues.
Test in Play mode and watch for abrupt camera moves or lags.
Will camera locking affect accessibility?
It can. Provide an unlock option and consider alternative viewpoints to accommodate players who rely on keyboard or screen readers.
Make sure players can unlock and adjust the camera if needed.
How can I revert to normal camera after a tutorial?
Include a reset path in your script to switch CameraType back to Custom and restore MouseBehavior when the locked segment ends.
Add a reset path so players can return to normal camera control.
Watch Video
The Essentials
- Lock the camera using Scriptable mode for full control
- Test thoroughly in Studio Play mode and across scenarios
- Provide an unlock option to preserve accessibility