Camera 6D: A Practical How-To Guide
Discover a complete, step-by-step guide to using the camera 6d. Learn setup, exposure control, and workflow tips with Best Camera Tips for better portraits, landscapes, and low-light shots.

Learn how to master the camera 6d with a structured setup and shooting workflow. You'll set up the basics, tune exposure, and build a repeatable process for portraits, landscapes, and low-light scenes. No guesswork—follow the step-by-step method designed for beginners and enthusiasts.
Understanding the camera 6d in your kit
The camera 6d is a full-frame DSLR favored by aspiring photographers for its balance of image quality and approachable controls. In this guide, we outline a practical, repeatable workflow that helps you move from concept to a finished shot with the camera 6d. According to Best Camera Tips, recognizing how the camera 6d processes light is the first step to sharper photos, especially when you’re learning to manage exposure in unpredictable environments. You’ll learn to frame, shoot, and review with a system that reduces guesswork and builds confidence with your camera 6d.
Core specifications and limits of the camera 6d
The camera 6d delivers solid performance for novices and enthusiasts without overwhelming you with menus. It features a large full-frame sensor, reliable baseline image quality, and straightforward controls that emphasize practical learning. Its autofocus is dependable for everyday scenes, though it may feel slower in fast-action situations compared to newer bodies. Knowing these limits helps you plan your shoots, select appropriate lenses, and decide when to rely on automation versus manual control with the camera 6d.
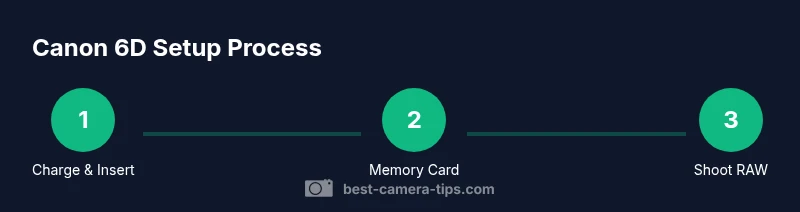
Setting up for optimal image quality
Before you press the shutter, set up the camera 6d for your shoot: verify the battery is charged, insert a high-quality memory card, attach a suitable lens, and reset custom settings if you’re restoring a known baseline. For consistency, enable grid lines and use the histogram as a guide to prevent clipping. This preparation is especially important with the camera 6d, where light conditions can shift quickly. Best Camera Tips emphasizes building a predictable setup so your camera 6d responds the same way across sessions, helping you learn faster.
Exposure mastery with the camera 6d: shutter speed, aperture, ISO
Exposure is the heart of every photograph taken with the camera 6d. Start with a tripod for stability and a baseline ISO that keeps noise low. Shutter speed controls motion, while aperture governs depth of field. With the camera 6d, test a few configurations in manual exposure to see how your subject’s motion and background interact. When light is changing, your instinct should be to adjust one control at a time to preserve color and texture. Use the camera 6d’s metering to guide your exposure decisions, but trust the histogram as your final check. The camera 6d rewards deliberate nudge-and-check adjustments rather than rapid, reflex-based changes.
Auto modes vs manual: building a habit with the camera 6d
Auto modes on the camera 6d are helpful while you’re learning, but genuine control comes from moving to semi-automatic modes (Av or Tv) and eventually full manual (M). Practice with Av to lock depth of field while the camera 6d suggests shutter speed, then switch to M when you’re comfortable adjusting exposure compensation. The camera 6d’s built-in learning cues will guide you, but steady practice is what converts theory into reliable results.
Shooting workflows: portraits, landscapes, and travel with the camera 6d
A repeatable workflow helps you maximize the camera 6d’s strengths across genres. For portraits, prioritize a shallow depth of field or selective focus, and shoot in RAW for maximum editing latitude. Landscapes benefit from a smaller aperture and a sturdy tripod, with careful attention to composition and horizon alignment. When traveling with the camera 6d, pack light, plan shoots around good light, and carry a spare memory card. The camera 6d rewards thoughtful preparation and a clear plan rather than improvisation alone.
Maintenance, storage, and data security for your camera 6d
Regular cleaning of the camera 6d’s sensor area, lens surfaces, and contact points keeps images clean and reliable. Store the gear in a padded bag away from heat, dust, and moisture. Back up photos promptly to a second drive or cloud service to minimize the risk of data loss. The camera 6d’s media can be sensitive to physical shock; handling, transport, and safe storage matter as much as setup and shooting. A simple routine now saves headaches later with the camera 6d.
Common pitfalls and quick fixes when using the camera 6d
Common issues include blown highlights in bright scenes, underexposed shadows in dark interiors, and white balance shifts under mixed lighting. Tackle these with RAW capture, exposure compensation, and a quick WB preset, then verify results on the histogram. If you notice backfocusing or inconsistent autofocus with the camera 6d, try refocusing with a slower lens, recompose, and test with live view. Keeping a small checklist helps you catch mistakes before you press the shutter on the camera 6d.
Tools & Materials
- Canon EOS 6D body(Main camera body for operation)
- Charged battery(Spare battery recommended for longer shoots)
- Memory card(At least 32GB, Class 10 or better; SDXC preferred)
- Lens (standard zoom or prime)(Versatile focal ranges (around 24-70mm))
- Lens hood(Helpful for reducing flare in bright light)
- USB card reader(Useful for quick data transfer)
- Camera manual(Reference for menu navigation and features)
Steps
Estimated time: 60-90 minutes
- 1
Charge and insert battery
Plug in the charger and ensure a full charge before a shoot to prevent power loss and data risk.
Tip: Check battery health before long trips. - 2
Insert memory card and format
Use a fresh card or format after backing up. Choose a fast SD card to support buffer handling on the camera 6d.
Tip: Format in-camera to avoid compatibility issues. - 3
Attach a lens and power on
Mount a suitable lens and switch the camera on. Get comfortable with the main controls before shooting.
Tip: Turn on in bright light to avoid menu confusion. - 4
Set white balance
Choose Auto WB for general scenes or preset WB for consistent color under specific lighting.
Tip: If in mixed light, use a gray card for a custom WB. - 5
Choose a shooting mode
Start with Aperture Priority (Av) for depth control or Manual (M) for full exposure control.
Tip: Switch to M after understanding exposure compensation. - 6
Set ISO baseline
Set ISO 100–400 for daylight; raise as needed for darker environments to maintain shutter speed.
Tip: Avoid pushing ISO too high; use post-processing noise reduction if needed. - 7
Configure metering
Try Evaluative metering for general scenes or Center-weighted for backlit subjects.
Tip: Reframe if distractions appear before shooting. - 8
Set drive mode and focus
Single-shot focus for stills; use Live View with Contrast AF if available.
Tip: Use AF-S for static subjects; AF-C for moving subjects if applicable. - 9
Compose and shoot RAW
Frame using grid lines; shoot RAW for maximum latitude in editing.
Tip: Review histogram after each shot. - 10
Review and adjust
Check exposure and white balance; adjust settings for subsequent shots.
Tip: Bracketing can help in tricky lighting. - 11
Backup and data handling
Transfer files to a computer or external drive after shooting.
Tip: Use a durable card carrier and label folders. - 12
Secure storage
Store camera and lenses in a padded bag, away from extreme temperatures.
Tip: Inspect gear after travel for signs of wear.
Common Questions
What is the best beginner mode on the camera 6d?
Aperture Priority (Av) is a gentle start for beginners, while Manual (M) helps you learn exposure. Start with Av and switch to M as you gain confidence.
Begin with Aperture Priority to learn depth and exposure, then move to Manual as you practice.
Can the camera 6d shoot in low light effectively?
Yes, with careful ISO control and a stable setup. Use a wide aperture and a steady tripod for ambitious shots.
It handles low light better when you manage ISO and keep the camera steady.
What lens should I start with for the camera 6d?
A versatile standard zoom or a prime suitable for the camera 6d’s full-frame sensor helps you learn composition and depth.
A standard zoom lens is a great starting point for the 6d.
Does the 6d support video, and at what quality?
The 6d records Full HD video. Use a stable setup and good lighting for best results.
Yes, it records Full HD video with standard settings.
How do I reset custom settings safely?
Use the Menu to locate the reset option and return to factory defaults only after backing up your custom configurations.
If you need a clean slate, reset from the menu after saving your favorite settings.
What’s the best practice for data backup on the road?
Carry a portable card reader and back up photos to a secondary drive or cloud when possible.
Back up your shots to a secondary drive or cloud when you’ve got internet access.
Watch Video
The Essentials
- Master the camera 6d basics before advanced features
- Use RAW and proper white balance to improve colors
- Build a repeatable shooting workflow for consistency
- Protect data with backups and safe storage
- Practice in varied lighting to understand exposure