What camera to use for live streaming: A practical guide
Discover how to choose the right camera for live streaming, from budget webcams to mirrorless options, and how to set up for reliable, high-quality broadcasts.

For reliable live streaming, choose a camera that offers 1080p or 4K output, clean HDMI or stable USB video, and solid autofocus in low light. If you're on a budget, start with a quality USB webcam; for better quality, use a mirrorless or DSLR with clean HDMI and a capture card. Lighting matters most.
Understanding why the right camera matters for live streaming
Choosing the right camera for live streaming isn't just about resolution; it's about reliability, ease of use, and consistency across long sessions. For aspiring streamers, your camera becomes the foundation of your entire broadcast, influencing image quality, autofocus behavior, color consistency, and how forgiving your setup is in imperfect lighting. According to Best Camera Tips, the camera you pick sets the baseline for viewer engagement and reduces fiddling during a live show. A suitable camera will provide a clean signal (HDMI output with minimal artifacts or a stable USB video feed), work smoothly at common frame rates (mostly 30fps with an option for 60fps), and play nicely with your streaming software. When choosing, consider your space, power options, and whether mobility matters. Many beginners get strong results starting with a reliable webcam and only graduate to an external camera once their streaming routine stabilizes.
Core camera features for streaming
When selecting a camera, several features matter most for live streaming. Resolution and frame rate determine how sharp motion appears; 1080p at 30fps is the standard, while 1080p at 60fps or 4K at 30fps are desirable if your audience has bandwidth and you plan on cropping in post-stream. Look for clean HDMI output or reliable USB video with minimal compression so you can feed a capture card or computer without extra processing. Autofocus performance matters in dynamic scenes; a camera with continuous, smooth autofocus reduces jitter when you move or reframe. Low-light performance and good color reproduction are essential if your lighting isn’t perfect; sensors with larger pixels and good noise control help. White balance controls and exposure adjustment should be accessible in live mode, not only in recording. Also consider power options (AC adapter vs. battery) and cooling noise, which can become distracting during long streams.
Camera types for different budgets
Budget-friendly options include basic USB webcams that offer 1080p output and straightforward setup. These are ideal for beginners who want a quick start with minimal cables and software configuration. For mid-range needs, consider an HDMI-capable camcorder or a compact mirrorless camera, which deliver higher image quality and more control over settings. In higher-tier setups, a mirrorless or DSLR with clean HDMI output lets you fine-tune color and exposure creatively, but it requires more space, power management, and cables. Finally, a smartphone can act as a streaming camera with USB capture or wireless apps, offering portability and impressive video for secondary angles. Each path has trade-offs between setup complexity, cost, and future-proofing; choose based on how often you stream, your space, and your willingness to tinker with gear.
Camera types for different budgets (continued)
Webcams are the most affordable and fastest way to start streaming. They plug directly into your computer and typically work with minimal software setup, but they're limited in control and low-light performance. Camcorders offer longer recording times and improved optics, often with better color and a more professional look, yet may require more cables and a separate power source. Mirrorless and DSLR cameras deliver the best image quality and a wide lens ecosystem; they provide advanced controls but demand careful power management, clean HDMI output, and a capture card for most setups. Your decision should align with your streaming goals, how often you go live, and whether you value portability over ultimate image fidelity.
Using smartphones and capture devices
Smartphones can be surprisingly strong live streaming cameras, especially when paired with a capture card or USB adapter that makes the feed appear as a standard webcam. They offer excellent sensors, fast autofocus, and compact form factors, but battery life and thermal throttling can limit long sessions. If you choose this route, use a stable mount, keep the device cool, and consider external microphones for better audio. For higher stability and consistency, you may still want a dedicated camera for primary angles and reserve the phone for secondary shots or mobile streams.
Essential gear beyond the camera
Your camera is just one part of the equation. Best Camera Tips analysis shows that lighting, audio, and reliable connectivity have as much impact on perceived quality as the camera itself. A simple key light and a fill light can dramatically improve skin tones and contrast, while a good microphone or a compact audio interface reduces room noise and handles voice clarity. Invest in a solid mount or tripod, sturdy cables, and a power solution that won’t force you to swap batteries mid-stream. An inexpensive capture card can unlock HDMI signals from mirrorless or DSLR cameras, delivering a clean feed to streaming software. Finally, keep backups: spare cables, a charged battery, and a secondary device for testing.
Setup workflow: from cable to live
Start by selecting your path: USB webcam or an HDMI camera with a capture card. Connect the camera to the computer, then install and open your streaming software. Add the camera as a video source, adjust resolution and frame rate to match your platform, and test audio with your microphone. Calibrate white balance and exposure in real-time to prevent sudden color shifts during your broadcast. Save a basic scene with at least two sources (camera and microphone) and a background image or video. Finally, run a private test stream to verify latency and scene transitions before inviting viewers.
Troubleshooting common issues
If you don’t see video, check the signal path: USB feed vs HDMI capture; verify power, cables, and driver installation. If video looks choppy or laggy, reduce the resolution or frame rate, and ensure your computer and network can sustain the feed. Color looks off or overexposed? Adjust white balance and exposure, and confirm lighting placement. Audio drift or echo? Separate the mic from the camera’s built-in mic, and set proper sync in your streaming software. Loose cables can also cause intermittent drops; secure them with clips or cable ties. Keep your software updated and test hardware changes with short, private streams.
Testing and going live: best practices
Before your first real broadcast, conduct a private run at your target resolution and frame rate. Monitor key metrics: CPU load, dropped frames, and incoming network bandwidth. Have a simple backup plan in case of hardware failure—backup camera or laptop with a saved scene. Document your workflow so later streams are faster to set up. The Best Camera Tips Team recommends scheduling a dry run at least 24 hours before a big event to catch any last-minute issues and to fine-tune lighting and audio.
Authority sources
- https://www.fcc.gov
- https://www.nist.gov
- https://www.w3.org
Tools & Materials
- USB webcam(1080p native resolution; plug-and-play with most OSes)
- HDMI-capable camera(Provides clean HDMI output; ideal for high-quality streams)
- HDMI capture card(Needed when using HDMI camera with a computer (not required for USB webcams))
- HDMI cable(Support length 2–6 feet for desk setups)
- USB cable(s)(For webcam or capture device connections)
- Tripod or stable mount(Should support your camera weight and height needs)
- Lighting kit(Key light + fill light; adjust brightness to reduce shadows)
- External microphone(Lavalier or desktop mic; improves audio clarity)
- Power supply or AC adapter(Reliable power for long streams; keep spare batteries handy)
- Cable management accessories(Cable clips or ties to keep setup tidy)
- Spare batteries and chargers(Backup power for camera and lights)
Steps
Estimated time: 45-60 minutes
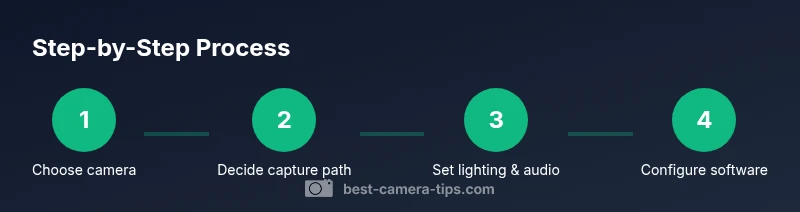
- 1
Assess goals and budget
Define your streaming goals, audience size, and how often you plan to go live. Set a realistic budget that covers a camera, capture method, and essential accessories. This alignment prevents scope creep and helps you choose the right gear from the start.
Tip: Write down your minimum viable setup to avoid overbuying. - 2
Decide on capture method
Choose between a USB webcam or an HDMI camera with a capture card. USB webcams are simplest and fastest to set up; HDMI with capture cards offers higher image quality and more control over settings.
Tip: If you plan future upgrades, lean toward the HDMI path.” - 3
Gather gear
Assemble essential items: camera or webcam, capture card (if needed), cables, lighting, and microphone. Verify all components are compatible with your computer and streaming software.
Tip: Label cables to speed up setup on live days. - 4
Make physical connections
Mount the camera, connect video and audio cables, and ensure the camera is powered. Place lights and microphone within easy reach of your setup.
Tip: Avoid tangling cables; leave extra slack for repositioning. - 5
Configure camera settings
Set resolution and frame rate to match your platform, enable clean HDMI or USB feed, and adjust white balance, exposure, and autofocus for stable output.
Tip: Test different lighting to find your optimal white balance. - 6
Adjust lighting and audio
Position key and fill lights to soften shadows; test your mic placement for clear voice capture and minimal wind or room noise.
Tip: Use a pop filter or windscreen to reduce plosives. - 7
Set up streaming software
Add your video sources, create scenes, and balance audio levels. Verify latency, region, and encoding preset to suit your bandwidth.
Tip: Use a simple scene with a clean background to start. - 8
Run a private test stream
Record a short test stream locally or to a private destination. Check video quality, audio sync, and transitions.
Tip: Make adjustments based on the test results. - 9
Go live with confidence
Launch the stream with viewers. Monitor chat, audio levels, and network stability; be prepared to pause and adjust if needed.
Tip: Have a quick backup plan if the main camera fails.
Common Questions
Do I really need a dedicated camera, or can a webcam work for starting out?
A webcam is a solid starting point for beginners due to ease of use and minimal setup. If your goal is quick, low-friction streaming, a high-quality USB webcam is often enough. As your channel grows, you can upgrade to a camera with better control, higher image quality, and cleaner output.
A webcam is a great starting point, and you can upgrade later for higher image quality.
Is 4K necessary for live streaming?
For most streams, 1080p at 30fps or 60fps is sufficient and widely supported. 4K can future-proof your setup and allow more flexibility in post-production, but it requires more bandwidth and processing power.
4K isn’t required for most streams; 1080p is usually enough.
What frame rate should I use for streaming?
30fps is standard and bandwidth-friendly; 60fps provides smoother motion for fast action. Choose based on your content type and audience capabilities.
Most streams use 30fps; go to 60fps if you have strong hardware and high-bandwidth viewers.
Do I need a capture card for all cameras?
If you’re using a camera with HDMI output beyond USB, a capture card is typically required to feed the signal into your computer. USB webcams don’t need a capture card.
A capture card is usually needed when you use HDMI cameras; USB webcams don’t require one.
Can I use my smartphone as a live streaming camera?
Yes, smartphones can be used with capture cards or compatible apps. They’re portable and powerful but may overheat with long streams; consider an auxiliary role or a dedicated camera for primary shots.
Your phone can work as a camera, especially for extra angles, but plan for heat and battery life.
How can I fix audio sync issues?
Ensure your microphone is configured as the primary audio source and enable ‘audio delay’ or ‘sync offset’ in your streaming software. Use a test stream to verify sync before going live.
Fixing audio sync usually means adjusting a small delay in your software and testing before going live.
Watch Video
The Essentials
- Choose the right camera type based on budget and goals
- Prioritize clean HDMI/USB video and reliable autofocus
- Lighting and audio are critical to perceived quality
- Test thoroughly before going live
- Use a scalable setup that can grow with your streaming plan