When to Change ISO on Camera: A Practical Guide
Learn how to decide when to adjust ISO on your camera to balance exposure, noise, and motion. This comprehensive guide covers scenarios, Auto vs Manual ISO, and a step-by-step workflow for beginners and enthusiasts.

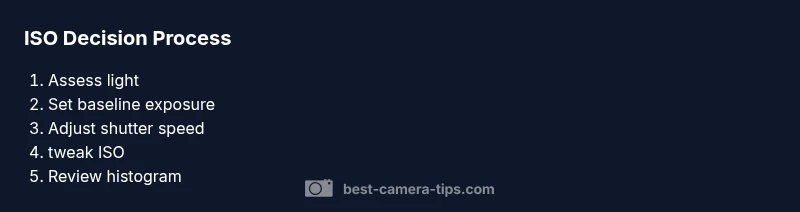
To decide when to change ISO on camera, follow the exposure triangle: light, motion, and noise. Start with the lowest ISO, then raise it in darker scenes until your shutter speed meets your target, or noise becomes unacceptable. Use histogram feedback to verify brightness and preserve detail.
What ISO does in photography
ISO measures how sensitive your camera sensor is to light. A lower ISO (e.g., base values) yields cleaner, crisper images with less noise but requires more light or longer exposure. A higher ISO increases sensor sensitivity, brightening scenes without changing lighting, but at the cost of more noise and reduced dynamic range. In modern cameras, "native" or "base" ISO values are optimized for the sensor; using ISO outside this range can degrade image quality. Understanding ISO helps you balance brightness, contrast, and grain across different shooting conditions. When you see a bright scene with strong shadows, ISO decisions become a key lever for achieving proper exposure without sacrificing detail or color accuracy.
How ISO interacts with aperture and shutter speed
The exposure triangle—ISO, aperture, and shutter speed—defines brightness in a photograph. Increasing ISO lets you keep a small aperture for sharp depth of field or a faster shutter to freeze motion. Conversely, lowering ISO requires more light or a longer shutter to reach the same exposure. In practice, you adjust ISO to support the combination you want: wide open aperture for background blur, or a fast shutter for action, all while aiming for acceptable noise levels. This dance between ISO and other settings is essential for consistent results across genres like portrait, landscape, and sports photography.
When to raise ISO: daylight, low light, and action scenarios
Raising ISO is appropriate when light is scarce or subject motion is fast. In dim interiors, you may need a higher ISO to maintain a usable shutter speed and prevent motion blur. In backlit or mixed lighting, a higher ISO helps you capture detail in shadows without losing highlights. For sports or wildlife, a higher ISO enables faster shutter speeds to freeze movement. The key is to monitor the histogram and ensure noise stays within an acceptable range for the final output. Practice by comparing shots at different ISO values to learn your camera’s noise tolerance.
When to lower ISO: preserving detail and dynamic range
Lower ISO reduces visible noise and preserves tonal gradations, which matters in landscapes and studio work. In bright daylight, keeping ISO low allows you to use a smaller aperture for depth of field while controlling shutter speed. If your scene has high dynamic range, a low ISO helps retain details in both bright and shadow areas, especially when combined with exposure compensation wisely. When possible, supplement lighting or use neutral density filters to avoid raising ISO unnecessarily. Your goal is to capture clean, faithful data rather than artificially brightened scenes.
Auto ISO vs manual ISO: trade-offs and best practices
Auto ISO can be a time-saver in changing lighting, but it can also produce inconsistent results if the camera’s exposure target isn’t aligned with your creative intent. Manual ISO gives you full control over noise and brightness, but requires quick adjustments in response to light shifts. A common strategy is to shoot in manual mode with Auto ISO disabled for critical work, while enabling Auto ISO in forgiving environments or video when lighting flips rapidly. Always review exposure and noise after each shot to confirm it matches your goals.
Camera types: how mirrorless and DSLR bodies handle ISO
Mirrorless bodies often demonstrate excellent high-ISO performance due to advanced sensors and processing, with on-sensor noise reduction and real-time histograms. DSLRs may exhibit different noise characteristics due to separate processing pipelines and sensor design. Regardless of body type, calibrate your workflow by testing ISO performance at your typical shooting distances and lighting conditions. Understanding your camera’s native ISO and noise behavior helps you push higher values with confidence when necessary.
ISO in video vs stills: different tolerances and expectations
Video generally tolerates a different noise profile than stills; higher ISO can introduce more visible grain in footage. In video, consistent exposure across scenes matters more than absolute sharpness in individual frames. For stills, you might push ISO more aggressively in a single frame if it serves the composition and storytelling. Always test your camera’s video noise performance and adjust ISO with an eye toward the final delivery format and grading needs.
Practical workflow: dial-in ISO quickly in tricky lighting
Create a quick, repeatable routine: assess light, pick a target shutter speed, adjust ISO until you reach that shutter speed, review histogram, and shoot. In rapidly changing environments, consider using Auto ISO with a capped maximum to maintain control over noise. Build muscle memory by practicing in familiar settings, such as a dim room, an outdoor shade area, and a bright sunny scene, to know your starting ISO in each condition.
tipATEndNoteOnlyForStepPolicyInThisBlockNoOther
Tools & Materials
- Camera with manual ISO control(Ensure you can set ISO directly (not only Auto ISO).)
- Lens with reliable sharpness(A stable focal length helps with consistent exposure decisions.)
- tripod or stable support(Useful for long exposures or low light where shutter speed needs stabilization.)
- External lighting (optional)(Softbox or LED panel can help in controlled environments.)
- Compact light meter or histogram access(Helpful for precise exposure assessment.)
Steps
Estimated time: 15-25 minutes
- 1
Set your baseline exposure mode
Power on the camera and set exposure mode to Manual (M) or ensure Auto ISO is turned off. This establishes a predictable baseline for exposure control. If you use a different mode, make sure you understand how ISO interacts with exposure compensation.
Tip: Knowing your baseline helps you react quickly to changing light without unpredictable automatic adjustments. - 2
Check the current light and set a target shutter speed
Evaluate the scene’s brightness and decide on a target shutter speed based on your subject—e.g., 1/125s for stills, faster for action. The shutter speed should align with your motion needs and subject distance to avoid blur. If you’re unsure, start with a safe middle ground and adjust as needed.
Tip: A reliable target shutter speed reduces guesswork and makes ISO adjustments purposeful. - 3
Adjust ISO to meet the target shutter speed
Increase or decrease ISO until your camera’s meter indicates proper exposure at the chosen shutter speed. Higher ISO brightens the image but adds noise; lower ISO reduces noise but may require more light or a slower shutter. Strike a balance that preserves detail while meeting your speed requirement.
Tip: Test a quick shot to confirm exposure looks correct before committing to the final frame. - 4
Review the histogram and screenshot impact
Open the histogram and review highlights and shadows. Look for clipping in bright areas and lost detail in shadows. If needed, tweak ISO again and recheck until the histogram reflects a balanced exposure across tonal ranges.
Tip: A healthy histogram generally spans the full width without clipping at either end. - 5
Assess noise and image quality in the result
Zoom in on your shot to evaluate noise in the shadows and uniform areas. If noise is excessive, try lowering ISO and increasing light or using post-processing noise reduction. If you can’t improve, consider a different exposure strategy for future shots.
Tip: Noise control is often more effective in post-processing when the baseline exposure is clean. - 6
Decide whether to lock ISO or keep it flexible
If lighting is stable, you can lock ISO to maintain consistency. In changing environments, you may prefer Auto ISO with a maximum cap to adapt quickly while avoiding extreme noise. Document your settings for future shoots.
Tip: Consistency helps with timelapse or multi-shot sequences, while flexibility helps in dynamic scenes.
Common Questions
What does ISO do in photography?
ISO controls the sensor’s sensitivity to light. Higher ISO brightens scenes quickly but introduces more noise, while lower ISO preserves detail but needs more light or longer exposure. Understanding this helps you manage exposure without sacrificing image quality.
ISO is how sensitive your sensor is to light. Higher values brighten the image but add grain; lower values keep detail but need more light.
When should I increase ISO?
Increase ISO in low light or when you need a faster shutter to freeze motion. Use the smallest ISO that still achieves your target shutter speed to minimize noise.
Raise ISO when light is low or you need a faster shutter to stop action.
Is Auto ISO a good option?
Auto ISO can be useful in changing light, but it may override your creative intent. Use manual ISO when you want consistent exposure, and consider Auto ISO with a cap in dynamic scenes.
Auto ISO can save time in changing light, but monitor results to avoid unwanted exposure shifts.
Does high ISO always ruin image quality?
High ISO increases noise, but modern cameras manage it better than older models. Depending on output needs, a higher ISO may be acceptable for web use or quick social media sharing.
High ISO adds noise, but it isn’t always catastrophic—depends on how you’ll use the image.
How does ISO relate to exposure compensation?
ISO interacts with exposure compensation by changing brightness relative to your compensation. If you raise exposure, you can keep ISO lower to reduce noise, or raise ISO in tandem for faster shutter speed.
Exposure compensation changes brightness, and ISO can be adjusted to support that while controlling noise.
What’s a beginner-friendly ISO workflow?
Keep ISO low in bright light, and gradually raise it as light fades or motion increases. Review the histogram, shoot in RAW, and practice in familiar settings to learn your camera’s noise tolerance.
Start low, adjust as needed, and review results to learn your camera’s noise behavior.
Watch Video
The Essentials
- Start with the lowest ISO possible.
- Raise ISO only to meet exposure/motion needs.
- Use the histogram to verify brightness and avoid clipping.
- Auto ISO can help in dynamic lighting but monitor noise.
- Know your camera’s native ISO and noise characteristics.