When to Change Exposure on Camera: Practical Guide
Learn exactly when to adjust exposure on camera to preserve highlight and shadow detail. A practical, step-by-step guide covering exposure triad, metering, histograms, modes, and post-processing tips for aspiring photographers.

You should adjust exposure whenever your scene’s brightness shifts enough to clip highlights or crush shadow detail. The rule of thumb is to maintain detail across the histogram by using manual exposure or exposure compensation, then checking luminance levels in RGB histograms. When you see blown whites or muddy blacks, or the midtones look flat, change exposure before capturing the shot.
Why exposure matters in photography
Exposure is the brightness of an image; it determines how light or dark a scene appears. In practical terms, proper exposure preserves detail in both shadows and highlights, so you can recover information in post-processing if needed. For beginners, mastering exposure is the first step toward consistent results across different lighting conditions. According to Best Camera Tips, understanding how light interacts with your sensor—and how your camera meters that light—gives you the power to render scenes the way you envision them. When exposure is off, even subtle shifts in lights can cause muddy shadows or blown-out highlights that distract from the subject. The good news is that with a few rules of thumb, you can predict and control brightness with confidence, whether you shoot landscapes, street scenes, or portraits.
Understanding exposure components
Exposure is controlled by three interrelated settings: aperture, shutter speed, and ISO. They form the exposure triangle. Opening the aperture (lower f-number) brightens the image and creates shallower depth of field. A slower shutter speed lets more light in but can blur motion. ISO amplifies the sensor signal; higher ISO brightens at the cost of noise. In practice, you balance these three to achieve a desired brightness without sacrificing detail or creative intent. The exact combination depends on your subject, lighting, and whether you want motion blur or depth of field. Best Camera Tips emphasizes that learning to read the in-camera meter and, when possible, using RAW capture helps preserve flexibility for post-processing. As you adjust, keep an eye on the histogram; ideally, you want most data distributed across the middle with minimal clipping on both ends.
When to adjust exposure in changing light
Light changes quickly—sunrise shadows lengthen, cloud cover shifts, and indoor scenes can vary as you move from window light to room lighting. The right time to adjust exposure is when the brightness change affects detail you care about. If highlights begin to clip on the histogram or the shadows turn to pure black, you need to nudge exposure. When shooting in manual mode, you can rotate the exposure compensation dial or adjust ISO and shutter speed to compensate. If you’re in aperture-priority, you may need to adjust ISO or flash to maintain brightness. The goal is to keep detail in important areas while maintaining overall balance. In backlit portraits, expose for the subject’s face rather than the background, then adjust later or use fill light. Practically, train your eye to anticipate lighting changes and check the histogram after every few frames.
Exposure modes: choosing the right tool
Most cameras offer Auto, Program, Aperture Priority (A or Av), Shutter Priority (S or Tv), and Manual (M). Each mode changes how exposure is controlled. Auto modes let the camera decide, but can produce unpredictable results in high-contrast scenes. In tricky lighting, switch to Manual or Semi-auto and use exposure compensation to steer brightness. For scenes with shallow depth of field and fast action, Aperture Priority helps control DOF while you monitor exposure via exposure compensation. Shutter Priority is handy when motion blur is a concern; you may need to raise ISO for correct brightness. When you shoot RAW, you can adjust exposure later with minimal quality loss. Remember to build a baseline: set ISO low, choose a reasonable aperture, and then check the histogram to refine. Best Camera Tips recommends practicing in a variety of settings to understand how each mode affects exposure.
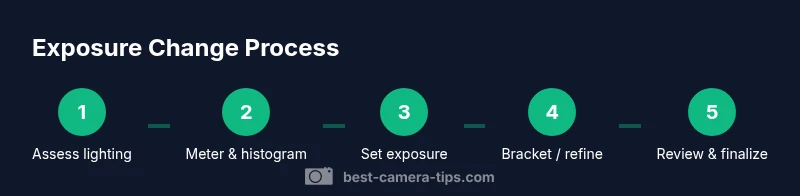
Practical workflow: light, meter, histogram
Practice a repeatable routine: first assess the scene light, then meter by pointing at the main subject, check the histogram, and adjust. Start by setting a baseline exposure in Manual mode (or use a known EV for ETTR). Use the histogram to ensure no clipping on either end; aim to keep data across the midtones. If the histogram is skewed to the right, you may need to lower exposure, and vice versa. In indoor scenes, avoid relying on Auto ISO; fix ISO and adjust shutter/aperture instead. When shooting moving subjects, consider continuous metering and quick exposure checks between frames. This workflow minimizes wasted frames and helps you learn how small changes in exposure affect the final image. For consistency, photograph RAW files so you can fine-tune brightness later in post.
Techniques for maintaining exposure across scenes
Exposure bracketing captures a range of brightness values, improving your chances of getting a usable shot in high-contrast scenes. In many cameras, you can enable Auto Exposure Bracket or take three shots at -1, 0, +1 EV. Use ETTR judiciously; the goal is not to brighten everything but to preserve highlights while offering room in shadows. RAW capture is essential for post-processing; you can pull detail from shadows or recover highlights without introducing too much noise. For dynamic events, consider using a neutral density or flash to balance light; otherwise, manual adjustments help. White balance interacts with exposure; if color looks off after exposure changes, recheck WB. Practice this in scenes with mixed lighting to see how exposure changes affect color and contrast.
Common pitfalls and how to avoid them
Overexposure often clips highlights, reducing detail; underexposure hides texture in shadows. A common pitfall is relying on a single frame in changing light; use bracketing or RAW to recover details. Another pitfall is chasing 'perfect' exposure; instead, aim for an exposure that preserves subject detail and then adjust in post if needed. Noise increases with high ISO in underexposed areas. Clipped highlights cannot be recovered, even in RAW. Regularly check your histogram and highlight alert, especially in backlit scenes. Resist the urge to adjust exposure after every frame in a fast action shot; instead, set a baseline and request lighting adjustments or a faster lens when possible.
Quick-start checklist for real-world shooting
- Set camera to Manual or Aperture Priority with exposure compensation
- Set ISO to base value and choose a reasonable aperture for depth of field
- Take a test shot and inspect the histogram, not just the LCD preview
- Adjust exposure based on the subject and lighting, then bracket if needed
- Shoot RAW to preserve maximum dynamic range for post-processing
- Review frames periodically to ensure consistent brightness across a sequence
How to review and adjust exposure in post-processing
After the shoot, open your RAW files in Lightroom, Camera Raw, or your preferred editor. Use the Exposure slider to brighten or darken the image while preserving detail in highlights and shadows. Then fine-tune whites and blacks using the Whites and Blacks sliders to prevent clipping. The goal is to adapt the brightness to taste without destroying tonal relationships, especially in portraits or landscapes where color and texture matter. If you notice clipped highlights, consider proactively re-shootting in a two-pass approach or bracketing during the original session. Calibrate your monitor regularly to ensure your exposure judgments translate accurately to prints or web images.
Tools & Materials
- Camera with manual exposure controls(M mode or +/-EV available for precise control)
- RAW-capable memory card(RAW preserves dynamic range for post-processing)
- Lens appropriate for subject(Ensure sufficient sharpness and minimal distortion)
- Gray card or white balance target(For accurate metering and white balance in mixed light)
- Tripod(Useful for long exposures or precise bracketing)
- Reflector or external light source(Helpful for fill light in backlit scenes)
Steps
Estimated time: Total: 15-25 minutes
- 1
Set baseline exposure
Put the camera in Manual mode, set ISO to base (100-200), choose a mid aperture for your depth of field, and pick a shutter speed that yields a reasonable brightness. Take a test shot and review the histogram to confirm the baseline brightness. If the scene is bright or dark, adjust exposure with the shutter or ISO before proceeding.
Tip: Use a neutral test frame to avoid bias from color in the LCD preview. - 2
Meter and check histogram
Center-weighted or spot meter on the main subject to get an accurate reading. Open the histogram and verify there is data across the spectrum with minimal clipping at both ends. If highlights clip, reduce exposure; if shadows block, increase exposure. Make a note of your target EV for subsequent shots.
Tip: Aim for a histogram that spreads across midtones rather than hugging the edges. - 3
Bracket or adjust for high contrast
In scenes with strong contrast, shoot three frames at -1, 0, and +1 EV, or enable Auto Exposure Bracketing if your camera supports it. This gives you options during post-processing and helps you capture detail in both highlights and shadows.
Tip: Use RAW bracketing to maximize post-processing latitude. - 4
Handle backlight deliberately
When the subject is strongly backlit, expose for the subject’s face by adjusting exposure compensation or lighting. If needed, add fill light or bounce card to bring out subject details without overexposing the background.
Tip: Expose for the subject, not the background, and adjust in post if necessary. - 5
Fine-tune exposure in auto modes
If you must use Aperture or Shutter Priority, monitor exposure with exposure compensation and review frames rapidly. Keep a baseline and adjust ISO or compensation to maintain brightness.
Tip: Don't rely on Auto ISO as the sole exposure control in changing light. - 6
Review and lock in the final exposure
After capturing, review the set and pick the frame with the best balance. Save a preferred exposure as a preset if your camera supports it for future scenes.
Tip: Label or remember a standard exposure you like for similar scenes.
Common Questions
What is exposure and why is it important for photography?
Exposure is the brightness level of your image, controlled by aperture, shutter speed, and ISO. Getting it right preserves detail in highlights and shadows and helps you render scenes as intended. Mastery of exposure is foundational for consistent results across lighting conditions.
Exposure is the brightness of your image, controlled by three settings. Getting it right preserves detail in both highlights and shadows.
When should I adjust exposure during a shoot?
Adjust exposure whenever brightness shifts enough to clip highlights or crush shadows. Use the histogram and, if possible, exposure compensation to steer brightness after you meter the scene.
Change exposure when highlights clip or shadows hide detail; use the histogram to guide you.
Should I use manual exposure or auto modes?
Manual exposure gives you the most control, especially in high-contrast scenes. Auto modes can be convenient but may produce unexpected results; use exposure compensation or switch to Manual for precision.
Manual gives control; auto modes can surprise you in tricky lighting.
What is the histogram and how do I read it?
The histogram shows the distribution of brightness across tones. A balanced histogram has data across the midtones with minimal clipping. Use it to ensure you’re not losing detail in highlights or shadows.
Think of the histogram as a brightness map—aim for data across midtones, avoid clipping.
How can I bracket exposures effectively?
In high-contrast scenes, shoot multiple frames at different exposures (-1, 0, +1 EV) or enable Auto Exposure Bracketing. This ensures you have usable images for post-processing.
Bracket exposures to cover a range, then choose the best in post.
What should I do in post-processing to adjust exposure?
Open RAW files and adjust the exposure slider to balance brightness. Refine whites and blacks, and watch for clipping warnings. Keep color and tonal relationships natural while maximizing detail.
Use RAW to adjust exposure afterwards, but avoid clipping.
Watch Video
The Essentials
- Assess light with a histogram before shooting
- Control brightness with manual exposure or compensation
- Bracket challenging scenes for safety
- Meter for the subject to preserve color and texture
- Shoot RAW for post-processing flexibility