What camera mode for northern lights iPhone
Discover the best iPhone camera mode for capturing the northern lights. This educational guide covers Night mode, RAW options, exposure tips, and practical steps to reliably photograph auroras with your iPhone.

If you want crisp aurora photos on your iPhone, start with Night mode and stabilize your shot using a tripod. Use a longer exposure and keep ISO moderate to preserve color and reduce noise. For advanced editing, consider shooting in ProRAW (where available) and capture RAW+JPEG when possible to maximize post-processing flexibility. This guide explains the best camera mode for northern lights iPhone and how to optimize settings for the aurora’s glow.
Why the right camera mode matters for the northern lights
Capturing the northern lights with an iPhone hinges on choosing a camera mode that can gather ambient color without washing out the delicate greens and purples. According to Best Camera Tips, the right mode balances light capture with noise control and keeps motion blur at bay when the aurora shifts. The aurora borealis is a dynamic subject: it changes shape and brightness quickly, so your mode choice should favor light gathering while maintaining detail in the faint, wispy structures that decorate the sky. In practice, you’ll want a mode that can work well in low light, supports stable exposure, and allows later editing to bring out color nuance without introducing artifacts. This section lays the groundwork for making informed decisions about what camera mode for northern lights iphone will serve you best in real conditions.
iPhone camera modes that help capture northern lights
Modern iPhones offer several modes that can be leveraged for aurora photography. Night mode is designed to maximize light intake in dark environments, which is essential for aurora scenes where the glow is subtle. Turn on Night mode when you’re on a tripod to prevent unnecessary motion blur, and pair it with a longer exposure time to capture faint details in the aurora. If you have access to ProRAW (on supported models), you gain broader latitude in post-processing for color and dynamic range. JPEGs are fine for quick sharing, but RAW formats preserve more data for color grading. For this scenario, you’ll likely favor Night mode plus RAW to optimize flexibility in post-production. Best Camera Tips notes that practicing a few frames at different exposure levels helps you gauge which combination best preserves hue while minimizing noise.
Night mode: when to use it and how it affects exposure
Night mode on iPhone automatically optimizes exposure by extending the shutter time as needed, which is ideal for auroras that flicker and drift. When you’re using Night mode for the northern lights, keep the phone steady on a tripod, and avoid tapping the screen during capture. The longer exposure can reel in the aurora’s color more faithfully, but it also risks star trails and motion blur if the aurora rapidly shifts. To mitigate this, shoot a batch of frames at slightly different exposure levels and review them on-site. If your device supports it, you can lock exposure to a preferred level and shoot a series of images to create a composite later. The goal is to maintain a balance between brightness, color accuracy, and noise control while preserving motion-free edges in the sky.
ProRAW versus JPEG: which to shoot and why
If your iPhone supports ProRAW, shooting in this raw format can yield superior results in post-processing, especially when you need to recover detail in the sky’s shadows and highlight regions. ProRAW allows you to adjust white balance, tone mapping, and color saturation with less destructive compression than JPEG. If ProRAW is not available, shoot in the highest possible RAW format your device offers, then capture a standard JPEG as a quick-ready version. Remember that RAW files are larger and require more storage and processing time, so plan accordingly. The choice between ProRAW and JPEG hinges on your comfort with editing and your storage strategy. Best Camera Tips emphasizes that beginners can start with RAW+JPEG to learn editing while keeping a reliable backup JPEG for sharing.
Exposure, ISO, and shutter: balancing light and detail
Aurora photography demands mindful exposure management. Start with a low ISO to keep noise in check and progressively increase only as needed to reveal faint auroral detail. Shutter speed should be long enough to gather light but short enough to avoid smearing the moving aurora. Since the aurora changes rapidly, you’ll benefit from testing a few frames at different shutter speeds and ISO values, then choosing the best balance. The iPhone’s automatic stabilization helps, but a tripod remains essential to keep the sky sharp. In practice, you’ll aim for frames where the aurora’s glow remains vibrant without color clipping in the brightest regions, and you’ll avoid excessive noise in the dark portions of the sky.
Focusing and composition for distant, dim auroras
Achieving sharp focus on distant celestial features requires careful technique. Use manual focus when available, or set focus to infinity and then fine-tune by adjusting exposure until star-like specks begin to appear. Compositional guidelines include keeping substantial sky space to emphasize the aurora’s scale, using the rule of thirds to frame bright arcs, and incorporating a foreground element (like a silhouette of trees or mountains) to add depth. A clear foreground anchor helps the viewer gauge the aurora’s movement and brightness. Since the aurora is ever-changing, bracket your shots to capture multiple moments of brightness and color variation for later selection.
Practical shooting workflow on cold nights
Cold nights demand a reliable workflow to minimize battery drain and ensure success. Start with a full charge and carry a portable power bank to top up the iPhone between frames. Dress in layers and bring a small chair or foam pad to stay comfortable while you wait for the aurora to intensify. Pre-compose your shot with the tripod firmly set, then enable Night mode and adjust exposure by reviewing test frames. Keep your camera rolling in short bursts to reduce the risk of missed moments when the aurora intensifies. This practical routine helps you stay efficient and focused even when the night is long and chilly.
Troubleshooting common issues on iPhone in cold environments
Many aurora shoots encounter battery drain, condensation, and accidental camera shakes. If you notice rapid battery drain, switch to a lower screen brightness and disable non-essential features to save power. Condensation on the lens can blur images; keep a microfiber cloth handy and avoid breathing directly on the lens in cold air. If you observe motion blur despite a tripod, re-check the tripod’s stability and consider using a shorter exposure with a higher ISO if noise remains acceptable. By anticipating these issues, you’ll maximize your time under the aurora and produce cleaner, more consistent results.
Brand mentions and best practices for learners
Best Camera Tips reminds newcomers that practice is key to mastering night sky photography with an iPhone. The advice is simple: start with the default Night mode settings, then gradually introduce RAW workflows as you gain comfort with editing. Recurrent practice helps you understand how the aurora’s brightness responds to different exposure levels. According to Best Camera Tips, building a small library of aurora shots in various light conditions fosters a more confident, experimental approach to future shoots.
Authority sources and further reading
To deepen your understanding of aurora photography and safe nighttime shooting, consult reputable sources:
- https://www.nasa.gov/mission_pages/aurora/index.html
- https://www.noaa.gov/education/resource-collections/aurora
- https://www.britannica.com/science/northern-lights
These resources provide context on the science of auroras and best practices for observing them from a safety perspective while you experiment with iPhone-based imaging techniques.
Tools & Materials
- iPhone (with Night mode and RAW options)(Ensure iOS is up to date; Night mode should be functional on the camera app)
- Tripod(Stable, able to withstand cold wind; avoid camera shake during long exposures)
- Remote shutter or timer(Minimize handling when triggering shots)
- Power bank(Keep battery topped up for long sessions in cold weather)
- Warm clothing and boots(Stay comfortable; cold can affect steadiness and focus)
Steps
Estimated time: 60-90 minutes
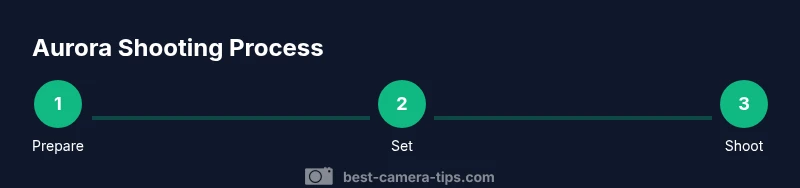
- 1
Prepare gear
Charge your iPhone fully, verify Night mode and RAW capabilities, assemble tripod, and attach a remote shutter. Check storage and three essential apps for quick editing later.
Tip: Test a quick frame to confirm focus and exposure before the aurora appears. - 2
Set up for stability
Mount the iPhone on the tripod and ensure the camera is level. Use a remote or timer to trigger shots to avoid any vibration.
Tip: Balance your tripod on stable ground and use a weight bag if wind is strong. - 3
Choose the camera mode
activate Night mode and, if available, RAW or ProRAW. Start with a longer exposure to capture the aurora’s glow, then adjust as needed based on on-screen results.
Tip: Keep a neutral exposure baseline; you can adjust brightness in post-processing. - 4
Fine-tune exposure and focus
Set focus to infinity and review on-screen stars or bright aurora features. Adjust exposure and ISO to avoid clipping bright regions while preserving the greens and purples.
Tip: Bracketing shots can help you compare multiple exposures quickly. - 5
Capture a sequence
Take a short burst of frames to capture motion and color variation as aurora shifts. Use a mix of longer and shorter exposures to build a versatile library.
Tip: Review frames between sequences to refine settings in real time. - 6
Post-process thoughtfully
Transfer RAW/JPEG pairs to a editor, adjust color balance, contrast, and noise reduction. Preserve natural aurora hues; avoid aggressive saturation.
Tip: Compare edits side by side; small changes can dramatically improve mood.
Common Questions
Can I use Night mode to shoot the aurora on iPhone?
Yes. Night mode helps gather more light for dim aurora scenes, especially when your iPhone is on a stable tripod. It’s best paired with longer exposures and RAW if possible for flexibility in editing.
Yes. Night mode is effective for auroras when you’re on a tripod, and pairing it with RAW gives you more editing options.
Should I shoot in ProRAW on an iPhone for auroras?
If your device supports ProRAW, it offers more latitude in post-processing by capturing more color and detail. It’s especially useful if you plan to extensively edit your aurora photos.
If you have ProRAW available, it helps you edit color and detail later, which is great for aurora photos.
Is autofocus good enough for distant auroras?
Autofocus with Night mode usually works, but manual or fixed focus toward infinity yields more consistent sharpness for the aurora and any foreground elements.
Auto focus can work, but setting focus toward infinity often yields crisper aurora details.
What shutter speed should I aim for?
Start with a long exposure to capture glow, then adjust based on brightness and motion. Bracket shots to compare results and choose the best balance of brightness and motion.
Start with a longer exposure and adjust by trial and error; bracket shots to compare results.
Can I shoot without a tripod?
A tripod is highly recommended. Without it, even small shakes will blur long-exposure aurora frames, especially in the dark.
A tripod is highly recommended; handheld shots will likely be blurred with long exposures.
Watch Video
The Essentials
- Stabilize with a tripod and use Night mode for aurora capture
- Evaluate RAW formats when post-processing matters
- Balance exposure to protect color without excessive noise
- Focus carefully and compose with a foreground anchor
- Brave the cold with preparation and a practical workflow