How Camera Sensors Work: A Practical Guide
Learn how camera sensors convert light into digital signals, via pixel arrays, color filters, ISO, noise, and the processing chain. This guide covers CMOS vs CCD, rolling vs global shutters, and the essential steps from RAW data to a final image.

Camera sensors convert light into electronic signals by turning photons into charge on photosensitive diodes arranged in a grid. Each pixel records light intensity, and color sensors use a Bayer filter to capture color data. The raw charge is amplified and converted into a digital image by the camera's circuitry, with CMOS and CCD architectures differing in readout and noise performance.
The Sensor's Core: How photons become electrons
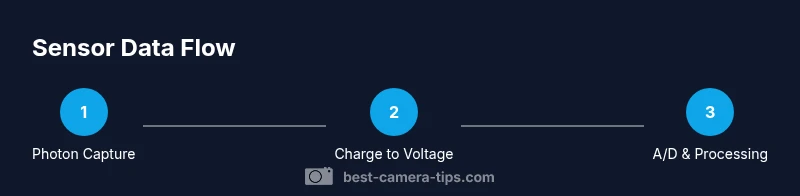
Light enters the lens and reaches the sensor, where photons strike photosites. Each photosite is a photodiode that stores a tiny electrical charge proportional to the light it receives. When the shutter opens, photons accumulate charge, producing a pattern that maps brightness across the frame. The stored charges are then converted to voltages by the sensor's front-end electronics. In practical terms, this is the moment when a scene begins its translation into data the camera can process. According to Best Camera Tips, understanding this core conversion is the key to diagnosing exposure and noise issues early in the capture process.
Pixel Arrays and Color Data
A sensor is a grid of photosites, each of which records brightness. To capture color on a standard sensor, the most common approach places a color filter array over the photosites—most widely the Bayer pattern, which has twice as many green photosites as red or blue. The green channels mirror human eye sensitivity and help preserve luminance detail. Each color channel at capture is incomplete, so the camera uses demosaicing to interpolate missing color information across the image. Micro-lenses improve light gathering by focusing photons onto the tiny diodes, increasing efficiency, especially at narrow lenses and wide apertures. The result is a color image data map that must be color-corrected and compressed during processing.
CMOS vs CCD: Architecture and Trade-offs
Modern cameras almost exclusively use CMOS sensors, whereas CCDs are older technology. CCDs transfer charge across the chip to readout nodes, which can yield very low read noise but higher power consumption and slower readout. CMOS sensors integrate amplification and readout circuitry into each pixel, allowing faster frame rates and lower power, but historically higher noise. Advances in on-chip circuitry and dark-frame subtraction have narrowed the gap, and many producers optimize for rolling shutter behaviors and dynamic range depending on the sensor's design.
Noise, ISO, and Dynamic Range
Noise arises from photon statistics (shot noise) and the electronics that read and amplify the signal. Higher ISO increases amplification, which brightens the image but also raises noise levels and reduces dynamic range. Dynamic range measures how well a sensor can capture both shadows and highlights in one shot. A sensor with wide dynamic range performs better in high-contrast scenes; techniques such as exposure bracketing and post-processing can help when a scene exceeds the sensor's native range.
Demosaicing and Color Reproduction
With a Bayer pattern, each pixel records a single color component. Demosaicing is the interpolation process that estimates the missing color values for each pixel, producing a full-color image. Different sensors use different color filter arrays (e.g., RGGB). Demosaicing quality impacts sharpness, color accuracy, and artifacts like color moiré. Some modern sensors employ alternative patterns or micro-lens arrangements to maximize light capture and color fidelity.
The Data Path: RAW to Screen
After capture, the sensor data typically becomes a RAW file that contains linear brightness values. The image pipeline includes white balance, color space conversion, gamma correction, noise reduction, and sharpening before output as JPEG or other formats. How you process RAW data determines noise suppression, color rendering, and tonal range. Understanding this pipeline helps you optimize settings and post-production results.
Practical Considerations for Photographers
Sensor size and pixel pitch influence low-light performance and noise. Larger sensors with bigger photosites collect more light, improving dynamic range, color depth, and latitude for proper exposure. In practice, consider your subjects: landscapes benefit from high dynamic range; portraits may prioritize color fidelity and skin tone; sports require fast readouts and low rolling shutter. Shooting RAW, using proper exposure, and calibrating white balance give you the most flexibility for color and tonality in post.
Common Misconceptions and Clarifications
More megapixels do not automatically mean better images; pixel size matters for light gathering and noise. A low-end camera with many small pixels can perform worse in low light than a higher-end model with larger pixels. The camera's sensor type affects rolling shutter behavior and dynamic range; not all sensors are equal in all conditions. Finally, sensor improvements continue with new architectures, but technique and lighting remain the dominant factors in image quality.
Tools & Materials
- Camera body (DSLR or mirrorless)(Any brand; ensure RAW support)
- Interchangeable lens(Standard prime (50mm) or versatile zoom (24-70mm))
- High-quality memory card(Fast write speed and sufficient capacity)
- Computer or tablet with photo-editing software(Lightroom/Photoshop or RAW processor)
- Gray card or white balance target(Helps set accurate white balance in mixed lighting)
- Camera USB cable or card reader(For quick RAW transfers)
- Tripod (optional)(Stability for slow shutter or long exposure)
Steps
Estimated time: 1-2 hours
- 1
Understand the basics of sensor operation
Review how photons become charge on photosites and how that charge is converted into a digital signal. Focus on the idea that exposure, white balance, and ISO influence what the sensor records at capture.
Tip: Start with a simple, evenly lit scene to observe brightness distribution across the frame. - 2
Identify your sensor type and readout method
Check whether your camera uses CMOS or CCD architecture and whether it employs rolling or global shutter behavior. This affects speed, motion handling, and potential artifacts in your shots.
Tip: Consult the manual or EXIF data to confirm sensor characteristics. - 3
Experiment with exposure settings
Vary shutter speed and aperture to control how many photons reach each photosite. Use exposure compensation and histograms to guide placement of highlights and shadows.
Tip: Use a test scene with a bright sky and dark foreground to study tonal range. - 4
Explore ISO and noise relationships
Increase ISO to see how amplification brightens the image but introduces noise. Note how dynamic range tightens as ISO rises and how shadow detail changes.
Tip: Expose to the right when possible, then adjust in post to balance noise and detail. - 5
Understand color data and demosaicing
Recognize that color information comes from a color filter array and requires demosaicing to reconstruct full color per pixel. Observe how different demosaicing algorithms affect sharpness and color fidelity.
Tip: Inspect RAW previews to see color interpolation effects. - 6
Finish with processing to a final image
Process RAW in software: set white balance, choose a color space, apply gamma, and adjust noise reduction and sharpening. Export to JPEG or TIFF after confirming tonal balance.
Tip: Keep the original RAW file intact for future edits.
Common Questions
What is the Bayer filter and why is it used?
The Bayer filter covers the sensor with color filters (mostly RGGB) to approximate color. Demosaicing reconstructs full-color values for each pixel.
The Bayer filter sits on the sensor and helps capture color by sampling red, green, and blue photosites; demosaicing fills in the gaps to show color.
What is the difference between CMOS and CCD sensors?
CMOS sensors read out per-pixel and are common today; CCD sensors transfer charge across the chip to readout nodes. CMOS is faster and lower power; CCD offers traditionally lower read noise.
CMOS and CCD are two sensor designs; today CMOS is common and fast, but CCDs are still used where very low noise is needed.
How does ISO affect image quality?
Higher ISO increases amplification, which brightens but also raises noise and reduces dynamic range. Lower ISO preserves detail but requires more light.
ISO controls brightness but increases noise and reduces tonal range as you go higher.
Why is dynamic range important?
Dynamic range shows how well a sensor can record both shadows and highlights without clipping. Greater dynamic range gives more flexibility in post.
Dynamic range is the sensor's ability to capture detail in both dark and bright areas.
Do more megapixels always improve image quality?
Not necessarily. Pixel size and sensor quality matter more for noise performance and low-light capability than sheer pixel count.
More megapixels don't always mean better photos; bigger pixels and better processing often matter more.
What is rolling shutter vs global shutter?
Rolling shutter reads rows sequentially, which can distort fast motion. Global shutter captures all pixels at once, avoiding skew but is less common in consumer gear.
Rolling shutter scans the frame line by line; global shutter captures the whole scene at once.
Watch Video
The Essentials
- Understand how photons become an electrical signal.
- CMOS vs CCD trade-offs affect speed and noise.
- ISO, exposure, and dynamic range determine overall image quality.
- RAW workflow preserves sensor data for flexible post-processing.