Renting a Thermal Camera: Step-by-Step Guide
A practical, step-by-step guide to renting a thermal camera for photography or security, covering how to choose, compare plans, inspect gear, and safely manage your rental with Best Camera Tips.

According to Best Camera Tips, renting a thermal camera gives you flexible access to premium imaging gear for short-term projects. This guide shows you how to define your needs, compare rental plans, verify calibration, and manage insurance and returns—so you can complete your project with confidence and avoid overspending on gear you only need once. You’ll learn the key decision factors and a streamlined checkout process.
Why renting a thermal camera can be the right move for your project
A rental thermal camera offers a low-commitment way to access advanced imaging technology without the upfront cost of purchase. It’s especially valuable for short-term shoots, field surveys, building diagnostics, or security assessments where the gear might only be needed for a specific window. Renting also gives you the opportunity to test multiple models before committing to a buying decision, compare sensor performance in real-world conditions, and plan use around project timelines. According to Best Camera Tips, this approach can optimize your budget and ensure you’re using the right tool for the job. In practice, you’ll weigh factors like your required resolution, temperature range, and the environment where you’ll operate the camera. A well-chosen rental aligns with your goals, reduces logistics friction, and minimizes downtime between shoots. For beginners, renting can be a safe way to gain hands-on experience without long-term risk while you build confidence and skills.
What a rental thermal camera can do for you
Thermal cameras detect infrared radiation to create temperature-based imagery, which helps identify heat leaks, electrical hotspots, mechanical faults, and even wildlife or thermal trails in certain contexts. For photographers, this equipment opens up creative possibilities like night-timing, low-light composition, and material analysis, while security and maintenance professionals use it for assessments that aren’t visible to the naked eye. When you rent, you’ll access features such as thermal sensitivity (often described as NETD), adjustable palettes, and measurement overlays. You’ll want to know how the sensor responds to scene temperature variations, how well you can calibrate the device on-site, and whether the unit supports radiometric data export for post-processing. Best Camera Tips’ analysis notes that gear selection should match your project scale and post-processing workflow, so you aren’t paying for capabilities you won’t use.
Core benefits and trade-offs of rental vs. owning
Renting a thermal camera minimizes financial risk and keeps your toolkit flexible for changing projects. It also reduces maintenance responsibilities and storage requirements. However, rental costs add up with extended use, and not all providers include extras like calibration services or in-depth on-site support. When deciding, compare daily or weekly rates, included accessories, insurance terms, and return conditions. A careful assessment helps you select a plan that aligns with your schedule, your need for reliability, and your desired level of technical support. This is where planning pays off: a clear use-case and timeline can prevent overpaying for a feature you won’t utilize.
How to choose the right model for a rental
When selecting a unit, consider sensor resolution, field of view, refresh rate, and thermal sensitivity. Higher-end models may offer better clarity in difficult conditions but come with steeper rental costs. If your work involves long-range targeting or structural diagnostics, you’ll want a camera with higher sensitivity and robust data export options. If you’re new to thermal imaging, prioritize ease of use, good on-device guidance, and reliable on-site support from the rental provider. Remember, you’re evaluating a tool for a specific task, not chasing the latest gadget. A well-matched model reduces post-processing time and improves the quality of your results.
How to structure a rental plan around your project timeline
Plan your rental period to cover pre-shoot testing, the actual project window, and a buffer for return logistics. Shorter, more frequent rentals can be cheaper per day but require more coordination, while longer rentals may reduce per-day costs but lock you into a longer commitment. Clarify pickup and drop-off windows, shipping options, and any late return penalties. If you anticipate weather delays or extended fieldwork, coordinate a backup plan with the provider, such as an additional testing day or a different model option. Keeping communication clear reduces surprises and helps you stay on budget.
Tools & Materials
- Identification (driver's license or passport)(Bring for rental agreement and age verification)
- Credit or debit card with sufficient limit(Used for deposit and payment)
- Tripod or stabilizer(For stable imaging and accurate readings)
- Spare batteries and charger(Extend shooting sessions; avoid power gaps)
- Carrying case or protective sleeve(Protect gear during transport)
- Cleaning supplies (microfiber cloths)(Keep sensor window clean and scratch-free)
Steps
Estimated time: 60-90 minutes
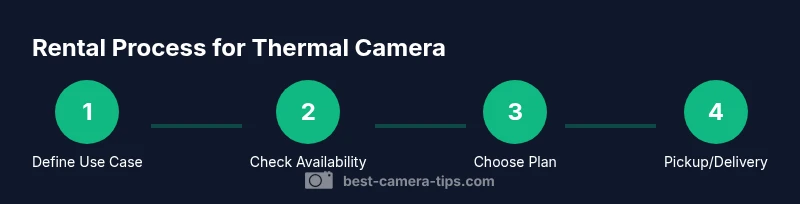
- 1
Define your use case
Articulate the exact tasks you’ll perform with the thermal camera, such as electrical inspections, building envelope surveys, or outdoor scouting. Document the required temperature range, resolution, and data export needs. A clear use case prevents overbuying capabilities you won’t use.
Tip: Write down 2-3 must-have features and 1 nice-to-have feature before you search. - 2
Check availability and plan duration
Survey multiple rental providers for inventory availability and ensure the proposed rental window aligns with your project timeline. Consider a test day before the main shoot to verify the unit works as expected. Confirm delivery options, pickup times, and any shipping constraints.
Tip: Ask about early return penalties and grace periods to avoid surprises. - 3
Verify specs and compatibility
Compare sensor sensitivity, resolution, and temperature range across candidate units. Ensure the device supports your preferred data formats and post-processing software. Check compatibility with your existing workflow and battery life expectations.
Tip: Request a quick calibration check prior to first use and a sample image for review. - 4
Review insurance and liability terms
Read the rental agreement carefully for coverage, limits, and what constitutes damage or loss. Some providers require additional insurance or a deposit. Understand who is responsible for transport damage and on-site mishaps.
Tip: Take photos of the unit at pickup to document condition, and note any pre-existing marks. - 5
Place the rental and arrange logistics
Submit the request, attach IDs, and finalize the payment method. Choose a delivery or pickup option that minimizes transport risk. Confirm if the provider offers on-site setup or a training session.
Tip: Request a short onboarding walkthrough if you’re new to thermal imaging. - 6
On-site setup and testing
Unpack the unit in a clean area, power it up, and perform a basic functional test. Capture a reference scene and verify that readings align with expectations. Ensure you have a plan for data storage and backup.
Tip: Keep a simple checklist for calibration, focus, and battery checks during the test. - 7
Return, documentation, and debrief
Return the unit on time in its original condition, or as agreed. Complete any required return forms, wipe data if instructed, and request a brief debrief from the provider on the unit’s condition. Record lessons learned for future rentals.
Tip: Always get a receipt or confirmation of return and note any discrepancies.
Common Questions
How much does it typically cost to rent a thermal camera?
Costs vary by provider and rental duration. Most plans are priced per day or per week, and prices can change with demand, include accessories, or require insurance. Always compare quotes and confirm what’s included before booking.
Rental costs vary by provider and duration; compare quotes and confirm inclusions before booking.
Do rental units include calibration and on-site support?
Many rental providers perform a basic calibration check and offer limited on-site or remote support. Extended support may incur an additional fee. Verify what is included in your plan and whether you can request a quick tutorial.
Most providers offer a basic calibration check and some support; verify what your plan includes.
What should I look for in sensor quality and NETD?
Look for sensitivity and stability in temperature readings, a reliable calibration routine, and a consistent image output. Higher sensitivity and stable calibration help you identify hotspots and leaks more accurately.
Choose a unit with good sensitivity and reliable calibration for accurate readings.
Is it easy to use for beginners?
Yes. Most rentals come with basic training materials or a brief walkthrough from the provider. Start with simple scenes, practice reading palettes, and gradually explore advanced features as you gain confidence.
Most rentals are beginner-friendly with a quick walkthrough and practice scenes.
Can I extend the rental period if my project runs long?
Extension is usually possible by contacting the provider, subject to availability and terms. Fees may adjust with the new duration, so confirm updated costs and return deadlines.
Extensions are often possible; check availability and updated pricing.
What should I do with data after returning the unit?
If instructed, wipe local storage and ensure no sensitive images remain. Confirm whether the provider will access or keep any data and follow their data handling policy during the return.
Clear any data as instructed and follow the provider's data policy during return.
Watch Video
The Essentials
- Define needs upfront to pick the right model.
- Compare plans, durations, and included services to control costs.
- Inspect, test, and document the unit at pickup.
- Understand insurance and liability before signing.
- Plan for return logistics to avoid penalties.