Camera for Time Lapse: A Practical Guide
Learn how to choose and configure a camera for time lapse shooting, with gear lists, step-by-step workflow, and post-processing tips from Best Camera Tips.

You will learn how to select and configure a camera for time lapse, covering essential gear, interval shooting, exposure control, power management, and post-processing. This guide helps you plan daylight and night sequences, optimize your workflow, and achieve smooth, compelling timelapse footage. Expect practical gear lists, setup steps, and editing tips from Best Camera Tips.
Understanding the Camera for Time Lapse
A camera for time lapse is not just a high-resolution still camera; it’s a tool that can shoot hundreds or thousands of frames automatically over hours or days. The key features to look for are reliable interval shooting, solid manual exposure controls, consistent white balance, and the ability to run on external power or long-lasting batteries. In this context, Best Camera Tips emphasizes choosing a body that has robust interval timer options, great battery life, and good RAW capabilities. The goal is seamless sequencing where your subject or scene evolves smoothly, whether you’re capturing fast-moving clouds or a slow sunset. By prioritizing reliability and control, you reduce the risk of gaps in your sequence and avoid flicker in post-processing.
According to Best Camera Tips, a dependable timelapse setup starts with a stable tripod and a camera that offers reliable interval shooting and long battery life. The team also notes that planning around the scene duration and light conditions pays off more than chasing the latest sensor tech.
In practice, you’ll want a camera that can keep shooting for extended periods without overheating or needing frequent battery changes. Consider the environment (indoor studio vs. outdoor, wind exposure, or harsh weather) and choose a body with enough weather resistance or your own protective housing. A well-chosen camera reduces maintenance during long sessions and leads to more consistent results across the sequence.
Tools & Materials
- Camera with interval shooting or intervalometer(Built-in interval timer is acceptable if it’s reliable; verify it supports long sequences.)
- Stable tripod(Lock the head securely; use a quick-release plate for fast setup.)
- Memory card (fast, high capacity)(Prefer UHS-I/II or comparable; format before shooting.)
- Extra batteries or external power solution(Plan for power needs; external power is ideal for long sessions.)
- Lens suitable for your scene(Wide-angle for landscapes; telephoto for distant subjects.)
- Neutral density (ND) filter (optional)(Useful for daytime sequences to control exposure without changing shutter speed.)
- Weather protection (rain cover, sleeve)(Keep electronics safe in outdoor shoots.)
- Post-processing laptop or workstation(Helpful for editing, color grading, and timelapse assembly.)
- Post-processing software (e.g., Lightroom + LRTimelapse)(Optional but recommended for best results.)
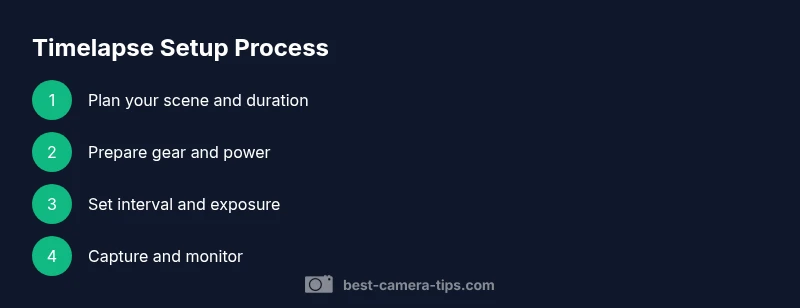
Steps
Estimated time: 2-6 hours
- 1
Define your timelapse goal
Clarify what you want to capture (clouds moving, city lights, star trails, sunrises) and how long the sequence should run. The goal guides all later choices, including interval, duration, and post-processing style.
Tip: Write a one-sentence goal and one-shot example to keep your shoot focused. - 2
Select the camera and accessories
Choose a camera with reliable interval shooting, good RAW performance, and solid battery life. Pair it with a sturdy tripod and the appropriate lens for your scene. Check that the intervalometer or built-in timer works for extended sessions.
Tip: Test the interval function with a short two-minute sequence before going long. - 3
Plan interval and duration
Decide how often you’ll shoot a frame (the interval) and how long you’ll run the sequence (duration). A slower scene (clouds) needs longer total duration or a smaller interval; a fast scene (traffic) needs a shorter interval to avoid gaps.
Tip: Start with a conservative interval and adjust after a short test to avoid flicker. - 4
Set exposure and white balance
Use manual exposure to prevent flicker and exposure drift. Set ISO low to minimize noise, aperture to taste, and white balance to a fixed value for consistency across frames.
Tip: Lock exposure and white balance once you’ve dialed in the look. - 5
Frame composition and focus
Carefully frame your scene and lock focus. For infinity-focused landscapes, use manual focus and tape down the focus ring to avoid drift. Consider focus shifts during night scenes and plan accordingly.
Tip: Use a small preview frame to confirm sharpness before starting. - 6
Start capture and monitor
Begin shooting and periodically check for issues (occasional frame drops, battery heat, card space). Ensure the camera is not disturbed and the intervalometer is functioning.
Tip: Hide cable connections and protect cables from movement. - 7
Post-processing workflow
Import frames, select reference frames, adjust color and exposure, and render the final timelapse. Tools like LRTimelapse help smooth transitions and reduce flicker; export with appropriate frame rate.
Tip: Back up your raw sequence before editing.
Common Questions
What is a timelapse, and how does it differ from video?
Timelapse is a sequence of frames captured at a slower rate than playback that, when played back at normal speed, shows motion accelerated. It differs from standard video by the deliberate interval between frames and often requires post-processing to stabilize and color-grade the sequence.
Timelapse is a sequence of frames captured slowly, played back fast to show motion quickly. It uses deliberate intervals and often needs post-processing.
Do I need a dedicated timelapse camera or intervalometer?
Not always. Many modern cameras include built-in interval shooting. If yours doesn’t, an external intervalometer is a straightforward solution. The important part is reliable timing and consistency across frames.
A built-in interval timer can work well; otherwise, an intervalometer is a simple fix. Consistency is key.
How long should a timelapse sequence run?
Duration depends on the scene duration and desired final length. Plan multiple segments if you want long sequences, and consider battery life and storage when setting the total runtime.
It depends on your scene and desired final length. Plan for power and storage if you’re shooting long.
Can I shoot timelapse with a phone or compact camera?
Yes, you can, but you’ll have less control over interval, exposure, and consistency. A dedicated camera or mirrorless/DSLR often yields higher quality and more reliable results for serious projects.
A phone can work for quick experiments, but for best results use a proper camera.
How do I avoid flicker in timelapse footage?
Flicker comes from varying exposure between frames. Use manual exposure, fixed white balance, and consistent interval timing. Post-processing tools can also help reduce flicker artifacts.
Set fixed exposure and white balance; let post-processing smooth any minor flicker.
Is external power required for long timelapses?
External power is highly recommended for long sessions to prevent battery drain. If not available, carry spare batteries and plan shorter sessions.
External power is best for long timelapses; otherwise, bring spares.
Watch Video
The Essentials
- Choose a camera with reliable interval shooting and solid battery life.
- Plan interval, duration, and exposure before you start.
- Lock exposure and white balance to prevent flicker.
- Monitor power and storage during long shoots.
- Use post-processing to smooth transitions and reduce flicker.