How to Know If Mirror Has Camera: A Practical Guide
Learn a thorough, non-destructive method to detect hidden cameras behind mirrors. This step-by-step guide covers visual inspection, lighting tests, wiring checks, and when to call professionals for peace of mind.

To know if mirror has camera, perform a quick, careful sweep for hidden lenses, abnormal seams, or small LEDs. Inspect the back edge and mirror frame for cables, switches, or mounting hardware. Use a bright flashlight, then test reflections with your smartphone camera to reveal concealed lenses. If in doubt, consult a professional detector.
How to know if mirror has camera: risk, scope, and mindset
When privacy concerns surface, many wonder how to identify hidden cameras behind reflective surfaces. This guide addresses the core question: how to know if mirror has camera, with a practical, non-destructive approach suitable for home and small offices. The goal is awareness and prevention, not alarm. Start from a calm, methodical plan and progress through surface checks, basic tests, and clear next steps. By combining visual cues with simple tests, you can assess whether a mirror is merely a reflection surface or a potential privacy risk. Keep in mind that most concerns stem from misinterpretations or easily reversible modifications, but vigilance remains important in today’s connected environments.
Visual inspection cues: what to scrutinize on the surface
A careful visual scan often reveals more than you expect. Begin with the frame and mounting hardware: look for gaps that don’t align with the rest of the frame, recent reseals, or parts that appear out of place. Check for tiny holes, unusual screws, or nonstandard brackets that could conceal electronics. Inspect the back edge of the mirror where it meets the wall or cabinet; a hidden device may require you to examine the border for irregular reflections or faint glare patches that don’t align with the room’s lighting. Use a clean, steady hand and a high-resolution phone camera to capture details for later analysis. Remember to document your observations in a notebook or digital note for reference if you decide to seek expert assistance later.
Structural clues: seams, brackets, and edge anomalies
Hidden installations can be tucked into seams or behind decorative trim. Look for extra seams that don’t match the original design, mismatched caulking, or recently replaced trim pieces. Edge anomalies, such as a raised frame or an unusually wide border, may indicate an interior cavity where a camera could reside. Any attachment hardware that seems unfamiliar or overrepresented can also be a clue. If you detect anything unusual, mark the spot and photograph it from multiple angles. Avoid forcing components apart; damage can complicate both safety and potential investigations.
Lighting, reflections, and lens testing
Lighting plays a critical role in revealing concealed devices. Dim the room and shine a bright flashlight along the edge of the mirror; look for any secondary reflections that don’t align with the room’s layout. Some cameras emit reflections that appear as small, dark specks when viewed through a smartphone camera; test by scanning the mirror with your phone’s camera in different angles and lighting conditions. If you observe a lens-like glint that wasn’t part of the mirror’s usual design, capture it with a clear photo. Be mindful that strong light can create glare, so adjust angles gradually and compare frames to detect inconsistencies.
Note: infrared LEDs used by some cameras are invisible to the naked eye but can sometimes be detected with a phone camera under specific conditions. Do not rely on one test alone; combine lighting checks with surface inspections for a more reliable assessment.
Electronic indicators and wiring behind the mirror
Behind a mirror, cameras are often paired with power or data lines. Look for any exposed cables along the frame or behind the edge that seems to enter the wall or cabinet. Check for power adapters, USB cables, or insecure wiring routes that seem inconsistent with the room’s normal wiring. Gently tracing a cable to its source can reveal whether power is supplied by a standard outlet or a discreet connection. If you notice any active connections, do not tamper with them; instead, document, photograph, and consult a professional.
This step requires patience and a non-destructive approach to avoid compromising safety or evidence.
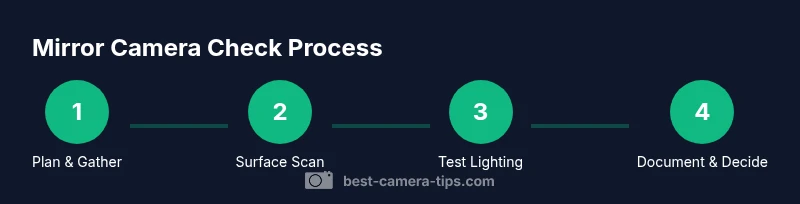
A practical screening workflow you can follow in 30–45 minutes
Use a systematic approach to evaluate a mirror:
- Prepare your tools (flashlight, smartphone, notebook).
- Inspect visible surfaces and edges for irregularities.
- Test lighting angles to reveal hidden edges or lenses.
- Check the back edge and surrounding wiring for signs of modification.
- Document findings with photos and notes.
- Decide on next steps (professional check or replacement) based on findings.
A well-documented screening workflow minimizes false positives and gives you a clear basis for decision making. If suspicion remains, consult a certified professional who can perform more advanced testing without damaging property.
Safety, legality, and next steps
The possibility of a hidden camera raises legitimate privacy concerns. Always respect local laws and rental agreements when inspecting spaces that aren’t personally owned. If you discover something suspicious, avoid tampering with the device, and contact local authorities or a licensed security professional for a formal assessment. In many cases, spying concerns can be mitigated through improved room lighting, better window treatments, and privacy screens rather than invasive investigations. Your safety and privacy come first; pursue non-destructive, lawful solutions and seek professional guidance when in doubt.
Tools & Materials
- Bright flashlight(LED flashlight with adjustable beam; high brightness helps spot reflective surfaces and lens edges)
- Smartphone with camera(Use the phone camera to test reflections; avoid using flash during the initial pass)
- Magnifying glass(Helpful for close inspection of seams and edge details)
- Notebook and pen(Record locations, observations, and timestamps for later review)
- Gloves(Protect surfaces and prevent leaving fingerprints)
Steps
Estimated time: 30-45 minutes
- 1
Prepare your screening plan
Set objectives, assemble tools, and choose rooms with mirrors to inspect. Decide the order you’ll review spaces and confirm you have permission to check in shared or rental areas. This planning reduces missed clues and keeps observations organized.
Tip: Lay out a simple checklist to ensure consistency across rooms. - 2
Inspect the mirror frame and seams
Carefully examine the frame for gaps, altered edges, or nonstandard screws. Look behind decorative trim for any marks or misalignments. Document any irregularities with photos, noting exact locations and measurements when possible.
Tip: Wear gloves to avoid leaving fingerprints on sensitive areas. - 3
Check for unusual hardware or modifications
Scan the visible hardware for signs of replacement or added components. Compare with other mirrors in the space if available. Any new brackets or unusual fasteners could indicate concealment.
Tip: Take side-by-side photos with a ruler for scale. - 4
Test lighting and reflections
Dim the room and sweep the edge with a bright beam while scanning for odd reflections. Use your phone camera at different angles to catch lenses that may be hidden by glare. Repeat with the light from different directions to validate findings.
Tip: Avoid relying on a single angle; multiple angles reduce missed details. - 5
Check for power and data connections
Follow any cables to see where they originate, focusing on edges and corners where wiring might be hidden. Look for adapters, USB cables, or power bricks that seem out of place for a standard mirror installation.
Tip: Do not unplug or manipulate cables; document and seek professional help if needed. - 6
Document, decide, and act
Compile your notes and photos into a report. If concerns persist, contact a licensed security professional or local authorities. Consider privacy-enhancing updates like window coverings or reputation-safe installations to reduce risk.
Tip: Keep a dated log of observations and actions for reference.
Common Questions
Can a mirror actually be a two-way mirror?
Two-way mirrors exist and are designed to be partially reflective. In typical lighting, they resemble ordinary mirrors, but lighting differences can reveal a hidden viewer area. If you suspect one, a cautious, non-invasive inspection is advised.
Two-way mirrors exist and can resemble regular mirrors in normal light. If you suspect one, proceed with careful, non-invasive checks and seek professional guidance if needed.
What should I do if I find a camera in a mirror?
Do not touch or dismantle the device. Take photos, note locations, and contact local authorities or a licensed security professional. Preserve the scene as evidence and ensure you and others are safe.
Do not touch the device. Document and contact authorities or a professional for a proper assessment.
Can a smartphone detect hidden cameras on mirrors?
A smartphone can help by revealing lens reflections under certain lighting conditions, but it may not detect all devices. Use additional methods or professional detectors for a more reliable check.
Your phone can help in some cases, but it’s not a definitive detector—combine methods or get a pro if unsure.
Are there legal concerns with inspecting private spaces?
Inspecting private property should follow local laws and tenancy agreements. In many places, homeowners can screen their own spaces, but in rentals or shared spaces, obtain permission before inspecting.
Check local laws and your lease or ownership terms. When in doubt, get permission before inspecting.
How long does a basic check take?
A basic pass typically takes about 20–40 minutes per mirror, depending on room size and complexity. Allow extra time if you discover suspicious elements requiring closer scrutiny.
Most basic checks take 20 to 40 minutes per mirror, depending on setup.
What if nothing is found but I still feel unsafe?
If concerns persist, implement privacy enhancements and consider a professional evaluation. Installing cameras or privacy shields may help, but rely on experts for a thorough assessment.
If you still feel unsafe after checks, get a professional evaluation and consider privacy enhancements.
Watch Video
The Essentials
- Follow a systematic screening process
- Inspect surface details and frame integrity
- Use lighting and camera tests in combination
- Document findings carefully for professional review
- Respect legality and safety; seek experts when unsure