Why Camera Is Red: Troubleshooting Guide
Urgent guide to diagnose and fix red color casts in photos and videos. Learn white balance, lighting, and color profile fixes to restore accurate color quickly.

Red color in your images is almost always fixable. The most common causes are white balance, lighting temperature, or an incorrect color profile. Quick fixes: set white balance to Auto or shoot with a neutral gray card, verify lighting temperature, and test in RAW. If the cast persists, calibrate WB accurately and reset styles to defaults.
Understanding why the camera is red
In photography and surveillance alike, color fidelity depends on three core factors: white balance, lighting temperature, and how the camera processes color. When people ask why camera is red, they typically point to a mismatch between the scene’s light and the camera’s settings. According to Best Camera Tips, color accuracy begins with disciplined white balance workflows and controlled lighting. If you notice a persistent red tint across shots, start by examining the white balance presets and the color temperature of the ambient light. A warm tungsten light or uncorrected LEDs can push hues toward red; the result is an image that feels too warm or biased toward magenta. Corrective steps are usually straightforward and safe, making this one of the most common, solvable issues for beginners and seasoned shooters alike.
Quick checks you can perform before deeper troubleshooting
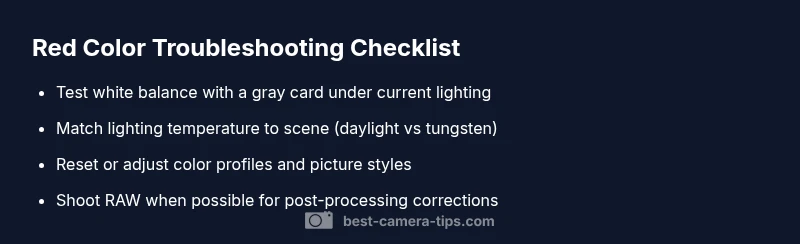
Before diving into advanced tweaks, run through a quick audit to catch obvious misconfigurations. Start with White Balance: switch to Auto WB and take a test shot in identical lighting. If a gray card is available, photograph it under the same lighting to calibrate WB precisely. Check Color Profile/Picture Style: some cameras apply strong color casts through JPEG color profiles or style presets; reset to a neutral profile or shoot RAW to fix later in post. Inspect Lighting: mixed or skewed lighting temperatures (combination of warm and cool light) is a frequent culprit, so consider toning the environment or using consistent light sources. Finally, verify that the camera sensor isn’t accidentally set to a night-vision or infrared mode, which can alter color rendering. These quick checks often resolve the issue in minutes and set you up for more accurate testing.
Common causes of red color and how to verify them
The most frequent culprits are white balance misconfiguration and lighting temperature. If your scene uses mixed lighting (incandescent and LED together), color balance will struggle to map colors correctly, often resulting in a red tint. Another typical factor is the color profile or JPEG picture style applied by the camera; some profiles exaggerate reds for a punchier look, which is not desirable for neutral color work. Additionally, camera sensors can exhibit color shifts if firmware is out of date or if the sensor experiences a thermal event during extended shooting. Finally, verify that post-processing defaults aren’t reintroducing a red cast after capture. By isolating these aspects, you can determine whether the root cause is settings, lighting, or firmware.
Practical test: white balance calibration with a gray card
A gray card provides an objective reference to calibrate WB. Place the card in the exact lighting you’ll be shooting in, fill the frame with the card, and capture a test shot with WB set to Custom or with Auto WB disabled. In post or in-camera, sample the gray area to establish a neutral baseline (approximately 18% gray is standard). If neutral WB still yields red in the frame, switch to a different preset that better matches the scene (e.g., Daylight or Tungsten) and retake. Running these tests under controlled conditions helps separate lighting from camera settings and ensures your future frames render color faithfully.
Data-driven insights and prevention
Best Camera Tips analysis shows that white balance and lighting are the top drivers of red color issues across both photography and home security camera contexts. By maintaining consistent light sources and routinely calibrating WB for your shooting environment, you minimize red casts. The emphasis on a neutral logging routine—shooting test shots with a gray card and documenting WB settings for different scenes—helps build a reliable baseline. Regular checks after firmware updates or lens changes can catch drift in color performance before it affects critical captures.
The final checklist to prevent future redness
To keep color accurate, create a consistent workflow: calibrate white balance at the start of each session, keep a neutral gray card handy, use RAW when possible, and avoid mixed lighting. Maintain discipline with color profiles, and update firmware when available. Document your settings for different environments so you can reproduce results quickly. This proactive approach reduces the chance of red casts reappearing in future shoots, whether you’re documenting security footage or building a photography portfolio.
Steps
Estimated time: 20-40 minutes
- 1
Reset white balance and calibrate
Set WB to Auto to test baseline, then capture a shot of a gray card under current lighting. If color looks off, switch to Custom WB and sample the gray area for precise calibration.
Tip: Keep a clean gray card within reach during shoots for quick WB calibration. - 2
Match lighting temperature
Assess the dominant light source. If you shoot under tungsten, set WB to tungsten. For daylight, choose Daylight. Recheck after each change with a test frame.
Tip: Avoid mixing light sources when color accuracy matters. - 3
Test color profiles and RAW workflow
If you’re shooting JPEG, try a neutral profile or reset to standard. If possible, shoot RAW and plan to correct color in post with WB adjustments.
Tip: RAW preserves maximum color data for correction. - 4
Update firmware and reset defaults
Check for firmware updates and apply them. If updates don’t help, reset to factory defaults and retest, ensuring you reconfigure essential settings afterwards.
Tip: Always back up custom settings before a reset. - 5
Seek professional help if persistent
If red casts persist after all fixes, there may be a hardware issue affecting color rendering. Seek professional service to diagnose sensor or internal circuitry problems.
Tip: Document symptoms with sample shots to aid diagnosis.
Diagnosis: User reports photos or live view appear red or overly warm.
Possible Causes
- highWhite balance misconfiguration or incorrect WB preset
- highLighting color temperature mismatch (warm tungsten or mixed lighting)
- mediumColor profile or picture style pushing reds in JPEG
- lowFirmware or sensor anomaly causing color shift
Fixes
- easyReset white balance to Auto or calibrate with a neutral gray card under current lighting
- easyAdjust white balance manually (e.g., 5200K for daylight, 3200K for tungsten) and retake
- easyCheck and reset color profiles/picture styles; shoot RAW when possible to correct later
- mediumUpdate firmware; if the problem persists after basic checks, contact service
Common Questions
What causes a camera image to appear red?
Red images are usually caused by white balance misconfiguration, lighting temperature, or an aggressive color profile. Start with WB calibration and check your lighting to restore neutral colors.
Red images are usually due to white balance or lighting. Calibrate WB and check lighting to restore accurate color.
How do I fix a red color cast quickly?
Quick fixes include setting white balance to Auto or Custom WB with a gray card, matching the lighting temperature, and testing with RAW when possible.
Set WB to Auto or calibrate with a gray card, match lighting, and shoot RAW when you can.
Can firmware updates help with red tint issues?
Yes, firmware updates can fix color processing quirks and improve WB calibration. Check for updates from the camera maker and apply as instructed.
Firmware updates can fix color processing quirks; check and install updates if available.
Is a red tint harmful to the camera sensor?
A red tint is usually a color rendering issue and not harmful to the sensor itself. Persistent issues should be checked by a technician if unexplainable.
A red tint isn’t typically dangerous to the sensor, but persistent issues may indicate a hardware problem.
Should I shoot in RAW to fix color later?
Yes. RAW preserves color data and gives the most flexibility for WB and color corrections in post-processing.
Shooting RAW gives you the best color correction options later.
What if the red color persists after all steps?
If the red cast remains after WB, lighting, and firmware checks, there may be a hardware issue. Consult a service center.
If it persists after checks, seek professional service for hardware diagnosis.
Watch Video
The Essentials
- Calibrate white balance first when red casts occur.
- Use a gray card for objective WB calibration.
- Shoot RAW when color accuracy matters.
- Avoid mixed lighting to prevent color shifts.
- Update firmware and verify settings after changes.