What To Do If Your Camera Lens Is Scratched: A Practical Guide
A practical, step-by-step guide for assessing, cleaning safely, and choosing between DIY remedies and professional repair when your camera lens is scratched.

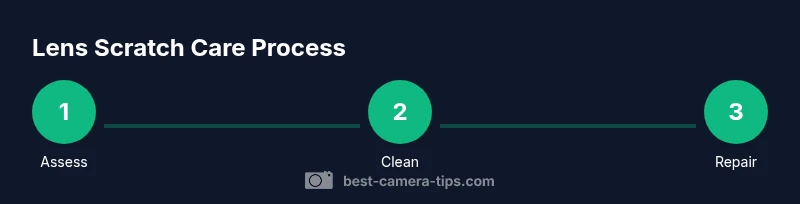
To handle a scratched camera lens, first assess depth and impact on image quality, then decide between safe cleaning, protection (like a filter) to prevent more damage, or professional repair for deep scratches. Start with gentle cleaning, avoid aggressive DIY fixes, and plan for future protection. Document the scratch with photos to aid service decisions.
Why lens scratches matter
A scratched front lens can reduce contrast, soften edges, and create hazy highlights, especially in high-contrast scenes. According to Best Camera Tips, scratches on the lens surface can alter light transmission and coating performance, potentially affecting color fidelity. If you’re searching for guidance on what to do if camera lens is scratched, remember that the best outcomes come from careful assessment, safe cleaning, and informed decisions about repair or protection. This introductory section, prompted by the Best Camera Tips team, sets realistic expectations about image impact and the value of a proactive care routine.
Image quality depends on the scratch’s location, depth, and whether it crosses the coatings. Minor surface abrasions may be barely noticeable in some shots, while deeper gouges can create persistent artifacts. The goal is to prevent further damage during handling and to preserve as much optical performance as possible while you decide on the right course of action.
Assessing scratch severity
Not all scratches are equal. Start by inspecting the front element under bright, diffused light and look for three indicators: depth, width, and whether the scratch passes through coatings. Surface scratches that barely catch the light may be little more than cosmetic; deeper scratches that disrupt the coating or show through at multiple angles are likely to affect image quality. Always photograph the scratch from multiple angles to document its size and location. Based on Best Camera Tips analysis, repair decisions hinge on how much light transmission is altered and whether the scratch compromises coatings that control reflections. If you’re unsure, err on the side of caution and seek a professional opinion.
Create a simple before-and-after record: keep the lens cap on during transport, note the focal length and aperture used when the scratch is most visible, and capture test shots on a neutral gray card to evaluate effect later.
Safe cleaning and initial care
Before attempting any cleaning, turn the camera off and remove accessories that might drag debris across the element. Use a clean microfiber cloth or a lens-cleaning tissue and a small amount of lens-safe cleaning solution or distilled water. Gently wipe in a circular motion starting from the center and moving outward; avoid heavy pressure and never scrub coatings. If there’s visible dust around the edge, use a blower to dislodge it first. The aim is to remove loose particles that could scratch the surface when you handle the lens, not to polish away deep damage. Best Camera Tips recommends documenting your cleaning steps and stopping if the scratch becomes more noticeable after cleaning.
Do not DIY polish unless you know what you’re doing
Polishing a scratch is risky and can remove protective coatings or change the lens curvature, making the problem worse. DIY remedies like toothpaste or household polishes are not designed for precision optics and can leave micro-scratches that degrade sharpness. If the scratch is beyond cosmetic, avoid amateur polishing and consult a professional. If you do pursue aggressive polishing, be prepared for potential re-coating or even element replacement, which can be costly. The safest approach is to treat the lens as a delicate optical surface and prioritize professional assessment when in doubt.
Professional repair options
For deep scratches or scratches that cross multiple coatings, professional repair is often the most reliable path. Options include coating reapplication, element replacement, or complete front-group service, depending on the lens model and the severity. When evaluating a shop, ask about warranty, turnaround time, and whether the service includes test imagery to verify performance after repair. Best Camera Tips Analysis, 2026 notes that repair costs vary widely with severity and model, so obtain a written estimate before authorizing any work.
Protective measures to prevent future scratches
Even with scratches repaired, prevention matters. Consider adding a protective UV or clear protective filter to shield the front element from future impacts, dust, and minor abrasions. Always use a lens hood to reduce incidental contact and store lenses in padded bags when not in use. Regularly inspect the front element and perform routine cleanings with proper materials. A small habit like this can significantly extend the life of your glass and keep resale value higher.
Choosing a service and warranty considerations
Choose a repair shop with transparent pricing, clear turnaround estimates, and a warranty on workmanship. Prefer technicians who specialize in camera optics and can provide before-and-after documentation. If your lens is still under warranty, check whether accidental damage is covered and what steps the manufacturer requires for service. Document the scratch and preserve purchase records to support warranty claims.
What to expect after repair and testing
After any professional service, test the lens across focal lengths and apertures to ensure consistent sharpness and clean bokeh. Take landscape, macro, and portrait shots to evaluate edge contrast and color transmission. If you notice ongoing haze, ghosting, or new artifacts, contact the service provider promptly for a retest or adjustments. Keep a simple test routine and compare it to the pre-repair photos to gauge improvement.
Common scenarios and quick fixes
If a minor scratch is barely noticeable during most shots, you may choose to live with it while continuing regular use, paired with protective measures to prevent worsening. For scratches that appear only in certain lighting or angles, the issue may be related to lighting or sensor processing rather than the optic path, so re-evaluating shooting conditions can help. In all cases, document changes with test photos and consult a professional if image quality continues to suffer.
Tools & Materials
- Microfiber cleaning cloth(Lint-free and non-abrasive; avoid cotton rags.)
- Lens cleaning solution or distilled water(Use sparingly on the cloth, not directly on the lens.)
- Air blower or bulb syringe(For removing dry dust before wiping.)
- Soft brush(Optional for edge dust.)
- Protective UV or clear filter(Adds physical protection for future use.)
- Lens cap and storage pouch(Protects from dust when not in use.)
- Professional repair quote (if considering service)(Have the model and serial handy; request written estimate.)
Steps
Estimated time: 60-90 minutes
- 1
Assess scratch severity
Carefully inspect the scratch under bright, diffused light and compare it to your test shots. Note its depth, width, and whether it crosses coatings. Documentation helps you decide on safe cleaning vs. professional service.
Tip: Take multiple photos from different angles to track changes. - 2
Prepare the lens for cleaning
Power off the camera and remove any accessories. Use a blower to dislodge loose dust, then set up a clean workspace.
Tip: Work on a clean, dust-free surface to avoid introducing more particles. - 3
Clean gently with proper technique
Moisten a microfiber cloth or tissue with cleaning solution and wipe in a circular motion from center outward. Avoid aggressive scrubbing and never scrub coatings.
Tip: If debris remains, stop and seek professional advice to avoid scratches. - 4
Decide on DIY vs. professional path
If the scratch is shallow and not affecting image quality, you may continue use with care. For deeper scratches, schedule a professional assessment before attempting repair.
Tip: Avoid DIY polishing that risks coating damage. - 5
Protect and prevent future scratches
Install a clear protective filter if appropriate and use a lens hood. Store lenses properly and check them regularly for new wear.
Tip: Protective filters buy time and limit further damage. - 6
Test after any service
Capture test shots across focal lengths and apertures to confirm restoration of sharpness and contrast. Compare with pre-repair images to verify improvements.
Tip: Document results to track any residual issues.
Common Questions
Can a scratched lens be repaired to original clarity?
Deep scratches that affect coatings often require professional repair or replacement. While minor surface marks may be mitigated, full restoration to pristine condition is not guaranteed and depends on the lens and damage.
Deep scratches often need professional repair or replacement; full restoration isn't guaranteed.
Is it safe to try DIY polishing at home?
DIY polishing is risky and can remove coatings or alter lens geometry. It’s generally not recommended unless you have specialized equipment and expertise.
DIY polishing is risky; better to avoid it unless you’re experienced.
Will a protective filter prevent further damage?
A protective filter can shield the front element from minor impacts and dust, reducing future scratch risk, but it won’t erase existing deep scratches.
A protective filter helps prevent future scratches but can’t fix deep ones.
Should I contact the manufacturer for warranty claims?
If your lens is under warranty, check policy terms for accidental damage coverage and required service channels. Manufacturer guidance can affect eligibility and cost.
Check your warranty terms with the manufacturer to see if accidental damage is covered.
How long does professional lens repair usually take?
Repair turnaround varies by model and service center. Ask for a written estimate and expected completion date before authorizing work.
Turnaround depends on the model and shop; get an estimate first.
What should I photograph to document scratches?
Take high-resolution photos of the scratch from multiple angles and lighting conditions to aid the technician’s assessment.
Photograph the scratch from different angles to help the repair estimate.
Watch Video
The Essentials
- Assess severity before acting
- Avoid aggressive DIY polishing on coatings
- Protect future lenses with filters and hoods
- Document scratches with photos for repair decisions
- Test after any service to verify results