Can You Get Camera Lens Fixed on iPhone? A Practical Guide
Can you fix an iPhone camera lens? Learn which issues you can DIY, when to seek professional help, and how to choose a repair service. Practical steps and tips from Best Camera Tips for aspiring photographers.

Yes — you can address some iPhone lens issues at home, especially minor smudges or surface scratches. More severe damage often requires professional repair or a replacement lens. This guide walks you through what can be fixed, safe DIY steps, and when to seek expert help. We cover signs of internal issues, the risks of disassembly, and how to document damage for a repair quote.
What lens damage looks like on iPhone
Damage to the iPhone camera lens can show as visible cracks on the exterior glass, blurry or smeared images, ghosting, haze, or reflections. Scratches may range from shallow to deep, and in some cases moisture can enter the lens assembly, causing fog or spots. Some issues are cosmetic (outer glass) while others affect focus, sharpness, or image quality. According to Best Camera Tips, many lens problems stem from fingerprints, oils, dust, or minor impact and can sometimes be addressed with careful cleaning or non-invasive fixes. The goal is to identify whether the issue is purely cosmetic or impacts photo quality, so you can choose the right repair path.
Can you get camera lens fixed on iphone? Feasibility overview
A common question is can you get camera lens fixed on iphone. The answer depends on the damage type and location. Surface-level issues—such as fingerprints, smudges, or hazy coatings on the outer glass—are more likely to respond to cleaning or exterior lens replacement if available. Deeper problems—like a cracked lens element, misalignment, or internal moisture—often require professional repair or lens replacement. In this guide we describe what is repairable at home and when it’s time to visit an authorized service provider. can you get camera lens fixed on iphone? For context, it’s useful to understand how lens assembly and sensor alignment affect image quality, so you can judge whether DIY fixes will help or if a pro is needed.
Safe DIY fixes you can try first
Before attempting any repair, power down the device and work on a clean, static-free surface. Use a clean microfiber cloth to gently remove fingerprints and dust from the exterior lens surface. If needed, dampen the cloth slightly with a small amount of isopropyl alcohol (70%) and wipe with a light, circular motion. Do not spray liquids directly onto the lens or camera housing, and avoid applying pressure to the glass. If you notice internal condensation or you hear rattling from inside the module, stop immediately and seek professional help. This section emphasizes safe, non-invasive steps to improve exterior clarity.
Tools and materials you might need
- Microfiber cloth (essential) — for dry cleaning of the exterior lens surface.
- Isopropyl alcohol 70% (essential if you need a damp wipe) — apply to cloth, not directly on the device.
- Soft brush or cotton swabs (optional) — to remove dust from the lens edge.
- Plastic spudger or non-metal prying tool (optional and risky) — only if you are experienced and have a proper guide.
- Protective case or stand — keeps the phone steady during cleaning and testing. Note: Avoid metal tools that could scratch glass or damage seals. Always work in a clean, bright area.
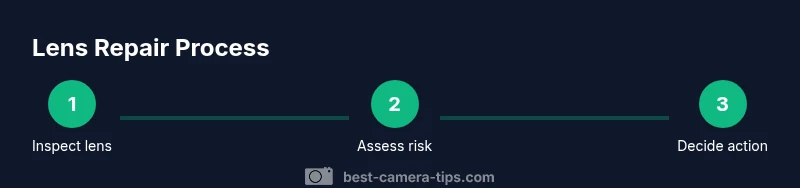
Step-by-step quick triage (DIY micro fixes)
- Inspect lens area for visible damage, including cracks or misalignment. 2) Power down the device and prepare a clean workspace. 3) Clean exterior lens with a dry microfiber cloth; if needed, use a lightly dampened cloth with 70% isopropyl alcohol. 4) Reassess image quality by taking a few test shots in bright light. 5) If you observe internal moisture or misalignment, stop and seek professional service. 6) Avoid disassembly unless you have a proper guide and tools. 7) After cleaning, retest the camera to confirm improvements.
When to avoid DIY and seek professional repair
If the lens is cracked, glass is loose, there is internal fog, or images remain out of focus after basic cleaning, DIY repair is not recommended. Internal components are delicate, and attempting a repair can worsen alignment, seals, or sensor damage. Professional technicians have calibrated tools and replacement parts to restore focus and image quality reliably. The decision to proceed with a professional repair should consider warranty coverage, device age, and the potential risk of data loss if you must open the phone.
How to choose a repair service
Start by contacting Apple Support or an authorized service provider if your device is under warranty or AppleCare+. For out-of-warranty repairs, compare estimates from authorized service centers and reputable independent repair shops. Ask about lens replacement versus full module replacement, turnaround time, and warranty on the repair. Read reviews and request a detailed quote before committing. If possible, verify that the shop uses genuine parts and offers a post-repair performance check.
Cost considerations and warranty
Repair costs vary based on model, damage extent, and whether replacement parts are required. While DIY parts may seem cheaper, the risk of further damage could outweigh savings. Professional repair often includes a warranty on the replaced parts and workmanship; make sure you understand what the warranty covers and its duration. If your device is older, weigh the cost against replacement options.
What to expect after repair and protective measures
After a successful repair, test image sharpness, color accuracy, and autofocus performance in different lighting. Keep your camera lens protected with a case, screen protector, and a lens cap when not in use. Regular cleaning with a microfiber cloth helps maintain clarity and can extend the time between repairs.
Tools & Materials
- Microfiber cloth(Lint-free, non-abrasive)
- Isopropyl alcohol 70%(Apply to cloth, never directly on the device)
- Soft brush(For dust near the lens edge)
- Plastic prying tool(Only if you have a guide and training)
- Phone stand or stable surface(Keeps device steady during testing)
Steps
Estimated time: Estimated total time: 20-40 minutes
- 1
Inspect lens area for damage
Examine the lens and housing for cracks, chips, misalignment, or moisture. This triage helps determine whether the issue is cosmetic or functional and guides your next steps.
Tip: Take a photo from multiple angles to document condition. - 2
Power down and prep workspace
Turn off the iPhone and unplug accessories. Work on a clean, static-free surface to minimize the risk of generating dust or static damage.
Tip: Use a soft mat and good lighting. - 3
Clean exterior lens surface
Gently wipe the exterior glass with a dry microfiber cloth. If there are stubborn smudges, lightly dampen the cloth with 70% isopropyl alcohol and wipe again in a circular motion.
Tip: Avoid pressing hard; let the cloth do the work. - 4
Reassess image quality
Take a few test photos in bright light to evaluate sharpness, focus, and color. Compare results with the pre-clean shots to gauge improvement.
Tip: Test at different focal lengths and lighting. - 5
Check for internal moisture or looseness
If you notice fog, water droplets, or a rattling sound, stop immediately and seek professional service. Internal moisture can cause corrosion and sensor damage.
Tip: Do not attempt to disassemble further. - 6
Decide whether to proceed or seek help
If there’s no improvement or you observed structural damage, avoid DIY and consult an authorized service provider or repair professional.
Tip: When in doubt, get a quote first. - 7
Test after any action
After any cleaning or minor fix, retest with multiple shots to ensure autofocus and sharpness are restored.
Tip: Document results for future reference.
Common Questions
Can I fix my iPhone camera lens at home?
Some lens issues are fixable at home, especially cleaning and minor surface problems. Cracks, misalignment, or moisture typically require professional repair.
Some lens issues can be fixed at home, but cracks or moisture usually need a professional.
Will AppleCare cover lens damage?
AppleCare+ may cover accidental lens damage with a deductible, but it depends on your plan and incident type. Check your coverage before paying out of pocket.
AppleCare+ may cover accidental damage with a deductible; check your policy.
What affects the cost of lens repair?
Costs vary by model and damage; a simple cleaning is low-cost, while a replacement lens or module is more expensive. Get quotes from multiple providers.
Costs vary by model and damage; get multiple quotes.
Can water damage be repaired entirely?
Moisture inside the lens module can cause ongoing issues; professional assessment is essential, and some cases require replacement of components.
Moisture often needs professional repair or replacement.
Is DIY lens repair safe for beginners?
DIY lens work is risky for beginners. If you’re not trained, avoid disassembly to prevent sensor or seal damage.
DIY repairs are risky; avoid unless you're trained.
How long do repairs typically take?
Turnaround depends on availability of parts and service scope. Check with the shop for an expected window and whether a loaner is available.
Repair times vary; ask for a timeframe when you get a quote.
Watch Video
The Essentials
- Inspect damage to decide if DIY is feasible.
- Prioritize exterior cleaning before any disassembly.
- Avoid disassembly if you see moisture or deep cracks.
- Refer to Best Camera Tips for professional repair guidance.