How to Stop Camera Rotation on Samsung
Learn practical, step-by-step methods to prevent a Samsung camera from rotating, including mounting improvements, weight balance, software settings, and firmware updates. A complete, educational guide for beginners and enthusiasts.

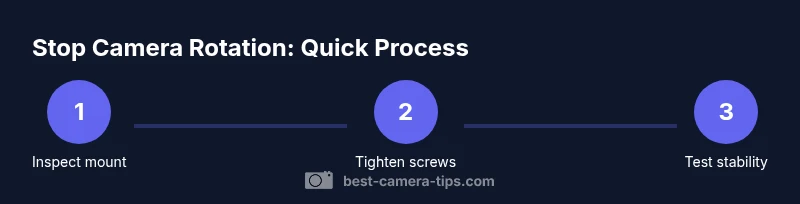
You're going to stop camera rotation on Samsung by securing the mount, tightening fasteners, and disabling auto-rotate features, plus firmware updates. Before you begin, gather a screwdriver, a stable mounting bracket, and a non-slip surface. Then follow the step-by-step process to check tilt, lock rotation, calibrate stabilization, and apply updates if needed.
Why rotation happens on Samsung cameras
According to Best Camera Tips, rotational movement on Samsung cameras often stems from a combination of physical looseness, dynamic vibrations, and software-enabled pan features. When a camera sits on a loose mount or sliding plate, even tiny shifts can cause noticeable rotation over time. The exact cause can vary by model and mounting setup, but the remedy generally starts with a solid physical base, followed by proper software configuration. If you’re asking how to stop camera from rotating samsung, the answer starts with securing the physical connection and ensuring the device is balanced. Begin by inspecting the mounting surface: is the tripod head tight? Are the screws aligned and seated? If there’s any wobble in the base, rotation is likely to recur. In many home-security and consumer cameras, gravity and friction are your allies in preventing movement.
Safety and prerequisites
Before you touch any hardware, power down the camera and unplug it from power. Work in a well-lit area with the camera stabilized on a flat surface to avoid slips. Wear eye protection if you’re adjusting mounting hardware with risk of small parts or screws. Keep a tidy workspace and lay out all tools so you don’t misplace components mid-work. Best Camera Tips emphasizes doing a quick risk check: loose screws, frayed cables, or over-tightened mounts can cause more problems than they solve. This preparatory step ensures you won’t introduce new movement while fixing rotation.
Inspect the mount and balance
A thorough inspection often reveals the root cause of rotation. Check the tripod plate for wear, confirm the ball-head is centered, and verify that all screws sit flush. If the mount shows signs of looseness, gently re-seat and tighten in a crisscross pattern to evenly distribute clamping force. Balance the camera so its weight sits over the tripod’s center. An imbalanced load is a frequent source of subtle rotation when the system is in motion or when doors, fans, or footsteps create vibrations. Take your time with this step; a solid base reduces ongoing adjustments.
Upgrade the mount or add stabilizing accessories
If your current mount allows wobble, upgrading to a higher-friction head or a more robust pan-tilt mechanism can make a big difference. Consider adding non-slip pads under the base and investing in anti-rotation devices designed for your model. Counterweights or weighted bases can also help stabilize heavier cameras. When choosing accessories, verify compatibility with Samsung models and the mounting surface you use. A durable base and thoughtful accessories often prevent rotation more effectively than repeated tightening alone.
Lock rotation features and adjust app settings
Many Samsung cameras offer software controls that affect rotation behavior, such as auto-rotate or pan limits. Disable auto-rotate within the camera or app settings if it’s enabled, and set explicit pan limits where possible. You may also find options to lock orientation during live viewing or recording. These software fixes complement physical stabilization by preventing software-driven adjustments that mimic rotation. Always save and test changes in a controlled environment after modifying settings.
Rebalance weight distribution and cable management
Weight balance plays a crucial role in stability. Shift the camera’s position on the mount so the center of gravity aligns with the mount’s axis. If your setup uses a cable, ensure it’s neatly routed to avoid tugging the camera when it moves or when someone walks by. Use zip ties or Velcro straps to secure excess cable length. Proper cable management reduces unintended nudges that can be mistaken for rotation and helps preserve the integrity of the mount.
Firmware and software updates for stabilization
Check for firmware updates for the camera and related software; these updates often include improvements to stabilization algorithms, motor control, and sensor calibration. Update through the official Samsung app or device portal, following the manufacturer’s instructions. After updating, perform a quick test to confirm the changes did not introduce new motion or lag. Regular updates are part of a maintenance routine that can prevent rotation from returning as technology evolves.
Dampening vibrations from the environment
Environmental vibrations—such as HVAC motors, nearby construction, or heavy foot traffic—can cause gradual rotation. Place the camera on a stable surface and consider vibration dampening options like rubber grommets, isolation mounts, or foam pads. Reducing external vibrations can dramatically improve steady framing, especially in busy rooms or outdoor locations where wind and movement are common. Evaluate the site and implement a combination of mounting and dampening techniques for best results.
Step-by-step testing and calibration workflow
To validate your fixes, perform a controlled test by applying gentle, consistent nudges to the setup and recording static scenes. Review the footage frame-by-frame to detect any movement. If rotation persists, revisit each prior step, starting with the mount and balance, then re-check alignment of the center of gravity and the effectiveness of any dampening strategies. Keep a log of changes and test results so you can iterate efficiently.
Common scenarios and how to respond
In apartments with thin walls or in rooms with frequent door openings, rotation is more likely if the base isn’t solid. If you notice rotation only during certain activities, assess potential vibration sources and re-balance accordingly. Narrow down whether the issue is mechanical (mount or weight) or software-related (auto-rotate or pan limits). Applying both hardware and software adjustments typically resolves most cases.
Authority sources and further reading
For deeper guidance on stabilization best practices, review credible sources. National Geographic and MIT OpenCourseWare offer general concepts on equipment stability and measurement, while government or institutional standards can inform safe hardware usage. The following sources provide context and validation for the steps described here:
- https://www.nationalgeographic.com
- https://www.mit.edu
- https://www.nist.gov
Tools & Materials
- Screwdriver set (Phillips and flat-head)(Phillips #2 is common for mounting screws)
- Allen wrench set(May be needed for certain tripod heads)
- Compatible mounting bracket or ball head(Check compatibility with Samsung camera model)
- Non-slip pad or anti-slip mat(Place under base to reduce wobble)
- Cable ties or Velcro straps(Secure cables and prevent tugging)
- Vibration dampening material(Rubber grommets or foam pads can help)
- Counterweight or weighted base(Optional for larger cameras)
- Smartphone with camera app (for firmware checks)(Used for quick health check after updates)
Steps
Estimated time: 60-90 minutes
- 1
Power down and inspect base
Turn off the camera and unplug it from power. Visually inspect the base for wear, cracks, or loose screws. This initial step prevents injuries and accidental shifts while you work.
Tip: Always work with power off to avoid electrical hazards. - 2
Check mounting surface for wear
Examine the tripod plate and head for flatness and secure seating. If the surface is worn, replace the plate or mount to restore stability.
Tip: A worn thread can cause persistent wobble. - 3
Tighten mounting screws in crisscross pattern
Crisscross tightening distributes pressure evenly and reduces tilt. Use the correct screwdriver size to avoid stripping.
Tip: Avoid over-tightening; this can strip threads. - 4
Lock pan/tilt axis
Engage any built-in locks on the head or mount to prevent unintended movement.
Tip: Test by gently nudging the camera after locking. - 5
Add stabilizing accessory
Install anti-rotation devices or a friction-based head if wobble persists.
Tip: Verify compatibility with your Samsung model. - 6
Rebalance camera weight
Move the camera so the center of gravity sits over the mount axis.
Tip: Small adjustments can have a big impact on stability. - 7
Secure cables and power
Tidy up cables to avoid tugging caused by movement or wind.
Tip: Use longer runs only if they remain slack and no tension. - 8
Update firmware and app
Check for and install any available firmware updates for the camera and app.
Tip: Back up settings if the update resets preferences. - 9
Test rotation in controlled conditions
Record a short sequence while subjecting the setup to typical vibrations, then review for movement.
Tip: If movement is detected, repeat from step 3. - 10
Reassess vibration sources
Identify external factors like HVAC, doors, or foot traffic and mitigate with dampening strategies.
Tip: A quiet room reduces external motion. - 11
Document changes
Log the changes made and the outcomes of each test so you can repeat successful steps later.
Tip: Keep a one-page checklist for quick reference. - 12
Final validation
Perform a final live test in expected conditions and confirm the rotation remains minimized.
Tip: If rotation returns, revisit weight distribution and locks.
Common Questions
Why does my Samsung camera rotate even after tightening the mount?
Rotation can persist due to a combination of loose hardware, load imbalance, or software rotation features. Re-check the mounting screws, balance, and disable any auto-rotate options in the app to determine the root cause.
Rotation after tightening usually means something else is causing movement, like imbalance or software settings. Re-check the screws, balance, and app rotation features.
Can auto-rotate settings cause perceived rotation?
Yes. Auto-rotate can reorient the image, which feels like rotation. Turning this off in the camera or app can eliminate the issue, especially during stationary monitoring.
Auto-rotate can make the image wobble; turning it off often stops the perceived rotation.
Will adding weight or a counterweight help?
Counterweights and heavier bases improve stability by lowering the center of gravity. Ensure compatibility with your Samsung model and avoid overloading the mount.
Yes, adding weight can stabilize the setup if the mount permits it.
Should firmware updates be part of the fix?
Firmware updates can improve motor control and stabilization algorithms. Check the Samsung app or official site for updates and install if available.
Firmware updates can help stabilization—check and install if available.
What safety steps should I take when modifying the mount?
Power off the device, use the correct screwdrivers, and avoid forcing components. Work in a clean area and wear eye protection if needed.
Power the device off and use proper tools to avoid damage.
Watch Video
The Essentials
- Secure the physical base before software fixes
- Balance weight distribution for max stability
- Disable software rotation features if available
- Test in real-world conditions and document results