How to Stop Camera Moving on Zoom
Learn proven, step-by-step strategies to stop your camera from moving during Zoom calls. Stabilize your setup with mounts, desk adjustments, and quick tweaks for crisp video in 2026.

Quick Answer: Preventing camera movement on Zoom starts with a stable support and a secured surface. Use a solid mount (tripod, desk arm, or shelf mount), tighten fasteners, and position the camera at eye level. Reduce desk vibrations, manage cables, and adjust Zoom’s video settings to minimize jitter. This guide walks you through setup, mounting options, and practical tweaks for steadier video.
Understanding the problem: why cameras move on Zoom
When you’re presented on camera during Zoom calls, even tiny shifts can feel disruptive to your audience. Movement can come from the camera itself (loose mounts, flex in the arm, or a wobbly desk stand), or from the surface it sits on (a vibrating desk, active PC fans, or someone walking nearby). The goal of this guide is to help aspiring photographers and home security enthusiasts master a steady shot by combining solid hardware with smart setup practices. The phrase how to stop camera from moving on zoom should be understood as a two-pronged task: stabilize the physical rig and reduce movement-inducing influences in the environment. According to Best Camera Tips, most wobble is preventable with a few focused changes, starting with a stable platform and precise placement at eye level. A calm, intentional setup makes your video feel professional and trustworthy, which matters for everything from remote learning to security monitoring.
Common causes of camera movement during Zoom calls
Camera wobble isn’t always obvious at first glance. A loose tripod head, a desk clamp that loses grip after a few minutes, or a shelf-mounted webcam with a shallow tilt can all introduce micro-movements. Environmental factors like air conditioning gusts, nearby foot traffic, or even keyboard taps can transmit vibrations to the camera. Additionally, sliding cables and cheap mounts may amplify what should be minor jitters into noticeable shakiness on screen. Finally, the surface you mount on matters: glassy desks and soft tables tremble more easily when you type, sneeze, or open a door. By understanding these culprits, you can target the right solution rather than overhauling your entire setup.
Evaluate your current setup and identify wobble
Start with a quick hands-on audit. Check that every joint and screw on your mount is tightened to the manufacturer’s spec. Wiggle the camera by hand to feel for looseness in the head, arm, or base. If motion is felt, address the weakest link first: the mount support, then the surface. Observe the shot for 15–30 seconds and note any movement when you gently tap the desk or breathe on the microphone. Use a simple string test by placing a light string across the camera lens and observe if the string’s alignment shifts with subtle table motions. A stable baseline makes subsequent adjustments easier and more predictable.
Choosing the right mounting solution for Zoom
The most practical options fall into three categories: tripods (for stand-alone stability), desk clamps/arms (for flexible positioning near the monitor), and shelf or wall mounts (for permanent locations). Tripods with a heavy, non-slip base and a tight, friction-based head are excellent for long sessions. Desk-mounted arms can isolate the camera from desk vibrations while keeping it at eye level. If you’re sharing a table with a laptop, consider a mounted arm that clamps to the back edge to minimize surface contact. The best choice depends on your desk size, room layout, and how often you’ll reposition for different calls.
Practical steps to stabilize your camera (installation mindset)
- Start with a sturdy base: replace a light, wobble-prone base with a weighted platform or a tripod that has non-slip feet. - Position at eye level: mount the camera so the lens is level with your eyes; this reduces the need to tilt and adjust during calls. - Tighten everything: looseness is the enemy of stability. Tighten every bolt, screw, and knob and test the setup by gently nudging the camera. - Manage cables: route power and data cables away from movement paths; bind them with clips or straps to avoid tugging on the mount. - Use dampening where possible: if your desk surfaces transmit vibration, place a silicone pad or rubber mat beneath the base to dampen movement. - Regular checks: re-tighten after a few sessions because mounts can loosen over time due to vibration and repeated use.
Lighting and background: how visuals influence perceived stability
Even with a physically stable setup, poor lighting or busy backgrounds can exaggerate camera movement in the viewer’s perception. Aim for even lighting that reduces shadows and highlights the camera’s position. A clean background with a fixed reference point makes any residual movement more noticeable to the audience, so consider a stable, uncluttered backdrop or use a green screen when appropriate. When the camera is steady, the viewer focuses on you rather than on the site where the image shifts. This is not just about hardware; it’s also about presenting a calm, controlled shot.
Adjusting Zoom settings to minimize motion perception
Zoom itself doesn’t provide a universal motion-stabilization toggle, so the best approach is to minimize events that look like movement. Disable any processing-heavy effects that could cause a slight jitter if your device is under heavy load. Close unnecessary background apps to free CPU cycles for video rendering. If you use virtual backgrounds, consider a static backdrop to reduce processing demand and to prevent movement artifacts when your body shifts. Finally, test at different resolutions; a lower resolution can be steadier on older hardware, while HD looks crisper on newer machines.
Quick fixes you can try today
- Switch to a heavier base or add a weight to the tripod. - Tighten all connections, and recheck after a few minutes of use. - Use a desk mat or rubber pad under the mount to dampen desk vibrations. - If possible, relocate the camera to a position with less foot traffic and closer to your face to reduce the camera’s need to tilt or pan. - Ensure your room is at a comfortable temperature; drafts can cause small movements in the desk or mount.
Testing and refining for long-term stability
After implementing changes, test by recording a short clip or conducting a test call. Observe for any residual wobble, then adjust as needed. If you still experience movement, consider upgrading to a more rigid mount system or reconfiguring your desk layout to eliminate one or more vibration sources. Periodic checks (weekly or monthly) help maintain a steady setup as components wear or shift with use. Documentation of your adjustments helps you reproduce a stable setup for future calls.
Safety and maintenance considerations
Always follow manufacturer guidelines when tightening mounts. Do not overtighten, which can strip threads or crack parts. If you’re mounting near electrical outlets or heat sources, ensure cables are routed safely to prevent tripping hazards. Regularly inspect your gear for signs of wear, such as cracked feet or loose joints, and replace parts as needed. A stable, well-maintained setup reduces risk during extended calls and ensures consistent video quality.
Tools & Materials
- Stable tripod or monitor-arm mount(Adjustable head; weight capacity 1–2 kg recommended)
- Desk clamp or arm for mounting(Clamp should fit desk edge 0.5–2 inches thick)
- Non-slip mat or pad(Under the mount base to dampen vibration)
- Anti-slip feet or rubber feet(Keeps base stationary on smooth surfaces)
- Cable management clips(Keeps cables tidy and away from movement paths)
- Velcro ties or straps(Secures cables and reduces tugging on mounts)
Steps
Estimated time: 30-45 minutes
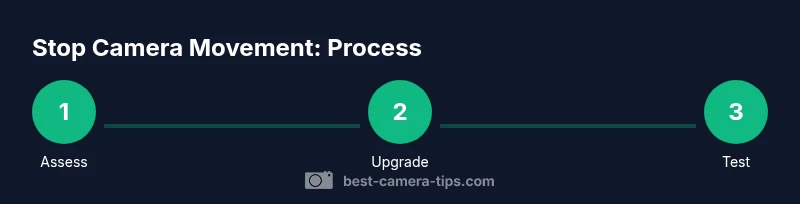
- 1
Assess current setup
Inspect your current mount and desk for looseness and wobble. Shake gently and note where movement originates. This baseline helps you measure improvement after changes.
Tip: Document the baseline with a short video to compare before/after. - 2
Upgrade to a stable base
If the current base is light or wobbly, replace it with a heavier, non-slip option. A heavier base reduces micro-movements that travel to the camera.
Tip: Prefer a weighted tripod foot or dense rubber pad under the base. - 3
Secure mounting joints
Tighten every joint, screw, and knob. Start at the base and work upward, testing each connection after tightening.
Tip: Avoid over-tightening to prevent thread damage. - 4
Organize and route cables
Bundle and clip cable runs so they don’t pull on the mount during movement.
Tip: Use clips at multiple points to keep cables taut but not strained. - 5
Position at eye level
Place the camera so the lens is near your eye level. This minimizes the need to tilt or pan during meetings.
Tip: A good guide is to align the camera with the line of sight when seated. - 6
Test with a quick call
Run a short test call to observe any residual wobble and adjust accordingly.
Tip: Ask a friend to watch for subtle movement you might miss.
Common Questions
Why does my camera shake during Zoom calls even when I’m not moving?
Most shaking comes from the mounting system or desk surface transmitting tiny motions. Upgrading to a heavier base and securing joints typically fixes this. Environmental factors like HVAC or footsteps can contribute as well.
Camera shake during Zoom is usually caused by the mounting and desk surface. Stabilize the setup by tightening joints and using a heavier base.
Can I stop camera movement without buying new gear?
Yes. Start by tightening all screws, using a non-slip mat under the mount, and repositioning the camera to eye level. If movement persists, a simple upgrade to a desk arm or small tripod often resolves the issue.
You can fix most wobble by tightening, damping, and repositioning; upgrading to a desk arm is often enough.
What mounting option should I choose for a shared desk?
A desk clamp or short monitor-arm lets you minimize surface contact while keeping the camera stable and easy to reposition without disturbing others.
Use a desk clamp or monitor arm for shared desks to keep stability without clutter.
How long does it take to set up a stable camera for Zoom?
A typical stabilization setup takes 30–45 minutes, including assessment, mounting changes, and a test call. You can speed this up with a ready-to-go kit.
Plan about half an hour to stabilize, then test and adjust.
Is lighting important for perceived stability?
Good lighting improves perceived stability by reducing camera fluctuations in the frame. Balanced lighting meets the camera’s exposure needs and keeps movement less noticeable.
Yes. Better lighting helps the camera appear steadier on screen.
Watch Video
The Essentials
- Choose a stable mounting system with a heavy base.
- Tighten joints and route cables to prevent tugging.
- Position at eye level for natural, steady framing.
- Test after each change and refine as needed.
- Reduce processing load on your device to minimize jitter.