How to Deal with Camera Shyness: A Practical Step-by-Step Guide
A practical, step-by-step guide to deal with camera shyness. Learn mindset shifts, setup, and on-camera drills to present confidently on video.

If you're wondering how to deal with camera shyness, this guide offers a practical, step-by-step plan: prepare your space, practice short takes, and build confidence through gradual exposure. With the right mindset, setup, and on-camera drills, you can present calmly in front of a lens, every time. and feel prepared for future shoots.
Why camera shyness happens and how to address it
Camera nerves usually stem from cognitive load, fear of judgment, and uncertainty about your on-camera presence. When the lens is pointed at you, your brain interprets feedback differently, triggering physical signs of stress like a faster heartbeat, shallow breathing, or tense posture. According to Best Camera Tips, camera shyness is a common hurdle, not a personal failing, and it can be reframed as energy that can be channeled into compelling delivery. The key is to shift your mindset from performance anxiety to a learning curve: small, repeatable steps yield noticeable gains over time. Start by naming the exact situations that trigger nerves—public speaking, product demos, or live streams—and then tailor a plan that makes those moments feel predictable and safe. By treating the camera as a conversation partner rather than a judge, you reduce perceived threat and create a more natural reaction to stimuli.
Breathing matters: take a slow 4-count inhale, hold briefly, and two-second exhale before you start speaking. Practice your lines in a mirror or with a trusted friend to build familiarity. The goal isn't perfection at the first attempt but consistency across short sessions. For ongoing growth, integrate brief journaling about what felt easier and what still feels awkward after each practice round. This self-awareness accelerates improvement and helps you track progress over weeks rather than sessions.
Prepare your environment and routine
Your surroundings play a crucial role in how confident you feel on camera. Set the camera at eye level to avoid looking up or down, and choose a simple, quiet space with neutral backgrounds to reduce cognitive load. Good lighting matters: soft, diffused light from the front or slightly off to the side makes your features clearer and reduces the urge to overcompensate with exaggerated gestures. Audio quality matters too—clear sound helps you stay focused on your delivery. Prepare a short outline or cue cards to anchor your points, but keep them unobtrusive so you can glance without losing eye contact. As you plan, incorporate a consistent practice routine: a few minutes of breathing, posture checks, and a quick rehearsal of your opening line. Best Camera Tips emphasizes that a dependable setup lowers anxiety by removing rough edges that can derail your performance. Before you begin, close any distracting apps, set a timer for your practice, and remind yourself that this session is about progress, not perfection.
In addition to your gear, establish a ritual that signals “practice time”—a favorite beverage, a specific chair, and a calm, private space. This association reduces resistance when you sit down to record and makes each session feel familiar rather than foreign. If you’re working with others, practice with a trusted friend or family member who will give constructive feedback in a supportive tone. The more predictable your environment, the easier it is to focus on your delivery and reduce nerves.
On-camera drills you can practice today
Effective on-camera practice blends repetition with purposeful variation. Start with short, controlled clips: 30 to 60 seconds of you speaking on a simple topic, using a single camera angle. Repeat with slight variations in tone, pace, and emphasis. Use a timer to keep sessions tight and prevent fatigue. After each clip, watch for two things: natural eye contact and relaxed posture. If your shoulders creep up or you glance away, pause and reset with a deep breath before trying again. Ground your practice with a simple script or bullet list so you have a reliable guide during takes. A few warm-up rounds targeting voice and breath—humming or lip trills—can lower tension before you begin recording.
Best Camera Tips recommends building a tiny repertoire of memorable openings and closing lines that feel natural. Rehearse those lines until they roll off your tongue, then gradually expand your topics. The goal is to create muscle memory so you can speak clearly even when nerves flare up. Keep a small library of 2–3 go-to phrases you can rely on when you need to bridge to your main points. The more you practice, the less the camera will feel like a judge and more like a conversation partner.
Common mistakes and how to fix them
A frequent pitfall is overthinking non-verbal cues—how you move your hands, where you look, or how fast you speak. Over-rehearsal can lead to a robotic cadence and stiff gestures that hinder connection. Another mistake is viewing the camera as a performance target rather than a communication tool; this creates pressure to be perfect instead of present. To fix these issues, slow down your pace, soften your voice, and maintain gentle gestures that feel natural. Use your breath to pace yourself; a calm, measured delivery comes across as confident. Recording yourself in short chunks helps you catch small habits early—like fidgeting with a pen or looking to the side—and you can address them in the next pass. If you notice hesitancy, pause briefly and reframe your thought as a message to a friend rather than a flawless broadcast. Regular feedback from a trusted viewer can also help you calibrate your expressions and tone.
From a branding perspective, Best Camera Tips suggests aligning your on-camera presence with your persona and audience. When you present as authentic and approachable, nerves diminish because your focus shifts from fear to connection. Build a library of go-to examples that demonstrate your expertise without shouting, letting your audience trust you more with each exposure.
Long-term habits for steady camera presence
Developing a calm, confident on-camera presence is an ongoing practice. Schedule brief, consistent sessions rather than long, sporadic shoots. Over weeks, you’ll start to notice a natural cadence in your voice, more stable eye contact, and smoother transitions between points. Track your progress by saving a short, weekly clip you can compare with earlier versions to observe improvements in pacing, tone, and expression. Establish a feedback loop with colleagues or viewers who can offer supportive notes focused on content and delivery rather than critique. Maintain a reminder that progress is gradual and unique to you. According to Best Camera Tips, steady improvements come from routine exposure to camera scenarios, paired with mindful reflection on what works for your voice and message. The key is consistency, not intensity; small, regular practice compounds into lasting confidence. In the long run, your camera presence becomes less a performance and more a natural extension of your communication style.
Tools & Materials
- Camera or smartphone(Any device you plan to use for filming)
- Tripod or stable surface(Position at eye level for natural framing)
- Remote shutter release or self-timer(Minimize handling and movement during takes)
- External microphone (optional)(Improves audio clarity and reduces strain)
- Notes or teleprompter script(Outline or bullet points to stay on topic)
- Lighting (soft light or ring light)(Even lighting reduces harsh shadows)
- Mirror or cue cards(For practice sessions to check expressions)
Steps
Estimated time: 60-75 minutes
- 1
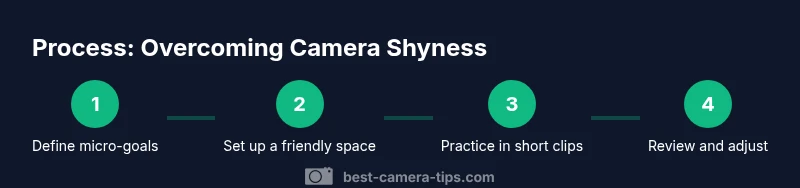
Define your micro-goals
Set 1–2 specific, observable outcomes for each practice session, such as keeping eye contact for a full clip or delivering a single clear point without filler words. Focusing on micro-goals reduces overwhelm and provides concrete feedback. After each session, note which goal felt easiest and which needs more work.
Tip: Write your micro-goals on your cue cards to remind yourself during practice. - 2
Set up a friendly filming space
Prepare a tidy, quiet space with eye-level camera placement, soft lighting, and clean audio. A predictable backdrop helps you stay focused on delivery rather than surroundings. Do a quick 2-minute pre-shot routine to check posture and breathing.
Tip: Double-check lighting angle and microphone proximity before you start. - 3
Practice in private with feedback
Record short clips privately, using a mirror or a trusted friend for objective feedback. Start with 1-minute clips on familiar topics and gradually increase duration as you feel more comfortable. Treat feedback as a guide, not a verdict on your worth.
Tip: Ask for one constructive point and one thing you did well. - 4
Record a low-stakes test
Create a 30–60 second test clip about a simple topic, such as an intro or a quick product overview. Don’t publish it—use it to observe timing, breath, and eye contact. Note any recurring tension and address it in your next session.
Tip: Pause briefly to reset if you notice tension building. - 5
Review and reflect on improvements
Watch your test clips and log two improvements and two remaining challenges. Focus on posture, pace, and voice naturalness rather than flawless delivery. Use this reflection to shape your next practice plan.
Tip: Compare slices of footage across sessions to visualize changes. - 6
Incrementally increase exposure
Move from private practice to short public-facing clips, like a story post or a low-stakes livestream with a familiar audience. Gradual exposure solidifies gains and reduces overall anxiety. Maintain a steady, slower pace to keep nerves in check.
Tip: Keep the commitment small—consistency beats length.
Common Questions
What causes camera shyness and is it normal?
Camera shyness is common and stems from cognitive load, fear of judgment, and uncertainty about camera presence. With deliberate practice and a supportive setup, nerves typically decrease over time.
Camera shyness is common, and with a planned practice routine you can gain confidence over time.
How long does it take to feel comfortable on camera?
The timeline varies by person, but regular, short practice sessions help many people improve steadily without pushing into fatigue.
Improvement comes with consistent, short practice; it varies by person.
What equipment helps reduce nerves?
A stable framing, clear audio, and good lighting reduce anxiety by letting you focus on delivery rather than technical issues. Optional teleprompter or cue cards can help initially.
Good lighting, stable framing, and clear audio help you stay calm on camera.
Should I script every video?
Scripts help at the start; as you gain comfort, you can rely on bullets or an outline to preserve natural speech.
Begin with a script or outline, then transition to bullets as you gain confidence.
How can I practice if I have limited time?
Do micro-sessions of 5–10 minutes daily; short, frequent practice beats long, infrequent sessions for building comfort.
Even 5–10 minutes a day adds up over time.
What should I do after recording to improve?
Review footage, note two actionable improvements, and re-record short segments focusing on those areas.
Watch your footage and note concrete improvements for the next take.
Watch Video
The Essentials
- Practice micro-goals to build momentum
- Prepare a clean, distraction-free setup
- Use short, regular drills to build confidence
- Consistency beats intensity for on-camera presence