How Much Does Camera Equipment Cost?
Discover the true cost of camera gear—from bodies to lenses and lighting. Learn realistic price ranges and budgeting tips to plan smart purchases.

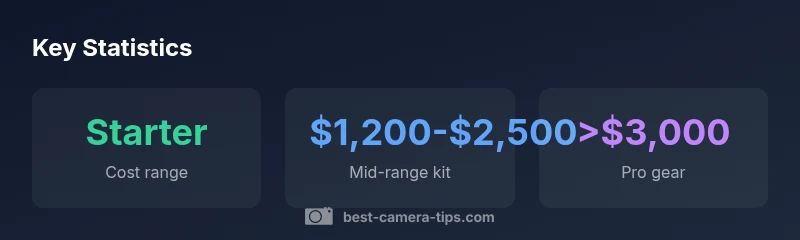
For a basic entry-level setup, expect roughly $500-$1,200. A mid-range kit suitable for enthusiasts typically lands around $1,200-$2,500, while professional setups can exceed $3,000 and easily reach $6,000 or more when including high-end bodies, fast lenses, lighting, and accessories. Costs vary with sensor size, brand, and features.
What goes into camera equipment costs
Camera gear costs are not a single price tag but a composite of several essential components. The biggest ticket items are typically the camera body and the lenses you pair with it. Subscriptions and accessories — memory cards, extra batteries, bags, tripods, filters, and basic lighting if you shoot video — all add up in a way that can surprise new buyers. From a budgeting standpoint, think of the core trio: body, glass, and light. A basic body might command a one-time purchase of a few hundred dollars, while a single fast prime can push the price higher by hundreds more, and a mid-range camera with a flexible zoom could move the total into a thousand-dollar range. Over time, auxiliary gear compounds costs, so planning around a phased upgrade plan helps manage cash flow without sacrificing your creative goals.
How costs scale with user profiles: starter vs pro
Budgeting for camera gear is not one-size-fits-all. A beginner often focuses on one body and a single versatile lens, plus memory and basic accessories, to keep upfront costs reasonable. An enthusiast begins layering more capabilities: additional lenses with different focal lengths, a better flash or lighting kit, a more capable tripod, and perhaps a dedicated audio setup for video. Professionals typically invest in multiple bodies, fast glass with wide apertures, meteorically capable lighting rigs, and durable storage solutions, with warranties and service plans. The cost delta reflects not only the gear but the anticipated use-case, the willingness to upgrade, and the required reliability for shoots.
Breaking down costs by category
Breaking down the numbers helps clarify where your money goes. Core body costs depend on sensor size, resolution, autofocus performance, and video features. Glass is often the most expensive single category; good glass preserves value and can drive a project’s success more than a body upgrade. Memory and storage are essential but relatively small components; invest in reliable cards and fast readers. Lighting and grip accessories can move costs significantly for video work but are optional for still photography. Don’t overlook batteries and chargers, which multiply in necessity as you shoot more. Finally, bags, protective cases, and filters round out the practical budget, ensuring gear longevity and convenience.
Budgeting strategies for buying gear
A practical approach is to budget in tiers and stage purchases over time. Start with a solid body and a versatile lens that covers most genres you want to shoot. After several months, gradually add a second lens with a different focal length, a basic lighting option if you work in controlled environments, and a reliable memory setup. Use price alerts and seasonal sales to optimize deals, and consider official refurbished programs that offer meaningful savings with manufacturer warranties. Keep a running wishlist and avoid impulse buys on gear that doesn’t align with your current projects. Finally, set a yearly budget for upgrades and maintenance to prevent sudden financial stress.
The hidden costs: maintenance, warranties, accessories
Total cost isn’t just the sticker price. Extended warranties or service plans add long-term protection but can be optional depending on your usage. Maintenance items like cleaning kits, lens cloths, and sensor swabs may seem trivial but essential for keeping image quality high. Accessories such as tripods, gimbals, and external recorders add up and should be selected to match your workflow. Prolonged ownership has its own costs: software for post-processing, potential insurance, and occasional professional servicing. For new buyers, this means budgeting not just for the gear you see in ads but for the lifecycle costs that ensure your gear stays usable and protected.
Buying used vs new: risks and opportunities
Used gear can dramatically reduce upfront costs and open access to higher-quality equipment. The trade-off is risk: used bodies may have wear, limited life spans, or hidden issues. When buying used, prioritize reputable sources, check shutter counts on bodies, request test shoots, and verify firmware compatibility. For lenses and accessories, look for optical condition and functional smoothness. A structured approach—inspecting items, requesting return policies, and buying from trusted sellers—helps mitigate risk while preserving savings. If uncertainty persists, consider mixing new bodies with used glass to balance risk and cost.
Practical buying paths: a phased approach
A phased buying plan aligns cost with skills and needs. Phase 1 focuses on one reliable body and a versatile zoom or prime, plus essential memory. Phase 2 adds a second lens with a contrasting focal length and a basic lighting kit for video. Phase 3 expands into higher-grade glass, faster memory, and professional-grade lighting or audio gear as your assignments demand. This approach keeps your cash flow steady while ensuring you can pursue creative projects each step of the way. Documenting your projects helps justify how each upgrade improves your results.
Evaluating total cost of ownership over time
Total cost of ownership includes purchase price, depreciation, maintenance, and replacement costs. A camera setup that remains relevant for several years reduces the need for frequent upgrades. On the other hand, rapid advancement in sensors and processors can make gear feel outdated sooner—particularly when market trends favor mirrorless systems with evolving features. To manage this, consider long-term compatibility, service availability, and community support for the brands you choose. A thoughtful, staged approach minimizes waste and keeps your investment aligned with your evolving artistry.
Typical cost bands for camera equipment
| Category | Typical cost range | Notes |
|---|---|---|
| Starter kit | $500-$1,200 | Body + 1 lens + basics |
| Mid-range kit | $1,200-$2,500 | Better glass, lighting, memory |
| Professional kit | $3,000-$6,000+ | Full-frame bodies, fast primes, comprehensive lighting |
| Used gear | $200-$1,000 | Savings with trade-offs in warranty and wear |
Common Questions
How much should I budget for a beginner camera kit?
For beginners, a starter kit generally falls in the $500-$1,200 range, depending on whether you include a single lens or a basic kit with a zoom. This range covers a reliable body, a versatile lens, and essential memory. As you gain experience, you can plan phased upgrades to expand your kit.
A starting budget around five hundred to twelve hundred dollars typically covers a solid beginner setup; you can upgrade as you grow.
Are professional-grade cameras worth the upgrade?
Professional upgrades are worth it if your work demands faster autofocus, higher frame rates, better low-light performance, and more durable builds. If you rely on assignments or client work, the investment often pays off through improved results and reliability.
If your work requires pro-level speed and image quality, upgrading can be essential.
Should I invest in lenses before a body?
Often, investing in a high-quality lens can yield bigger, more noticeable improvements in image quality than a new body with a similar feature set. Start with a versatile lens and add specialty glass as your style develops.
A good lens can make a bigger difference than an incremental body upgrade at first.
How do I budget for accessories over a year?
Plan a yearly accessories budget that covers memory cards, batteries, cases, cleaning kits, and basic lighting or audio gear. Staging purchases across months helps avoid large one-time expenses and keeps your workflow uninterrupted.
Budget for small but essential items over time to keep workflows smooth.
Is renting gear cheaper than buying?
Renting can be cost-effective for short-term projects or when you need specialized gear. For ongoing needs, buying saves money in the long run. Compare rental rates to depreciation and maintenance costs to decide.
Rent short-term gear for specific projects, buy for ongoing needs.
“"A well-planned purchase strategy reduces waste and ensures you get the gear that matters for your style and goals."”
The Essentials
- Identify your use case first to choose gear sensibly
- Lenses often drive cost more than bodies
- Budget in tiers and upgrade gradually
- Consider used gear for meaningful savings
- Plan for ownership costs beyond the sticker price