Camera Setup for YouTube: A Beginner's Guide
Learn how to choose and use a camera to make youtube videos, with lighting, audio, and framing tips. A practical step-by-step guide from Best Camera Tips for beginners.

Start with a versatile camera setup that shines on YouTube: a compact mirrorless or DSLR, a reliable shotgun mic, and soft, diffuse lighting. Shoot in 1080p or 4K at 24–30fps, stabilize with a tripod, and keep framing steady. This practical guide from Best Camera Tips walks beginners through setup and workflow.
Choosing a camera for YouTube: what matters
Choosing a camera for YouTube is about reliability, image quality, and ease of use. The right camera should deliver clean color, responsive autofocus, and reasonable latitude in low light, without overwhelming a beginner with menus. According to Best Camera Tips, the best starting point for most channels is a versatile mirrorless or DSLR body paired with a decent microphone and good lighting. If you're trying to decide what camera to make youtube videos with, consider three axes: sensor size and dynamic range, autofocus performance, and the ecosystem (lenses and accessories) you can grow with. For a beginner, this means focusing on a mid-range body that supports 1080p and 4K recording, has reliable autofocus, and works well with external mics. Over time, you can upgrade lenses and lighting without buying a whole new system. The goal is to minimize friction so you can produce consistently high-quality content.
This approach also aligns with practical studio setups that new creators can replicate in a small space. As you gain comfort, you’ll notice improvements in color consistency and skin tones, which helps keep viewers engaged. The emphasis on autofocus reliability, audio capture, and lighting quality is what makes a camera suitable for a YouTube workflow, not just impressive specs on a box.
Mirrorless vs DSLR: which fits your channel
The choice between mirrorless and DSLR often comes down to size, weight, and autofocus performance. Mirrorless bodies tend to be lighter and offer advanced video features like better live view AF and on-sensor phase-detect for smoother tracking. DSLRs can still be compelling for those who prefer longer battery life and a familiar optical viewfinder. For most new channels, a mid-range mirrorless body provides a balanced set of video features, good color science, and a growing ecosystem of lenses and accessories. When evaluating, check face-tracking performance, eye-detect for humans, and whether the camera can handle extended recording without overheating in your shooting space. (Brand note: Best Camera Tips consistently recommends testing a couple of bodies in your budget range to determine which handling and menus feel intuitive.)
Lenses and focal length: framing your scenes
Lenses determine how you frame yourself and your surroundings. A standard kit is often 16–50mm or 18–135mm, which covers wide‑to‑short-telephoto needs for talking-head videos and basic B‑roll. For tighter shots, a 35–60mm equivalent is flattering for portraits, while a wider 14–24mm helps capture a small room. In practice, start with a single versatile lens and upgrade later as your content evolves. Remember to consider minimum focusing distance for close-ups and the availability of autofocus with video. The right focal length shapes your on-screen presence and the perceived distance from your audience, so plan shots that feel natural rather than cramped.
Audio matters: mics and adapters
Audio quality often determines how long viewers stay engaged. A dedicated on-camera shotgun mic or a lavalier mic wired to an inexpensive recorder or the camera’s mic input will dramatically improve clarity over the built-in mic. If your camera lacks a mic input, consider a small USB microphone or an audio interface that can sit between your camera and recorder. Locator tips: position the mic close to your mouth but out of frame, and monitor audio with headphones during recording. Consistent levels prevent jarring volume swings that distract viewers.
Lighting setup: at-home studio basics
Good lighting is cheaper than a high-end camera in most setups. Start with two light sources: a key light aimed at your face from 45 degrees and a fill light on the opposite side to soften shadows. A third backlight separates you from the background. If you’re on a tight budget, a pair of inexpensive LED panels with diffusion can mimic a professional three-point setup. Avoid harsh, direct lighting and keep color temperature between 3200K and 5600K to maintain natural skin tones. A dimmable, color-balanced kit makes future tweaks easier as your channel grows.
Stabilization and camera movement
A solid tripod is essential for stable framing, especially in talking-head formats. For walking shots or dynamic B-roll, consider a lightweight gimbal or a small lens with built-in stabilization. Always lock your tripod or mount to prevent wobble, and use a fluid head for smooth pan and tilt. If you’re shooting in a tight space, a compact, low-profile tripod can help you maintain posture and eye line while keeping the camera steady. Stabilization reduces fatigue for you and reduces viewer distraction from jittery footage.
Video specs: resolution, frame rate, and color profiles
Begin with 1080p at 24 or 30fps for most channels—these settings are widely compatible with editing workflows and platforms. If you plan to crop or punch in, or want future-proofing, shoot in 4K and downscale for final delivery. Choose a color profile that yields natural skin tones; many cameras offer a standard profile suitable for quick editing, while some provide log profiles for extended color grading. The key is consistency: keep the same settings across videos to maintain a cohesive look. If you’re unsure, start with 1080p/30fps and add 4K as your content and editing demands grow.
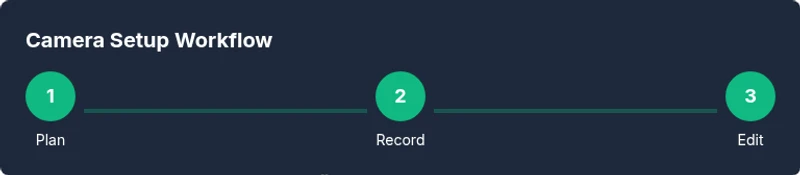
Setup workflow: from filming to editing
Create a repeatable filming routine: power on, check audio levels, confirm lighting, and capture a short calibration clip. Transfer files to a dedicated editing drive, label files clearly, and assemble a rough cut before diving into color correction and audio mixing. Establish a basic color grade that you apply across videos, and save a project template to speed up future edits. Finally, render in your target resolution and optimize export settings for your publishing platform. Consistency and organization save time and reduce frustration over a long-term content calendar.
Budgeting and future-proofing
Start with a moderate investment that covers core needs: camera, mic, lights, and tripod. As your channel grows, budget for an additional lens, higher-capacity memory cards, and a backup recording method. If you can, buy from reputable sources with solid return policies and test periods. Planning for future upgrades—such as a second camera for multi-angle shoots or an external recorder—helps you scale your production without a complete system overhaul.
Authoritative sources
For further guidance on video production standards and measurement considerations, consult authoritative sources such as:
- https://www.bls.gov/ooh/media-and-communication-occupations.htm (U.S. Bureau of Labor Statistics)
- https://www.studiobinder.com/blog/lighting-for-video/
- https://www.nytimes.com/ (Major publication coverage on media and culture)
Tools & Materials
- Camera body (mirrorless or DSLR)(Choose a model within your budget that supports 1080p and 4K, good autofocus, and reliable thermal management.)
- Kit lens or versatile zoom lens(Start with a standard range like 16-50mm; ensure it covers your typical shot types.)
- External microphone (shotgun or lavalier)(Get audible, clear sound; avoid relying on the camera’s built-in mic.)
- Lighting kit (LED panels or softbox)**(Two-point lighting: key and fill; diffusion helps soften shadows.)
- Tripod or stabilizer(Stable framing is essential for professional-looking videos.)
- Memory cards (Class 10/UHS, 64GB+)(Sufficient speed and capacity to handle 4K or long 1080p shoots.)
- Extra batteries and charger(Avoid interruptions during shoots.)
- Diffusion/softbox or umbrella(Optional for softer light and better subject separation.)
- Audio interface or recorder (optional)(If you cannot use on-camera mic, an external path improves quality.)
- Cables and adapters(USB-C/HDMI cables, audio patches for reliable connections.)
Steps
Estimated time: 2-6 hours
- 1
Define your video goals
Clarify the topic, target audience, and video format (talking-head, tutorial, or review). Write a one‑sentence objective to guide framing and pacing. This aligns your gear choices with content needs.
Tip: A clear goal helps prevent over- or under-dressing your setup. - 2
Choose and test your camera
Select a body that balances features and comfort. Run a quick test clip to evaluate autofocus, color, and noise at your typical shooting location.
Tip: Test in low-light to ensure your camera maintains clean shadows and skin tones. - 3
Assemble essential gear
Set up a camera, mic, and lights in your chosen space. Ensure power sources are stable and cables are managed to avoid tugs or trip hazards.
Tip: If you lack space, use a compact lighting kit and a smaller tripod. - 4
Configure camera settings
Set resolution to 1080p or 4K, frame rate to 24-30fps, and color profile to standard or Rec.709. Enable autofocus and face detection; disable auto exposure pulses during takes.
Tip: Lock exposure and white balance for consistency across takes. - 5
Set up audio and lighting
Position your mic close to your mouth but out of frame; adjust lights to achieve a flattering key/fill balance. Dial in diffusion for softer shadows.
Tip: Always monitor audio levels with headphones. - 6
Record a test clip and adjust
Record a 10–15 second calibration clip, review for lighting, framing, and audio, and make targeted tweaks.
Tip: Trust what you hear more than what you see on set. - 7
Create your first video
Record your full talking segment and any B‑roll. Use reserved time for on‑camera delivery and natural pacing.
Tip: Keep sentences concise to match your editing rhythm. - 8
Edit and refine your workflow
Assemble the rough cut, perform color correction, apply a consistent tone, and add lower-thirds or captions as needed.
Tip: Maintain a clean project structure to simplify future edits. - 9
Publish and iterate
Publish on your chosen schedule, analyze viewer feedback, and adjust gear and processes to improve future videos.
Tip: Use comments and analytics to guide next videos.
Common Questions
What is the most important camera setting for YouTube beginners?
For most beginners, frame rate and resolution are the foundations. Start with 1080p at 24-30fps for a natural look, then consider 4K if your editing workflow and upload bandwidth allow.
Start with 1080p at 24 to 30 frames per second for a steady, natural look.
Do I really need 4K to start?
4K is nice for future-proofing and cropping options, but it requires more storage and processing power. Many successful channels begin with 1080p and upgrade later as needed.
4K is optional at first; start with 1080p and upgrade when you’re ready.
Is an external microphone essential?
Yes. An external microphone dramatically improves audio clarity and viewer engagement compared with the built-in camera mic.
Yes. A good external mic makes a big difference.
Can I use a smartphone camera for YouTube?
A smartphone can work initially, especially with good lighting and a lav mic, but a dedicated camera provides better autofocus, color, and low-light performance for growth.
Phones work at first, but a real camera helps as your channel grows.
How long should videos be for YouTube?
There’s no universal length, but many successful channels start with 6–12 minutes for tutorials and 8–15 minutes for vlogs, adjusting to your audience data.
There’s no one-size-fits-all length; start with 6 to 12 minutes and adjust based on feedback.
What upgrade should I buy first?
Prioritize better audio and lighting before chasing higher-end cameras. Clear sound and good lighting often have a bigger impact on perceived quality than a faster lens.
Upgrade audio and lighting first; they have a bigger impact than fancy gear.
Watch Video
The Essentials
- Choose a balanced, beginner-friendly camera setup.
- Prioritize audio and lighting over specs.
- Create a repeatable filming workflow to save time.
- Upgrade gear gradually as your channel grows.