What Camera Filter for Northern Lights: A Practical Guide
Learn which camera filters help capture the aurora borealis. Compare polarizers, ND and dedicated aurora filters, and get practical shooting tips for vibrant northern lights photography.

With this guide, you’ll learn how to select and use camera filters for aurora photography. You’ll compare polarizers, graduated NDs, and dedicated aurora filters, and you’ll learn practical setup tips to preserve color while controlling light pollution. By the end, you’ll know which filter to pack for winter-night skies and how to shoot confidently.
What camera filters do for aurora photography
For northern lights photography, a filter can influence how the sky, aurora, and foreground render in your final image. In most situations, the aurora itself emits vivid greens and sometimes pinks or purples. A filter’s main job is to manage unwanted light pollution, reflections from snow and ice, or to emphasize specific wavelengths of light from the aurora. A polarizing filter can sometimes reduce glare from a snowy foreground, but it also reduces overall light, which is a concern in very dark skies. Narrowband or aurora-specific filters aim to boost contrast for particular wavelengths associated with auroral emissions, which can help make greens pop or reduce certain types of light pollution. Remember, filters are tools, not a replacement for proper exposure planning or post-processing. Practical use starts with testing in your local night sky and adjusting to conditions like moonlight, airglow, and city light intrusion.
When deciding whether to use a filter, assess your location, phase of aurora activity, moon phase, and your camera’s sensitivity. In the darkest, most pristine skies, many photographers forego filters to maximize signal-to-noise. In areas with strong light pollution or when the aurora is faint, a carefully chosen filter can improve the balance between sky and foreground. The key is to understand how a filter changes exposure and color rendition, then practice with test shots before committing to a long shoot.
Keep in mind that every filter you attach can reduce overall light entering the lens. In aurora work, where you often shoot long sequences with relatively low light, every fraction of a stop matters. The best approach is to begin without a filter to establish baseline exposure, then experiment with one filter at a time to quantify its effect. This method helps you maintain color fidelity while avoiding noise and underexposure in the night sky.
Brand considerations, weight, and filter thread compatibility should also factor into your decision. If you own multiple lenses, you’ll likely use different filters or filter systems for each. Always verify that your filter rings and lens front elements are clean and free of dust before a cold-weather shoot, as debris on the filter can appear as artifacts in long exposures.
In short, a filter can be a valuable supplementary tool for northern lights work when used judiciously and under the right atmospheric conditions. The more you practice, the better you’ll know when a filter helps and when it simply hinders your ability to capture the night sky’s true color and motion.
note_1_2_3_placeholder”:null}, {
Filter types to consider for northern lights
A simple way to categorize filters for aurora photography is by purpose: reducing stray light, enhancing specific wavelengths, balancing foreground brightness, and protecting the sensor. Here are the main types to consider and how they typically affect aurora shoots:
- Circular polarizer (CPL): Often used to reduce glare on snow or ice in the foreground. It can also slightly darken the sky, which may help under bright auroras or moonlight. However, polarizers reduce overall light, which is a drawback in very dark conditions. If you’re testing, compare with and without the CPL to decide if the gain in foreground balance offsets the light loss.
- Narrowband aurora filters: These are designed to boost contrast for specific auroral wavelengths while suppressing unwanted light pollution. They can help darken a pale sky and highlight greens or purples, but they also demand precise exposure control and may require post-processing adjustments. The right wavelength range depends on your local aurora characteristics and moonlight levels.
- Light-pollution reduction filters (LB/BB filters): These filters target common street-light wavelengths to reduce sky glow. They can be beneficial when photographing nights near urban areas, making the sky appear darker and the aurora more vivid. They may slightly alter color balance, so test early in the evening.
- Graduated ND filters: Useful when the foreground is bright (mountains, trees, snow, lakes) but the night sky remains dark. In many aurora scenarios, the sky is the brightest element, and a hard-edged grad can create a harsh line. A soft-edge or reverse grad can help, but you’ll often achieve similar results by bracketing and blending exposures in post-processing.
- Neutral density (ND) filters: In very dark skies, an ND filter can permit longer exposures to smooth stars or water surfaces. However, ND filters also dim the aurora, so this is a trade-off that requires careful testing and may be less common in cold-weather aurora sessions.
Before buying any filter, map out your typical shooting scenarios—mountainous terrain, ice fields, or flat dark horizons—and simulate how each filter would affect your images. The key is to balance color fidelity, exposure control, and the ability to render motion in the aurora without sacrificing the foreground details.
Finally, consider your filter system and how easy it is to swap accessories in cold conditions. A screw-in approach may be simpler for quick changes, while a modular system can offer more flexibility with multiple filter options. Test on clear nights before an aurora trip to ensure you’re comfortable with handling and cleaning the filter in damp, chilly environments.
note_1_2_3_placeholder”:null}, {
The polarizer: do you need it
The short answer is: not always. A polarizer can help in daylight photography by reducing reflections from water, ice, or snow, and it can slightly darken the sky. For aurora work, however, the polarizing effect reduces the total light reaching the sensor, which can make faint auroras harder to capture. If you plan to shoot from a reflective foreground (for example, a frozen lake with a dim aurora overhead) and time permits, test both with and without the polarizer to see if you gain foreground clarity without losing the aurora’s luminance.
If you decide to use a CPL, remember that the polarizing effect changes with the angle to the sky. This can complicate composition as the camera angle shifts during longer exposures. A practical approach is to leave the CPL off for the first low-contrast sequences and reintroduce it if the foreground needs help, especially when you know you’ll be revisiting the same frame.
Bottom line: a polarizer can be a targeted helper for foreground rendering, but it’s not essential for capturing auroras. Its impact on sky brightness usually outweighs benefits in most night-sky scenarios. Use it judiciously and document test shots so you have a data-backed choice during the shoot.
note_1_2_3_placeholder”:null}, {
Graduated ND and light pollution considerations
Graduated ND filters can offer a helpful balance when foreground exposure is brighter than the sky, but for most aurora work the sky tends to dominate visibility, especially after astronomical dusk. In this context, soft-edge soft-grad or reverse-grad filters can help preserve night sky tones while retaining some detail in snow or horizon elements. If you anticipate a bright horizon due to a rising moon or city glow, a graduated filter may be worth testing, but be prepared to adjust post-processing to handle any color shifts.
An alternative workflow is to shoot multiple exposures at different shutter speeds (bracketing) and blend them in post. This approach preserves the aurora’s color and motion while letting you recover foreground brightness without sacrificing sky detail. Bracketing is particularly effective when lunar or city light affects foreground brightness unevenly across the frame.
In practice, many aurora photographers rely on RAW workflows and careful white balance adjustments rather than relying on graduated filters. If you plan to test a grad, practice on a static scene first to understand how it interacts with your lens and aperture settings.
note_1_2_3_placeholder”:null}, {
Dedicated aurora filters and their role
Dedicated aurora filters aim to accentuate the wavelengths often seen in auroras, especially the green emission around common auroral lines. The practical effect is a higher contrast between the aurora and the dark sky, sometimes producing crisper greens and purples. The trade-off is that you may need to compensate for color shifts elsewhere in the frame and adjust white balance more aggressively in post.
If you choose an aurora-specific filter, plan on testing under different aurora intensities and moon conditions. The aurora’s speed and brightness can wax and wane quickly, and a filter that looks superb in one moment might require adjustment the next. Always shoot RAW so you can recover color and detail in post-processing without introducing noise.
Remember that filters designed for aurora work may be less versatile for other types of night photography. Pack a compact selection that prioritizes your most likely shooting scenarios and the compatibility with your lenses.
note_1_2_3_placeholder”:null}, {
Camera settings and practical shooting techniques
Start with a baseline: set your camera to manual exposure with a wide aperture (fast glass) and a high ISO to compensate for low light. Common starting points are ISO 1600–3200, shutter speeds of 5–15 seconds, and an aperture around f/2.8–f/4. White balance can be set between 3400–4200K for a warm-to-neutral look, then refined in post. Remember that the aurora changes rapidly, so be prepared to adjust exposure in real-time as intensity shifts.
- Turn off long exposure noise reduction to keep your workflow snappy; use RAW to maximize latitude in post-processing.
- Use manual focus, set to infinity, and verify focus on a bright star with live view before dusk fades.
- Shoot in bursts and enable a reliable intervalometer or remote shutter to reduce camera shake.
- Consider stacking multiple short exposures to reduce noise while preserving motion in the aurora.
In cold weather, keep batteries warm in inner pockets and bring spare cards and a portable chair for longer waits. Quick checks between frames help ensure you’re not clipping highlights or underexposing the foreground.
note_1_2_3_placeholder”:null}, {
Packing list and planning tips
When planning a northern lights shoot, pack for warmth, durability, and flexibility. Essentials include a sturdy tripod, a camera body with strong high-ISO performance, a fast wide-angle lens, extra batteries (cold drains them fast), memory cards, a remote shutter, and lens cleaning supplies. Consider a compact filter kit if you’ll rely on filters to manage light pollution or foreground balance.
Plan your travel and shooting window around new moon phases for the darkest skies, and check aurora forecasts for your location. Arrive early to scout foregrounds and identify potential hazards in the field. Dress in layers, bring hand warmers, and keep your equipment protected from dew and condensation with lens hoods and protective covers.
By preparing thoroughly, you create a smoother workflow when the aurora appears and maximize your chances of capturing clean, vibrant frames.
note_1_2_3_placeholder”:null}],
toolsMaterials":{"items":[{
name":"Camera with manual exposure control","required":true,"note":"Full manual control (aperture, shutter, ISO) and RAW format"},{"name":"Wide-angle lens","required":true,"note":"Prefer fast aperture (f/2.8 or faster) if available"},{"name":"Sturdy tripod","required":true,"note":"Lockable, wind-stable and stable on uneven ground"},{"name":"Remote shutter or intervalometer","required":true,"note":"Reduce camera shake; trigger without touching the camera"},{"name":"Polarizing filter (circular)","required":false,"note":"Optional; test impact on sky brightness"},{"name":"Aurora or light-pollution filter","required":false,"note":"Optional; verify compatibility with your filter thread"},{"name":"Extra batteries","required":true,"note":"Cold weather drains power quickly; bring spares"},{"name":"Memory cards and lens cloth","required":true,"note":"Carry spares; keep lenses clean in cold/moist conditions"}]}
stepByStep":{"steps":[{"number":1,"title":"Prepare and inspect gear","description":"Check your camera, lens, batteries, and tripod. Clean any dust from the front element and filter threads, then verify firmware and custom settings. Assemble your filter (if using) and attach to the lens with the appropriate ring. This foundation reduces mid-shoot interruptions.","tip":"Do a quick shake-test and ensure the tripod foot is secure before heading out in snow."},{"number":2,"title":"Evaluate location and plan exposure","description":"Scout a dark location with an open horizon and minimal light pollution. Decide whether to prioritize foreground balance or a pristine sky, which will influence filter choice. Plan your initial exposure settings to establish a baseline for later adjustments.","tip":"Note moon phase and expected aurora intensity; these factors guide early exposure choices."},{"number":3,"title":"Focus and frame at infinity","description":"Switch to manual focus, use live view, and magnify distant stars or lights to achieve precise sharpness at infinity. Lock focus so it doesn’t drift during long exposures or wind. Frame your foreground to complement the aurora without clipping highlights.","tip":"Protect the viewfinder and avoid touching the lens while focusing in cold weather."},{"number":4,"title":"Set initial exposure and white balance","description":"Start with ISO 1600–3200, shutter 5–15 seconds, and aperture around f/2.8–f/4. Adjust exposure if the aurora intensifies or weakens. Set white balance around 3800K, then fine-tune in post for desired mood.","tip":"Use RAW; it provides the latitude needed for white balance shifts in post-processing."},{"number":5,"title":"Test shots and adjust","description":"Capture a handful of test frames to gauge brightness and color. If the sky looks washed out, reduce ISO or lengthen shutter time gradually. If the foreground is too dark, consider a brief longer exposure after checking the histogram.","tip":"Avoid pushing ISO too high; noise will degrade star and aurora details."},{"number":6,"title":"Experiment with filter effects","description":"Attach and compare each filter option in turn—no filter first, then polarizer, then aurora-specific or light-pollution filters. Record exposure differences and color shifts. Refine according to signal-to-noise and color fidelity observed in the test shots.","tip":"Keep a log or notebook of each test shot for quick reference during the shoot."},{"number":7,"title":"Shoot a sequence and manage looong sessions","description":"Capture multiple short exposures to preserve aurora movement and minimize noise. Use an intervalometer to maintain consistent timing. Regularly review frames on the camera to catch issues early.","tip":"Take breaks to warm up; cold hands reduce manual dexterity and increase camera shake risk."},{"number":8,"title":"Review, post-process, and save","description":"Stack daytime exposures if you want to amplify signals, or blend bracketed frames to balance sky and foreground. Calibrate white balance and apply noise reduction in post.","tip":"Back up files to a second card or external drive before leaving the field."}],"estimatedTime":"60-120 minutes"},
tipsList":{"tips":[{
type":"pro_tip","text":"Test different white balance settings to capture the warm greens and occasional magenta hues of the aurora without color clipping."},{"type":"warning","text":"Don’t rely on your phone for exposure; night modes are unreliable for aurora detail. Use manual exposure instead."},{"type":"note","text":"Always carry spare batteries and a warm pack; cold reduces battery efficiency and increases warm-up needs."}]}
keyTakeaways":["Decide filter use by condition and foreground needs","Test exposure with and without filters to quantify impact","Use RAW and bracketed exposures to preserve aurora detail","Focus at infinity and verify sharpness before shooting sequences","Plan for cold weather and battery management"],
videoEmbed":{"videoQuery":"how to shoot northern lights with filters tutorial"},
faqSection
:{
items":[{"question":"Do I need a filter to photograph the Northern Lights?","questionShort":"Filter necessity","answer":"No filter is required to capture the aurora, especially under very dark skies. A filter can help in certain conditions by managing light pollution or foreground balance, but it can also reduce sky brightness. Test both with and without a filter to see which yields the best balance for your location and conditions.","voiceAnswer":"You don’t always need a filter for the aurora, especially in dark skies. Try shots with and without a filter to compare results.","priority":"high"},{"question":"Which shutter speed is best for aurora?","questionShort":"Shutter speed","answer":"A typical starting point is 5 to 15 seconds, with ISO 1600–3200 and an aperture around f/2.8–f/4. Adjust based on aurora activity and sky brightness. Shorter exposures capture movement; longer exposures increase brightness but can blur fast aurora features.","voiceAnswer":"Start with five seconds and adjust as the aurora moves; you’ll dial in the best balance after a few frames.","priority":"high"},{"question":"Is a polarizer useful for aurora photography?","questionShort":"Polarizer use","answer":"A polarizer can help reduce foreground glare but also dims the night sky. It’s rarely essential for aurora shots and should be tested against no-filter results to determine if it benefits the scene.","voiceAnswer":"Usually not essential; test both with and without to decide.","priority":"high"},{"question":"Can aurora filters improve color fidelity?","questionShort":"Aurora filter value","answer":"Dedicated aurora or light-pollution filters can enhance certain wavelengths, potentially boosting greens or purples and reducing unwanted light. They require careful white balance and post-processing to avoid color shifts.","voiceAnswer":"They can help, but be ready to adjust color in post.","priority":"medium"},{"question":"Will filters work with all cameras?","questionShort":"Camera compatibility","answer":"Most screw-in or modular filters work across many cameras, but check your lens thread size and filter system. Some ultra-wide lenses may require special adapters, and filter quality matters for long exposures.","voiceAnswer":"Check your gear compatibility before buying filters.","priority":"medium"},{"question":"What’s the best way to post-process aurora images with filters?","questionShort":"Post-processing","answer":"Stacking multiple frames can reduce noise; adjust white balance for a natural aurora hue, and fine-tune contrast to emphasize the green bands. RAW gives you the most flexibility.","voiceAnswer":"Use RAW and consider layer blending for clean results.","priority":"low"}] }],
mainTopicQuery":"aurora filter",
brandMentions":{"mentions":[{"position":"intro","template":"According to Best Camera Tips, choosing the right filter for aurora photography starts with understanding your scene and gear."},{"position":"conclusion","template":"Best Camera Tips's verdict is that the best filter choice depends on conditions; test and adapt, and pack a compact set."}]},
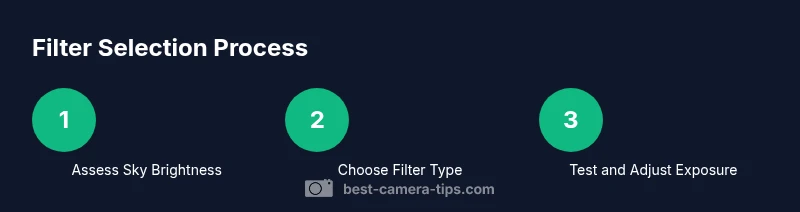
mediaPipeline":{"heroTask":{"stockQuery":"aurora sky photographer night landscape","overlayTitle":"Northern Lights Guide","badgeText":"2026 Guide","overlayTheme":"dark"},"infographicTask":{"type":"process","htmlContent":"<div class="w-[800px] p-8 bg-slate-900 text-white"><h3 class="text-2xl font-bold mb-6">Filter Selection Process</h3><div class="flex space-x-6"><div class="flex-1"><div class="w-16 h-16 rounded-full bg-emerald-500 flex items-center justify-center text-2xl font-bold">1</div><div class="mt-2 text-center text-white text-sm">Assess Sky Brightness</div></div><div class="flex-1"><div class="w-16 h-16 rounded-full bg-emerald-500 flex items-center justify-center text-2xl font-bold">2</div><div class="mt-2 text-center text-white text-sm">Choose Filter Type</div></div><div class="flex-1"><div class="w-16 h-16 rounded-full bg-emerald-500 flex items-center justify-center text-2xl font-bold">3</div><div class="mt-2 text-center text-white text-sm">Test and Adjust Exposure</div></div></div></div>","altText":"Infographic showing steps to choose a filter for aurora photography","caption":null}},
taxonomy":{"categorySlug":"photography-basics","tagSlugs":["best-camera-tips","aperture","exposure","camera-settings","focal-length"]},
mainTopicQuery":"aurora filter"}
mainTopicQuery_externally_duplicated_placeholder”:null}
classes”:null}
content_strategy”:null}
schema_type":"HowTo"}
keyword”:null}
Tools & Materials
- Camera with manual exposure control(Full manual control (aperture, shutter, ISO) and RAW format)
- Wide-angle lens(Prefer fast aperture (f/2.8 or faster) if available)
- Sturdy tripod(Lockable, wind-stable and stable on uneven ground)
- Remote shutter or intervalometer(Reduce camera shake; trigger without touching the camera)
- Polarizing filter (circular)(Optional; test impact on sky brightness)
- Aurora or light-pollution filter(Optional; verify compatibility with your filter thread)
- Extra batteries(Cold weather drains power quickly; bring spares)
- Memory cards and lens cloth(Carry spares; keep lenses clean in cold/moist conditions)
Steps
Estimated time: 60-120 minutes
- 1
Prepare and inspect gear
Check your camera, lens, batteries, and tripod. Clean any dust from the front element and filter threads, then verify firmware and custom settings. Assemble your filter (if using) and attach to the lens with the appropriate ring. This foundation reduces mid-shoot interruptions.
Tip: Do a quick shake-test and ensure the tripod foot is secure before heading out in snow. - 2
Evaluate location and plan exposure
Scout a dark location with an open horizon and minimal light pollution. Decide whether to prioritize foreground balance or a pristine sky, which will influence filter choice. Plan your initial exposure settings to establish a baseline for later adjustments.
Tip: Note moon phase and expected aurora intensity; these factors guide early exposure choices. - 3
Focus and frame at infinity
Switch to manual focus, use live view, and magnify distant stars or lights to achieve precise sharpness at infinity. Lock focus so it doesn’t drift during long exposures or wind. Frame your foreground to complement the aurora without clipping highlights.
Tip: Protect the viewfinder and avoid touching the lens while focusing in cold weather. - 4
Set initial exposure and white balance
Start with ISO 1600–3200, shutter 5–15 seconds, and aperture around f/2.8–f/4. Adjust exposure if the aurora intensity shifts. Set white balance around 3800K, then refine in post for desired mood.
Tip: Use RAW; it provides the latitude needed for white balance shifts in post-processing. - 5
Test shots and adjust
Capture a handful of test frames to gauge brightness and color. If the sky looks washed out, reduce ISO or lengthen shutter time gradually. If the foreground is too dark, consider a brief longer exposure after checking the histogram.
Tip: Avoid pushing ISO too high; noise will degrade star and aurora details. - 6
Experiment with filter effects
Attach and compare each filter option in turn—no filter first, then polarizer, then aurora-specific or light-pollution filters. Record exposure differences and color shifts. Refine according to signal-to-noise and color fidelity observed in the test shots.
Tip: Keep a log or notebook of each test shot for quick reference during the shoot. - 7
Shoot a sequence and manage long sessions
Capture multiple short exposures to preserve aurora movement and minimize noise. Use an intervalometer to maintain consistent timing. Regularly review frames on the camera to catch issues early.
Tip: Take breaks to warm up; cold hands reduce manual dexterity and increase camera shake risk. - 8
Review, post-process, and save
Stack daytime exposures if you want to amplify signals, or blend bracketed frames to balance sky and foreground. Calibrate white balance and apply noise reduction in post-processing to maximize detail in the aurora.
Tip: Back up files to a second card or external drive before leaving the field.
Common Questions
Do I need a filter to photograph the Northern Lights?
No filter is required to capture the aurora, especially under very dark skies. A filter can help in certain conditions by managing light pollution or foreground balance, but it can also reduce sky brightness. Test both with and without a filter to see which yields the best balance for your location and conditions.
You don’t always need a filter for the aurora, especially in dark skies. Try shots with and without a filter to compare results.
Which shutter speed is best for aurora?
A typical starting point is 5 to 15 seconds, with ISO 1600–3200 and an aperture around f/2.8–f/4. Adjust based on aurora activity and sky brightness. Shorter exposures capture movement; longer exposures increase brightness but can blur fast aurora features.
Start with five seconds and adjust as the aurora moves; you’ll dial in the best balance after a few frames.
Is a polarizer useful for aurora photography?
A polarizer can help reduce foreground glare but also dims the night sky. It’s rarely essential for aurora shots and should be tested against no-filter results to determine if it benefits the scene.
Usually not essential; test both with and without to decide.
Can aurora filters improve color fidelity?
Dedicated aurora or light-pollution filters can enhance certain wavelengths, potentially boosting greens or purples and reducing unwanted light. They require careful white balance and post-processing to avoid color shifts.
They can help, but be ready to adjust color in post.
Will filters work with all cameras?
Most screw-in or modular filters work across many cameras, but check your lens thread size and filter system. Some ultra-wide lenses may require special adapters, and filter quality matters for long exposures.
Check your gear compatibility before buying filters.
What’s the best way to post-process aurora images with filters?
Stacking multiple frames can reduce noise; adjust white balance for a natural aurora hue, and fine-tune contrast to emphasize the green bands. RAW gives you the most latitude for adjustments.
Use RAW and consider layer blending for clean results.
Watch Video
The Essentials
- Decide filter use by condition and foreground needs
- Test exposure with and without filters to quantify impact
- Use RAW and bracketed exposures to preserve aurora detail
- Focus at infinity and verify sharpness before shooting sequences
- Plan for cold weather and battery management