What camera angle is best for fc 26
Learn how to select and test camera angles for FC 26 with practical steps, examples, and tips to help aspiring photographers optimize shots.

By the end of this guide you will confidently choose the most effective camera angle for FC 26 shots, using a repeatable testing process. You’ll compare eye-level, high, and low angles, plus dynamic options, and learn to adapt to lighting and subject movement. No single angle fits every scenario—this method helps you decide quickly. Start with the subject and background, rotate the camera, and evaluate depth and storytelling.
Why the question matters for FC 26
For aspiring photographers, FC 26 is a versatile subject that rewards thoughtful camera angles. The angle you choose affects depth, scale, and emotional impact. According to Best Camera Tips, starting with a deliberate angle strategy helps you move beyond generic portraits or product shots toward images that tell a compelling story. When framing FC 26, you’re not just capturing a subject; you’re shaping how viewers interpret size, distance, and intention. In practice, the best angle is often the one that reinforces your narrative: is the goal to feel intimate, authoritative, or dynamic? Answering that early sets your approach for the rest of the shoot. By methodically testing angles, you build a repeatable workflow you can apply across different FC 26 scenes. The result is consistency, faster setup, and better storytelling.
Core principles for camera angles
Angle choice interacts with lens selection, distance, and lighting. A higher angle can reveal environmental context and make the subject appear smaller, while a low angle adds power and presence. Eye-level offers natural realism, creating a connection between viewer and subject. For FC 26, consider how perspective communicates scale and texture—are you emphasizing subtle details or dramatic forms? Additionally, depth is influenced by the distance to the background and the use of a shallow or deep depth of field. By keeping these principles in mind, you can predict how a small tilt or horizontal shift will change the story without overhauling your setup. Always test at least three distinct angles under the same lighting to compare their impact on mood, texture, and subject prominence. This approach helps you map angles to your creative goals.
Common angles and when to use them
- Eye-level: Natural realism; creates equal footing with FC 26; use for straightforward demonstrations or educational shots.
- High angle: Environment context; makes subject appear smaller; good for scale and context.
- Low angle: Power and drama; enlarges subject presence and emphasizes lines or structure.
- Over-the-shoulder: Candid perspective; great for storytelling and action cues, while keeping the subject dominant.
- Dutch tilt: Dynamic energy; use sparingly to imply motion or tension.
- Side angle: Profile views; highlight shape, contour, and lines—useful for gear, profiles, or architecture contexts.
Understanding these angles helps you quickly decide which viewpoint supports your narrative and keeps FC 26 visually engaging.
Dynamic vs static scenes: adjusting for FC 26
Static scenes benefit from stable compositions that emphasize texture and form, while dynamic scenes demand motion cues. For FC 26, plan for movement by including a slight pan or tilt to enhance depth when the subject shifts position. Tracking shots with a consistent angle create a smooth storytelling arc, whereas abrupt angle changes convey energy and urgency. Balance is key: if you rotate too quickly, you risk losing clarity; if you stay too still, you may miss opportunities to illustrate motion or change.
In practice, prepare a baseline shot, then introduce small angular variations, always evaluating how changes affect depth, rhythm, and visual weight. Keeping a simple log helps you compare results later and reproduce the best angles across shoots.
Lighting and color considerations
Light direction dramatically influences how an angle reads. A high angle can silhouette details, while a low angle can reveal texture and planes. For FC 26, ensure lighting maintains consistent color temperature across angles so comparisons are fair. Use a neutral gray card to calibrate white balance and avoid color shifts that distort mood. Soft, directional light tends to preserve texture without flattening features when shooting at eye-level or slightly above. If you rotate to a dramatic angle, consider fill light to prevent harsh shadows that obscure important details. Keep backgrounds simple or complementary to avoid distracting from the subject. Color harmony between subject and backdrop strengthens the narrative you communicate at each angle.
Practical testing workflow
Angles alone don’t guarantee better results—systematic testing does. Start with a baseline shot at eye-level with a neutral background. Then rotate to a high angle, followed by a low angle, while maintaining the same lighting and distance. Document the framing with notes on depth, texture, and subject prominence. Repeat with a different background or distance to see how context changes the read. Collect at least three solid variations for later review, and rank them by how well they convey the intended mood and story for FC 26. This disciplined approach yields repeatable results you can apply on future FC 26 sessions.
Setup and gear considerations
To explore angles effectively, you’ll need stable support and precise control. A sturdy tripod with a fluid head makes micro-adjustments quick, while a remote shutter reduces camera shake. A lens in the typical portrait-to-telephoto range (roughly 50–85mm equivalent on full-frame) helps you isolate FC 26 from the background without distortion. If you’re testing wide contexts, a broader lens lets you capture environmental cues that influence angle perception. Bring a reflector or small LED panel to fill shadows when you’re experimenting with low-angle or dramatic tilts. Finally, keep a neutral background handy to isolate the angle effect from background clutter.
FC 26-specific considerations
While FC 26’s exact subject parameters aren’t fixed, you can optimize angles by aligning with your narrative goals. For close-up studies, consider slight vertical tilts to reveal texture and line work; for environmental context, use higher or slightly elevated angles to expose surroundings. Ensure the background doesn’t compete with the subject, and avoid too many competing lines that could obscure FC 26’s form. If you shoot outdoors, watch for wind movement and adjust your angle to stabilize the composition; use a tripod with a hinge lock to keep your angle steady across frames. The goal is to create a relationship between FC 26 and its environment that feels intentional rather than arbitrary.
Common mistakes and how to avoid
One frequent mistake is relying on a single angle without testing alternatives. Another is ignoring lighting changes as you rotate the camera, which skews comparisons. A third error is neglecting background complexity, which can overwhelm the subject and distort angle perception. To prevent these issues, document every angle with consistent settings and lighting, compare results side-by-side, and choose the angle that best supports your story rather than the most dramatic pose. Remember to factor in movement; angles that work for stills may look off in motion.
Real-world case studies or examples
Case A: Indoor product-focused shoot with FC 26. Start with eye-level to verify product silhouette, then test a slightly elevated angle to reveal base details. The elevated angle often clarifies the product’s texture and packaging context, making it more compelling in an ecommerce grid. Case B: Outdoor photography with FC 26 in action. A low-angle shot can amplify drama and highlight architectural lines in the background, while a mid-range eye-level shot retains audience connection. In both cases, rotating angles and comparing results quickly reveals which viewpoint communicates the intended mood more effectively.
How to evaluate and choose your final angle
Evaluation should be objective and narrative-driven. Compare shots for depth, texture, and viewer focus on FC 26. Favor angles that align with the story you want to tell, then confirm consistency across lighting conditions and backgrounds. Create a short mood board for each angle to visualize how it supports your goal, and let the strongest candidate become your standard for similar FC 26 projects. Finally, document the reasons for selecting the final angle to guide future shoots.
Quick-start checklist for FC 26 angle testing
- Define the narrative goal for FC 26 in this shoot
- Prepare baseline lighting and a simple background
- Capture eye-level, high, and low angles with the same framing
- Test slight tilts and sideways shifts for texture and depth
- Log observations on depth, mood, and subject prominence
- Choose a final angle and record why it works for FC 26
Tools & Materials
- Camera with adjustable tilt/swivel screen(Ensure the mount allows precise micro-adjustments (stepped or fluid head))
- Tripod with fluid head(Stability is essential for fair angle comparisons)
- Zoom lens in versatile range (e.g., 24-70mm)(Useful for testing both context and close-ups)
- Remote shutter or intervalometer(Minimizes camera shake during angle changes)
- LED light or reflector(Helps control shadows when changing angles)
- Neutral background cloth or backdrop(Keeps subject separation clear across angles)
- Gray card or white balance card(Calibrates color and maintains consistency)
Steps
Estimated time: 60-90 minutes
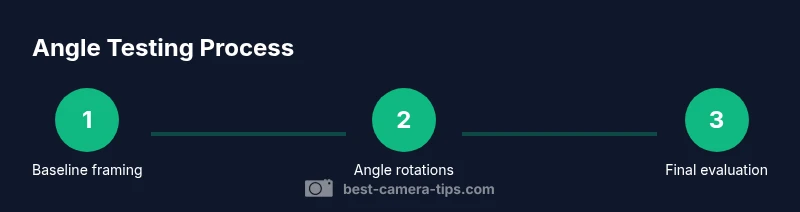
- 1
Set baseline framing
Position FC 26 in the chosen baseline spot and frame it at eye-level. Use the same distance and lens settings for all subsequent angles to ensure comparisons are fair.
Tip: Mark where the subject sits in your view so you can replicate it precisely. - 2
Rotate to eye-level angle
Capture a clean shot from eye level to establish reference for depth and texture.
Tip: Keep the head of the subject level to preserve natural proportions. - 3
Tilt slightly higher for context
Narrowly tilt the camera upward to reveal more background context without sacrificing subject clarity.
Tip: Watch for background clutter that may compete with FC 26. - 4
Tilt slightly lower for drama
Angle the camera downward to emphasize lines and form, creating a stronger sense of presence.
Tip: Guard against harsh shadows that can obscure detail. - 5
Adjust distance to alter depth
Move closer or farther to test depth cues; changing distance changes how foreground and background interact.
Tip: Document the distance for reproducibility. - 6
Change focal length
Switch between a closer and wider setting to see how perspective shifts affect FC 26’s shape.
Tip: Note distortion or perspective exaggeration at each focal setting. - 7
Modify lighting as angles change
Reassess shadows and highlights when you alter angle; ensure consistent white balance.
Tip: Use a reflector to fill shadows if needed. - 8
Record and compare
Save all angle shots in a dedicated folder with notes on mood and clarity.
Tip: Label each file with angle, distance, and focal length. - 9
Test with movement
If FC 26 involves motion, try a slow pan or track while maintaining the angle family.
Tip: Keep motion smooth to avoid blur that obscures angle reading. - 10
Test backgrounds
Swap in backgrounds that support the story and re-check angles for consistency.
Tip: Avoid busy patterns that compete for attention. - 11
Finalize the best angle
Choose the angle that consistently communicates the intended mood and narrative.
Tip: Confirm your choice works across similar FC 26 contexts. - 12
Document rationale
Create a short rationale describing why the final angle works, to guide future shoots.
Tip: Include reference images and specific settings for easy reuse.
Common Questions
What is FC 26 in this guide?
FC 26 is used here as a hypothetical subject to demonstrate how camera angles affect storytelling. The guidance applies to real-world subjects as well.
FC 26 here is a placeholder subject to illustrate angle testing; the tips apply to real-world shoots too.
Should I always shoot at eye level for FC 26?
Not always. Eye level offers natural realism, but other angles can better express mood, texture, or context depending on your narrative.
Eye level is common, but other angles may better convey mood or texture depending on your story.
How many angles should I test?
Test at least three distinct angles under consistent lighting to compare mood, texture, and subject prominence.
Test at least three angles under the same lighting so you can compare fairly.
What about backgrounds when changing angles?
Choose backgrounds that complement the subject and do not distract from FC 26. Simpler backgrounds improve angle comparisons.
Keep backgrounds simple so they don’t steal focus from the angle you’re testing.
Do I need professional gear to start?
No. Start with a stable tripod, a reliable lens, and natural or available light. You can upgrade as you refine your workflow.
You can start with basics; upgrade later if you need more control.
How do I know which final angle to keep?
Choose the angle that best communicates your intended mood and supports FC 26’s narrative, verified across similar contexts.
Pick the angle that most clearly tells the story and holds up in related shots.
Watch Video
The Essentials
- Define narrative goals before choosing an angle
- Test multiple angles and document results
- Maintain consistent lighting for fair comparisons
- Use depth cues to enhance FC 26 shots