Angle Camera: Mastering Perspective with Practical Shots
Learn how to use angle camera techniques to shape perspective, mood, and storytelling. Practical steps, examples, and setup tips for portraits, street, architecture, and product shoots in 2026.

Angle camera describes the position of the camera relative to the subject to shape perspective, mood, and storytelling. According to Best Camera Tips, angle choices influence depth and intent in every shot. This guide explains how to choose and use angles effectively, with practical steps, examples, and setup tips for portraits, street work, architecture, and product shoots. Whether you shoot with a phone, mirrorless, or DSLR, understanding angles unlocks creative options and helps you tell stronger visual stories.
Understanding Camera Angles and Perception
Angle camera is a foundational concept in photography and cinema. The position of the camera relative to the subject influences how viewers interpret space, power, and emotion. A slight tilt or a change in height can shift a moment from intimate to authoritative, from flat to three-dimensional. When you plan a shoot, think about the narrative you want to convey before you press the shutter. This is not just about getting a flattering shot—it’s about guiding the viewer’s eye, creating depth, and communicating intent through perspective. In practical terms, experimenting with angles expands your toolbox for storytelling and helps you solve spatial problems in real environments. As you practice, you’ll notice that angle camera choices also interact with lens focal lengths and lighting, reinforcing the mood you want to set.
The Language of Angles: How Different Positions Shape Meaning
In photography and videography, a handful of standard angles forms the core vocabulary. Eye-level shots feel natural and honest; high-angle shots can convey vulnerability or overview; low-angle shots empower the subject and add drama. Dutch tilts introduce tension and speed, while worm’s-eye views dramatize scale and isolation. The term angle camera also encompasses slight variations, such as leaning or correlative poses with architectural features or natural lines in the scene. Understanding these cues helps you plan faster and capture more expressive frames. As you practice, label each angle you try and note what mood it produces to build a personal reference library for future projects.
How to Choose the Right Angle for Your Subject
Choosing the right angle begins with a concept. If you want to emphasize vulnerability in a portrait, a high-angle shot reduces dominance. For a product shot that communicates luxury, a slightly low angle with controlled lighting elevates presence. For architectural photography, aligning the camera with the building's lines creates a strong sense of scale. In cramped spaces, keep the camera close to eye level or slightly above to avoid distortion while preserving context. Consider the subject’s relationship to foreground elements—angles can exaggerate depth, leading lines, and geometric rhythm. Testing different angles on location will reveal which one communicates the story most effectively while staying efficient with time and resources.
Framing Techniques to Enhance Angle and Depth
Framing is the bridge between angle choice and visual impact. Use leading lines such as roads, walls, or furniture to direct the viewer’s gaze toward the subject. Position the subject off-center using the rule of thirds to create dynamic tension. Use foreground objects to create a sense of depth and scale, especially when shooting at a slight tilt or from a lower/upper vantage point. When working with an angle camera, consider the background stability—clean backgrounds reduce noise and keep attention on the subject. If space is limited, move your body or camera to change the angle rather than cropping aggressively in post.
Practical Setup: Positioning Your Body and Gear
Your stance and equipment shape the resulting angle as much as the camera settings. Stand hip-width apart for stability, tuck your elbows in to minimize shake, and hold the camera with a relaxed grip. If you’re using a tripod, adjust height to align the lens with your chosen angle; for eye-level shots, the center of the frame should be near your subject’s eye line. When a move requires a creative tilt, use a light touch on the camera to avoid abrupt motion. For handheld work with longer lenses, brace against a stable surface and shoot with a fast shutter to keep edges crisp. Remote triggering reduces shake for precise angle changes when you’re restricted by space or timing.
Lighting and Angle: How Angle Interacts with Light
Light interacts with angle to create mood, texture, and shape. A backlit angle can reveal silhouette while a front angle may flatten texture, so you’ll choose angle and position to capture intended highlights and shadows. In soft natural light, adjust your angle to avoid harsh shadows on the subject’s face. In studio setups, place light sources to complement the angle—key light slightly above and in front produces flattering detail, while a rim light from the side can accentuate contours. If you shoot at golden hour, tiny changes in vertical angle dramatically alter color warmth and depth, so iterate quickly to lock the desired look.
Angles for Different Genres: Portraits, Street, and More
Portraits benefit from angles that reveal personality without distortion. Street photography thrives on quick, fluid angle changes that capture movement and environment. Architectural shots rely on parity between the camera’s axis and building lines to emphasize scale and geometry. Product photography often uses eye-level or slightly elevated angles to convey scale and texture. Macro work uses very low angles to explore micro worlds, while landscape shots can benefit from high-angle sweeps to reveal context. The angle camera toolkit becomes more effective as you profile genres and assemble a set of go-to positions for each.
Common Mistakes and How to Fix Them
One frequent error is shooting at too-low angles with ultra-wide lenses, which can exaggerate perspective and create unintentional distortion. Another pitfall is neglecting background alignment, causing clutter to compete with the subject. A third challenge is relying on a single angle for every shot, which grows monotonous and weakens storytelling. Fixes include using a tripod or stable support to hold precise angles, performing quick on-site angle tests before committing to a setup, and using cropping strategically in post to refine composition without losing depth. Finally, be mindful of how your angle interacts with flare, reflections, or bright backlights that can obscure subject detail.
Quick Setup Checklist for On-the-Go Shoots
- Define the concept and target angle before arriving on site.
- Pack a lightweight tripod, a versatile lens, and a remote release if possible.
- Scout the area for leading lines and background elements that support your angle choice.
- Test at least three angles for each scene and compare the mood they produce.
- Capture a few frames with different shutter speeds to preserve motion or freeze action as needed.
Tools & Materials
- Camera body (mirrorless or DSLR)(Any sensor size; prefer better ergonomics for holding angles)
- Interchangeable lens (normal to short tele)(28-85mm range recommended for versatility)
- Tripod or monopod(Stable support; adjustable height)
- Remote shutter release or timer(Minimizes shake when nailing precise angles)
- Bubble level or angle finder(Helps maintain straight lines when needed)
- Reflector or fill light (optional)(Softens shadows created by chosen angles)
- Notebook or external app for notes(Record angle choices and outcomes for future reference)
Steps
Estimated time: 25-45 minutes
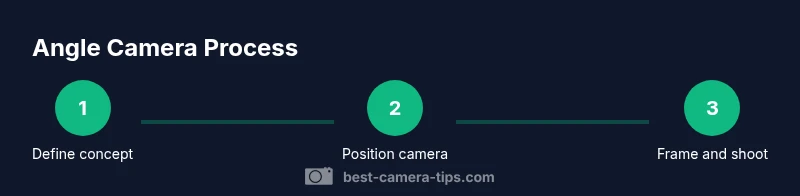
- 1
Define concept
Clarify the story or emotion you want to convey and pick a primary angle that supports that narrative.
Tip: Write down the mood you want to communicate before moving the camera. - 2
Position camera and body
Stand in a stable stance and align your body with the desired angle; adjust the camera height to approximate your target line.
Tip: Keep elbows tucked and breathe steadily to minimize shake. - 3
Set height and distance
Choose a height that matches the subject’s eyes or subject dominance; move closer or farther to change perspective without distortion.
Tip: Use a tape measure or built-in grid to ensure consistent alignment. - 4
Select lens and focal length
Pick a focal length that complements the angle—shorter for context, longer for compression and focus on the subject.
Tip: Avoid extreme wide angles at very close distances to limit distortion. - 5
Frame and compose
Apply the rule of thirds or leading lines to emphasize the angle; check background alignment and horizon level.
Tip: Take multiple frames at different angles to compare mood quickly. - 6
Test and refine
Capture test shots and review for sharpness, exposure, and depth; adjust angle if needed.
Tip: Bracket exposure slightly if lighting is challenging at unusual angles. - 7
Finalize and shoot
Lock in the angle by committing to a final setup and capture the desired frames.
Tip: Capture a quick set of variations in case cropping later helps tell the story.
Common Questions
What is the angle camera and why is it important?
The angle camera describes where the camera sits relative to the subject to influence perspective and mood. Mastery of angles helps you tell clearer stories and adapt shots to different genres without expensive gear.
Angle camera is about where you position the camera to shape perspective. It helps you tell stories more clearly across genres.
Which angle should I use for portraits?
Portraits often benefit from eye-level or slightly elevated angles to convey honesty and connection, while low angles can add power for dramatic intent. Try a few options to see what matches the subject’s personality.
Eye-level is usually best for portraits, with slight variations for mood.
How can I avoid distortion when using wider lenses?
Keep the camera at a moderate distance and avoid placing key features extremely close to the lens. When in tight spaces, switch to a longer focal length or step back if possible.
Keep distance from the subject and avoid extreme close-ups with wide lenses.
What equipment helps stabilize odd-angle shots?
A lightweight tripod or monopod and a remote shutter release help stabilize angles that require low or high viewpoints. Use a sturdy surface whenever possible.
Tripod or remote release helps a lot with angles that are hard to hold steady.
Can angle camera work with smartphones?
Yes. Smartphones are flexible for experimenting with angles. Use a small tripod or steady surface, enable grid lines, and consider a clip-on lens for variety.
Absolutely, smartphones work well for angle experiments with the right setup.
How do angles affect lighting choices?
Angle influences how light wraps around a subject. Foreground angles cast different shadows than background angles; adjust light direction to emphasize texture and mood accordingly.
Angles shape how light falls on the subject, so adjust lighting to match the mood.
Watch Video
The Essentials
- Define concept and select angle before shooting
- Balance height, distance, and lens to control perspective
- Frame with lines and depth for strong composition
- Test multiple angles and refine before final capture
- Keep lighting in mind to enhance angle-driven mood