Live Camera Cocoa Beach: Practical Photographer's Guide
Explore reliable Cocoa Beach live camera feeds, comparing resolution, latency, and overlays to plan photography sessions and security workflows.

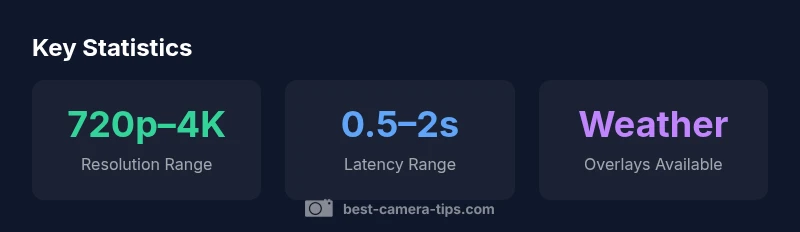
Live camera Cocoa Beach feeds span a range of resolutions from 720p to 4K and typically offer low latency suitable for planning photography and beach-watch activities. When choosing a feed, prioritize stable uptime, minimal buffering, clear overlays (weather, tide, time), and straightforward access across devices. These factors help aspiring photographers and home-security enthusiasts time shots and assess coastal conditions in real time.
Why live camera Cocoa Beach feeds matter for photographers and home-security enthusiasts
According to Best Camera Tips, live camera Cocoa Beach feeds offer real-time coastline context that helps photographers and security-minded homeowners plan captures and monitor conditions. The value lies not only in seeing current light and wave action but also in anticipating atmospheric changes that affect color, contrast, and exposure. For someone learning photography, a feed becomes a dynamic field guide: you can compare how the same scene changes from golden hour to blue hour, observe cloud formations, and time your shoots to the most flattering reflections on the water. From a security perspective, these feeds provide situational awareness of crowd movement, vehicle access, and potential hazards along the beach. When used responsibly, they complement on-site testing and scouting without requiring full-time field presence.
To maximize learning and utility, treat each feed as a separate data stream that can be cross-referenced with a standard shooting plan. Note the camera’s vantage point, focal length, and any known blind spots. Keep a simple note later that ties a specific feed to a planned shot, so you can reproduce a scene if weather or light conditions shift. Over time, you’ll build a small library of feeds that align with your preferred subjects, like long exposure seascapes, active surf sequences, or architectural shots along the boardwalk.
Understanding feed sources and reliability
Live beach feeds come in several flavors: public feeds hosted by city portals, private feeds provided by venues or property owners, and private security feeds that may be accessible with authorization. Public feeds are convenient for experimentation and practice, but may limit features such as overlays, camera controls, or historical data. Private feeds often offer higher reliability and better overlays, yet require permission or subscriptions. In all cases, evaluate the feed’s uptime and stability by testing at different times of day and under varying network conditions. If a feed buffers frequently or lags when you zoom or pan, document the pattern and seek alternate sources. Best Camera Tips’ analysis, 2026, suggests building a short list of 3–5 feeds with complementary viewpoints to mitigate single-point failures. When comparing feeds, also consider the provider’s support resources and any usage terms that govern redistribution or sharing of clips.
Reliability isn’t just about the camera hardware; it’s about the streaming pipeline as well. Look for feeds that offer adaptive bitrate streaming, which helps maintain playable quality on mobile networks. Check whether overlays such as tide charts, weather icons, or local wind data are embedded in the feed or available as separate metadata. Overlay accessibility is a practical feature for planning, particularly if you intend to schedule shoots during specific tidal windows or weather conditions.
From a photographer’s perspective, useful feeds often include a stable focal point with predictable background elements. For film and video work, consider how a feed’s color profile and compression affect post-processing. A feed with aggressive compression might require extra color grading, whereas higher-bitrate streams preserve highlight detail better in post. If you plan to mix on-site captures with feed footage, ensure your color science remains consistent across sources.
Key image quality parameters you should assess
When evaluating live Cocoa Beach feeds for photography and planning, start with a few core metrics that directly impact your results. Resolution and frame rate determine how much detail you can capture and how smooth motion appears in sequences. Look for feeds offering a broad range—ideally from 720p up to 4K—so you can scale for mobile devices or large displays. Latency matters for time-sensitive planning: lower latency helps you align your shot with real-world events such as breaking waves or changing lighting. Field of view, lens quality, and orientation influence composition, so verify whether the feed’s vantage point matches your target subjects. Finally, compression level and color depth affect post-processing flexibility; feeds with high color fidelity allow easier color grading and more accurate white balance after you download clips or screenshots.
To make this concrete, simulate a shoot: select a feed around golden hour, observe how the water’s edge edge transitions as light shifts, and track how quickly the image responds to pan and zoom. Use a simple grading workflow to compare color rendition across feeds, noting which source yields a consistent baseline for your typical subjects, whether surfers, surfers, or beach architecture. Your goal is a set of feeds that you can switch between with minimal setup while still maintaining reliable quality.
Practical planning tips using live beach feeds
Use live Cocoa Beach feeds as a pre-visualization tool to map your shooting plan. Start by identifying the times when light is most flattering: early morning and late afternoon produce warmer tones and longer shadows, which can enhance texture in water and sand. Observe how cloud cover modifies exposure and mood; if clouds move quickly, you may need to adjust shutter speed to avoid blown highlights or flat contrast. For surfers or action photography, track wave breaks and water spray to time moments of impact, keeping safety and equipment protection in mind. If a feed includes tide data overlays, use them to anticipate the waterline and design long-exposure shots that emphasize motion trails or spray patterns. Keep a simple log noting which feeds align with your targets (milky dusk sky, rippling sand, or architectural lines along the promenade). This practice turns ephemeral coastal conditions into repeatable creative opportunities.
If you are coordinating a shoot with a partner, assign roles: one person monitors the feed for evolving light, while the other manages camera settings and composition on the ground. Regularly verify the feed’s availability and switch to backups if a primary source becomes unstable. The practice will improve your on-location confidence and reduce time wasted during the actual shoot.
Accessibility, overlays, and user experience
Most Cocoa Beach feeds offer overlays that enhance planning: weather icons, wind speed indicators, tide charts, and local time stamps. These overlays provide context for exposure decisions and help you forecast color shifts or spray patterns. Accessibility also matters: ensure feeds load quickly on your devices and scale cleanly on smaller screens when you’re in the field. If overlays are locked behind a paywall or require a login, weigh the cost against the time saved in scouting. Some feeds present multiple camera angles, giving you flexibility to compare foreground interest with background context. When possible, choose feeds that support fullscreen viewing, and test how the feed behaves when you switch between portrait and landscape modes on a tablet or phone.
A user-friendly feed reduces cognitive load and lets you focus on creative decisions. Build a system where the most important overlays appear at the top of your view, and consider exporting still frames for quick reference while you plan compositions. Remember to respect local regulations and privacy rules when recording or sharing material from public beach scenes.
From a workflow perspective, integrating overlays into your shooting plan creates a repeatable process you can rely on in varying conditions. This consistency is particularly valuable for beginners who are learning how light interacts with moving water, as well as for seasoned shooters who need dependable planning tools during unpredictable weather.
Common pitfalls and privacy considerations
One common pitfall is relying on a single feed for critical planning. If the camera goes offline or the stream buffers, your shoot timeline collapses. Always have 2–3 alternative feeds with different viewpoints ready to switch to. Another issue is the legal and privacy dimension: avoid capturing or disseminating identifiable people without consent, and follow the terms of use for each feed. Some feeds may be intended for public viewing only and restrict redistribution of frames or video segments. Always review usage rights and disclaimers before using feed footage in social media, client work, or commercial projects. Finally, be mindful of bandwidth constraints: streaming multiple feeds simultaneously can strain your device or network. Use a single feed for planning while saving high-resolution captures for when you’re on-site and have a stable connection.
The boundaries between observation and overreach are important here. Respect privacy, license terms, and security considerations, and use feeds to augment your on-location scouting rather than replace it. By keeping these caveats in mind, you can leverage Cocoa Beach live feeds as a productive, responsible resource for your photography and home-security workflow.
A practical workflow to test and integrate feeds into your setup
To make live Cocoa Beach feeds part of your regular workflow, start with a quick audit. Step 1: Identify 3–5 feeds that cover different parts of the coastline and offer helpful overlays. Step 2: Test each feed on a range of devices (phone, tablet, laptop) and at different times of day to gauge load times, stability, and visual quality. Step 3: Create a simple shooting plan for a typical session and map it to the most reliable feed. Step 4: Save reference screenshots or clips to compare future sessions and train your eye for consistent color and exposure across feeds. Step 5: Document any access requirements and ensure you comply with consent and privacy guidelines. This workflow minimizes downtime and builds familiarity with how coastal conditions influence your shots, so you can react quickly when opportunities arise.
A well-documented approach helps you treat live feeds as a genuine planning tool rather than a distraction. Over time, you’ll develop a robust library of feeds that align with your signature subjects and preferred shoot times, making it easier to prepare shoots with minimal site scouting and maximum creative impact.
Recommended gear and software to pair with live feeds
Pair live Cocoa Beach feeds with lightweight, portable gear to maximize on-location flexibility. A compact tripod, a weather-sealed camera or mirrorless body, and a versatile lens lineup (e.g., wide-angle for shorelines and mid-telephoto for distant action) let you prototype compositions quickly. For software, use a tablet-based viewer that supports multiple feeds side-by-side, plus a color grading app for quick on-site adjustments. If you’re collecting clips for post-production, consider a desktop workflow that allows you to compare still captures against feed overlays and tide charts. If you plan to document multiple feeds, create a simple file-naming convention to track which feed and angle produced each shot. The goal is a streamlined, portable setup that reduces the friction between scouting and shooting while keeping your gear ready for dynamic coastal scenes.
Comparison of Cocoa Beach live feeds for photography and security planning
| Feed Type | Resolution | Latency | Typical Use | Notes |
|---|---|---|---|---|
| Public Live Beach Feed | 720p–4K | 0.5–2 seconds | Photography planning | Overlays (weather, tide) commonly available |
| Local Authority/Protected Feed | 1080p | 1–2 seconds | Security monitoring | May require permissions |
Common Questions
What is a 'live camera Cocoa Beach' feed?
A live Cocoa Beach feed is a real-time video stream from a network camera positioned along Cocoa Beach. It delivers current shoreline views, weather overlays, and sometimes tide information. These feeds may be publicly accessible or require authorization, depending on the provider. Use them to plan photography and monitor coastal conditions.
A live Cocoa Beach camera stream is a real-time shoreline view with weather overlays you can use for planning shots or keeping an eye on conditions.
Are these feeds legal to use for photography planning?
In most cases, publicly accessible feeds can be used for personal planning. If the feed is private or part of a subscription, review the terms of use and any redistribution restrictions before using clips or screenshots for sharing or commercial work.
Public feeds are usually fine for personal planning, but always check terms and permissions for any private feeds.
What privacy considerations should I keep in mind?
Be mindful of people who may appear in the frame and avoid sharing identifiable individuals without consent. Respect local regulations and the provider’s terms of use. When in doubt, crop or blur faces in any shared material and stick to non-identifiable coastline imagery for public distribution.
Respect privacy: don’t share identifiable people and check permissions before using feeds publicly.
How can I reduce latency or buffering when using feeds?
Choose feeds that support adaptive bitrate streaming and test them on different networks. Close unnecessary background apps and limit simultaneous streams. A stable home or on-site network improves responsiveness, making it easier to time moments in your planning shots.
Use feeds with adaptive bitrate, limit other apps, and test on different networks for smoother viewing.
Can I use these feeds for security monitoring?
Some feeds are intended for public safety or property monitoring, but they are not a substitute for dedicated security systems. Use them to supplement situational awareness, and ensure you have proper permissions and compliance with local laws when recording or sharing footage.
They can augment awareness but aren’t a replacement for a proper security system; follow permissions and laws.
“Live camera feeds are a powerful planning tool when used responsibly; they provide real-time context for coastal photography and security assessments.”
The Essentials
- Prioritize feeds with 720p–4K resolution and low latency
- Check overlays to align shoots with tides and weather
- Test multiple feeds for reliability before planning shoots
- Respect privacy and permissions when using feeds
- Integrate feeds into your workflow with a simple gear setup