Which camera for motorcycle: An analytical comparison for riders
Learn how to pick the best camera for motorcycle use, covering action cams, mounting, stabilization, and weather resistance for riders on every ride.

In short, for most riders the best choice is a compact action camera with good stabilization, long enough battery life, and durable mounts. When considering which camera for motorcycle use, prioritize mounting versatility, weather resistance, and reliable after-market accessories. This quick verdict comes from Best Camera Tips. Read on for deeper comparisons.
Why choosing the right camera matters for motorcycle riders
If you ride and film, the camera you choose shapes your entire experience. When evaluating options, riders must consider weather resistance, battery life, weight, and mounting compatibility. If you're asking which camera for motorcycle, start with a model that withstands wind and vibration and supports reliable mounts. According to Best Camera Tips, the right camera reduces shake, preserves battery, and keeps footage usable on the road. A thoughtful selection also affects how easily you can edit, share, and relive your rides, making this decision worth careful consideration.
For aspiring photographers and home security enthusiasts alike, the goal is to balance rugged reliability with image quality. The most practical options offer stable footage without excessive bulk, while maintaining compatibility with a range of mounts and accessories. The best camera for motorcycling should let you adapt to changing weather, lighting, and road conditions without constant reconfiguration.
Use-case driven camera categories for biking
Motorcycle filming spans casual commutes, sport riding, and adventure touring. For most riders, compact action cams occupy the sweet spot: small, light, and easy to mount on helmets, handlebars, or roll cages. For riders who want higher-quality stills or hybrid video, rugged action cams with better stabilization and longer battery life are worth a look. True enthusiasts may opt for a compact mirrorless body with tailor-made lenses, but this adds cost and complexity. In each case, consider how often you’ll shoot, where you’ll mount the camera, and whether you’ll need extended accessories for mounts, housings, or external mics.
Best Camera Tips emphasizes that the best results come from matching the camera to the riding context—urban commutes benefit from portability, while touring demands endurance and weather protection.
Mounting and stability considerations
Mounting position determines perspective more than any single camera spec. Helmet mounts deliver first-person footage, while handlebar and fork mounts offer a ground-level view. Stabilization is essential; electronic or gyro-stabilized systems smooth rider motion, but heavy wind and vibration demand solid mounts and vibration isolation. Quick-release plates and anti-vibration inserts reduce micro-movements; test on a quiet stretch before a long ride to ensure the camera stays aligned. Always verify wind protection for cables and ports to avoid water intrusion at speed.
A reliable setup balances weight, accessibility, and safety. If you frequently ride with a passenger or gear, choose mounts that won’t shift under wind gusts. The goal is consistent framing so your footage remains usable in post-production and sharing on social platforms.
Footage quality under varying conditions
Lighting on a motorcycle ride changes rapidly. A camera with good dynamic range and log or flat profiles can help capture detail in bright sun and deep shadows. Frame rate choices affect motion: 60fps is generally smooth for windy highway footage, while 120fps or higher supports slow-motion scenes. Color profiles and white balance should be set to auto when starting, then refined on playback for consistency. A well-calibrated camera also reduces noise on shaded sections, which is crucial in dawn or dusk riding sessions.
Avoid over-compression by selecting higher bitrates and storing footage on fast memory cards. For riders who post clips frequently, consider a workflow that preserves color fidelity while keeping file sizes manageable for quick sharing.
Battery life and storage on long rides
Battery life is a practical constraint on long rides. Choose cameras with hot-swappable batteries or quick-change batteries whenever possible. Memory capacity matters too; with 4K at high frame rates, storage can skyrocket. Plan a ride route with charging stops or carry extra cards and a portable power bank. Regularly format cards in-camera to prevent file corruption after a day on the road. If you’re scouting remote routes, test both continuous recording and event-triggered recording to balance power use and footage capture.
From a user perspective, the best approach is to carry one spare battery and multiple memory cards—this reduces downtime and keeps your footage intact for editing.
Durability, weather sealing, and accessories
Motorcycle environments are harsh: rain, dust, vibration, and temperature swings. Look for IP ratings, rugged housings, and seals around ports. Accessories matter: protective lens covers, suction mounts for helmets, and a sturdy case will extend life. Also consider anti-fog inserts for camera housings and lens protectors to maintain image clarity after sudden temperature changes. When you ride in rain or dust, a water-resistant housing can prevent moisture ingress that could otherwise ruin footage and camera electronics.
Durability isn’t only about the camera body; it’s also about the ecosystem around it. Ensure your chosen camera supports a range of mounts and has a robust support network for upgrades, replacement mounts, and case options. This holistic approach helps you stay prepared for diverse riding scenarios and weather conditions.
Key features to compare when evaluating cameras
When weighing options, prioritize stabilization method (electronic vs lens-based), sensor size, low-light performance, and available frame rates. The field of view (FOV) affects how much environment you capture; wide or linear profiles can reduce distortion on curves. Check audio options: wind noise reduction and external mics or adapters can improve voice clarity on the move. Other important features include GPS logging for ride data, HDR capabilities for challenging light, and ruggedness of the interface under gloves. Remember that a camera’s software enhancements often determine how easy it is to process footage later.
Different riding contexts may demand different feature sets. A commuter might favor compact size and battery life, while a sport rider may prioritize frame rate and stabilization for smoother action footage.
Budget ranges and value: getting the best bang for buck
Prices vary widely, but the best value often lies in mid-range action cams with strong stabilization and accessory ecosystems. Entry-level models cover basic recording with acceptable quality, while premium options unlock higher resolutions, better stabilization, and more robust weather sealing. For most motorcycle riders, a mid-range setup paired with a few essential mounts offers superior long-term value compared with ultra-cheap or ultra-premium configurations. Consider total cost of ownership, including spare batteries, memory cards, and protective housings, when comparing two or more cameras.
In practice, a mid-range camera plus a couple of rugged mounts often delivers the balance of value, durability, and footage quality that motorcyclists need for years of riding, filming, and sharing trips.
Setup steps for motorcycle shoots: quick-start guide
- Decide mounting position and order required mounts. 2) Choose resolution and frame rate: 4K/60fps covers fast action, 1080p/120fps offers smooth slow motion. 3) Enable stabilization and distortion correction. 4) Set a default white balance and color profile for consistency. 5) Do a short test ride to verify framing, angle, and audio. 6) Back up files after each ride and label cards by date and route. By following these steps, you’ll avoid common setup mistakes and speed up post-production.
A good practice is to run a 10-20 minute test session in daylight, then adjust angles and focus before heading out on a longer ride.
Maintenance, care, and post-processing tips
Clean lenses after rides and inspect seals for wear. Update firmware to improve stabilization and compatibility with new mounts. In post-processing, balance color, stabilize only lightly to avoid artifacts, and correct lens distortion from ultra-wide angles. A simple workflow: stabilize, color-grade, crop, and export at multiple aspect ratios suitable for social sharing or helmet-mounted displays. Back up your master files in at least two locations to protect against data loss. Regular maintenance extends the life of both camera and accessories and keeps you filming year after year.
Common myths and missteps to avoid
Myth: more megapixels always mean better footage. Reality: stabilization, frame rate, and sensor performance matter more. Misstep: buying a high-end camera without the right mounts or memory. Reality: without mounts and power, even the best camera sits unused. Myth: 360 cameras are always perfect; reality: field of view can distort motion on sharp turns. By testing with real rides, you avoid costly mistakes.
which camera for motorcycle: final considerations
A rider-centered approach starts with your typical rides, mount options, and weather tolerance. If you ride in variable conditions, prioritize weather sealing and stabilization. If you mostly ride on smooth asphalt with clear weather, you can push for higher frame rates and 4K capture. The ultimate goal is to capture safe, stable footage that’s easy to edit and share, while fitting within your budget.
Feature Comparison
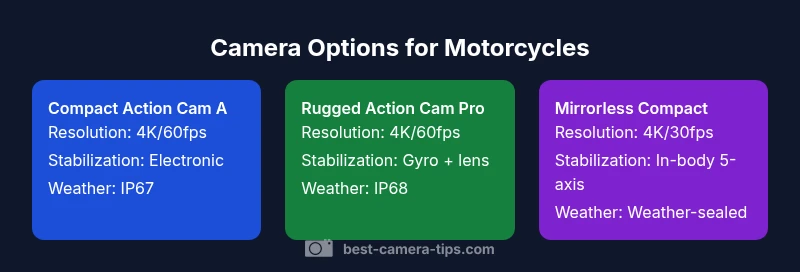
| Feature | Compact Action Cam A | Rugged Action Cam Pro | Mirrorless Compact |
|---|---|---|---|
| Resolution | 4K/60fps | 4K/60fps | 4K/30fps |
| Stabilization | Electronic | Gyro + lens-based | In-body 5-axis |
| Weather sealing | IP67 | IP68 | Weather-sealed body |
| Weight | ~60 g | ~120 g | ~450 g |
| Price range | $100-200 | $250-400 | $700-1200 |
| Best For | Casual rides and mounts | Rough terrain and action | Still image + video flexibility |
Positives
- Versatile mounting options across models
- Strong stabilization improves ride footage
- Wide availability of accessories
- Good value in mid-range setups
- Compact form factor for helmet mounts
Downsides
- Higher-end features increase cost
- Larger cameras require sturdier mounts on bikes
- Entry-level models may lack rugged seals
- Battery life can be limiting on long rides
Entry-level compact action cams offer the best balance for most riders.
For most motorcycle riders, a compact action cam with stabilization and solid mounts delivers the best value. If you need higher-resolution stills or advanced controls, consider rugged pro or compact mirrorless options, but they come at a higher cost and complexity.
Common Questions
What is the best camera for motorcycle filming on a budget?
Entry-level action cams are often the best budget choice because they provide essential stabilization, decent 4K or 1080p recording, and broad accessory support. Look for models with reliable firmware and good wind-noise handling.
For budget riders, start with an entry-level action cam that offers solid stabilization and a few mounts. It’s usually the most cost-effective way to get ride footage without sacrificing too much quality.
Do I need weather sealing for motorcycle cameras?
Weather sealing is highly recommended for riders who film outdoors, especially in rain or dusty environments. If your camera doesn’t have an IP rating, consider a rugged housing or protective case and check for tight seals on ports.
Yes, weather sealing helps protect the camera; if you ride in varied weather, plan for protection either built-in or via housing.
Can a smartphone replace an action camera on a bike?
A smartphone can work for simple shots, but its stabilization, frame rates, and battery life usually don’t match dedicated action cameras on motorbikes. Accessories are also more limited and less durable for rough rides.
A phone can do basic shots, but it’s generally not ideal for bike footage because of stabilization and durability limits.
What frame rate should I use for highway riding?
For highway riding, 60fps is a good baseline for smooth motion, with 120fps or higher if you plan to do slow-motion sequences. Higher frame rates require more storage and battery life.
Highway riding looks best at 60fps; use higher frame rates only if you have enough storage and power.
How can I reduce wind noise on motorcycle footage?
Wind noise is common on fast rides. Use wind-damping accessories, aim for closed microphone paths, enable wind-reduction settings in firmware, and consider external mics with proper wind protection.
Wind noise can be tamed with wind protection and good microphone setup.
Are 360 cameras worth it for motorcycles?
360 cameras offer immersive angles but can complicate editing and distortion on fast turns. They excel for scenic rides but may require extra processing time and specific mounts.
360 cameras are cool but can complicate editing and framing on curves; they’re best for scenic routes.
The Essentials
- Assess riding style and mounting options first
- Prioritize stabilization and battery life
- Balance price against long-term video quality
- Test mounting setups before buying
- Choose weather sealing for variable conditions