How to Put Camera in Pairing Mode: A Complete Guide
Learn how to put camera in pairing mode with this comprehensive, brand-agnostic guide. Get step-by-step instructions, troubleshooting tips, and best practices for reliable camera setup.

To put a camera in pairing mode, locate the pairing option in the device’s hardware or app and follow prompts to connect to your network. Look for a blinking LED or on-screen indicator as confirmation. Keep the camera powered and close to your phone during setup.
What pairing mode is and why it matters
Pairing mode is the window during which your camera announces itself to nearby devices and accepts a connection from a companion app or network. Understanding this state is essential because a failed or misunderstood pairing is the most common reason a camera remains invisible or unusable. When you know where to find the pairing option and what the LED signals mean, you can avoid hours of frustration.
In practical terms, pairing mode makes the camera listen for a secure instruction from the app and begin the handshake that creates a trusted link. Without this state, the camera won't appear in the app, won't broadcast its Wi-Fi credentials, and won't allow streaming or motion alerts. Different brands implement pairing with slight variations—some require you to scan a QR code, others to press a hardware button, and many rely on an initial temporary wireless network created by the camera.
For readers new to home security gear, this concept may seem abstract, but with the right approach, you can complete pairing on the first attempt. The phrase how to put camera in pairing mode is often the first query people search when they start configuring a new device, and the answer usually lives in the user guide and the app onboarding flow. According to Best Camera Tips, grounding your workflow in the device's prompts reduces setup time and increases reliability.
Preparing your devices: prerequisites before pairing
Before you begin, gather everything you need and verify a few basics to avoid mid-process stalls. Ensure your camera is charged or plugged in, and install or update the companion app on your smartphone or tablet. Check that you’re using a compatible Wi‑Fi network—many cameras require a 2.4 GHz band and will not connect to 5 GHz alone. If possible, update the camera firmware to the latest version, since manufacturers fix pairing quirks with updates.
Also confirm that your mobile device has a stable internet connection and that the app permissions (location, Bluetooth, notifications) are enabled as required by the pairing flow. Create a simple, unique network password if you’re setting up Wi‑Fi credentials through the app. If you’re using a security camera, have the camera’s model number handy in case the app asks you for exact device identification. This groundwork helps you move through the pairing flow smoothly and minimizes interruptions later on.
As you prepare, keep the camera within arm’s reach of your phone or tablet and ensure you have a clear line of sight to avoid interference. Having a clean desk or table space with no clutter around the camera also helps keep the device steady during the initial connection.
Step-by-step: put camera in pairing mode
Getting a camera into pairing mode usually follows a repeatable pattern, though exact steps can vary by brand. The core idea is to wake the device, trigger a pairing signal, then complete the setup in the app. Here is a general workflow you can adapt to most cameras:
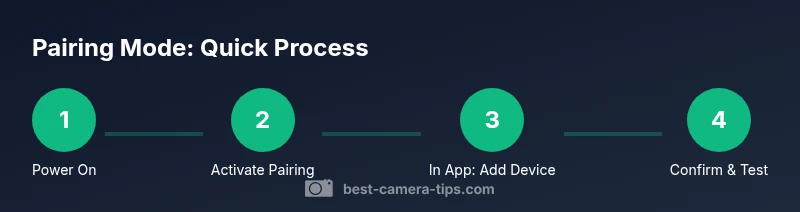
- Power on the camera and ensure it is within range of your phone. 2) Locate the pairing option—this might be a dedicated button, a recessed hole labeled Reset/Pair, or an option within the on-device menu. 3) Activate pairing mode by holding the button for several seconds, or by selecting the pairing option in the menu until the LED blinks or the indicator changes color. 4) Open the companion app and choose Add Device or Pair New Camera, then follow prompts to connect to the camera or to your Wi‑Fi network. 5) If prompted, enter your 2.4 GHz network name and password, and confirm the connection. 6) Wait for a success message or a visible confirmation in the app that pairing is complete. 7) Return to the main device list and ensure the camera’s status shows as Online.
If you see a steady orange LED or a blinking blue light instead of the expected pattern, consult the model’s troubleshooting guide for the exact LED codes and press-and-hold durations. This step-by-step approach keeps you organized and minimizes missteps during pairing.
Common methods by camera brands
Brand-specific pairing methods can differ in small but important ways. Many brands rely on one of these common approaches: scanning a QR code shown in the app, connecting to a temporary camera‑created network, or using a hardware button sequence. Some brands require you to first connect to the camera’s direct Wi‑Fi hotspot and then return to the app to provide your home network credentials. Others use Bluetooth as a bootstrap to establish the initial link before the camera joins your Wi‑Fi.
Understanding the common methods helps you anticipate what to expect during setup. If your camera shows a QR code in the app, hold your phone steady and align the code with the screen for a moment until the app confirms the pairing. If your device uses a temporary AP, you’ll switch your phone’s Wi‑Fi to that network, proceed with the pairing prompts, and then reconnect to your home network once the camera is linked. If your camera has a physical or touch-sensitive button, double-check the exact hold duration and LED pattern described in the manual, since a mis-timed press can trigger a reset instead of pairing.
Troubleshooting pairing failures
If pairing stalls or fails, start with a quick reset-and-retry approach. Power off the camera, wait a few seconds, then power back on. Reopen the app and retry the pairing flow from the Add Device screen. Ensure you’re not attempting to pair on a crowded 2.4 GHz network that requires MAC address whitelisting or special permissions. Ensure the camera is within reasonable distance of your router during credential entry; a poor signal can cause the device to drop the connection during setup.
Common culprits include expired firmware, incorrect Wi‑Fi credentials, or conflicts with other smart home devices. If the LED indicators do not follow the expected pattern, refer to the manufacturer’s LED code guide and the “pairing mode” section of the manual. For devices that require Bluetooth during setup, make sure Bluetooth is enabled on your phone and that the app has permission to access it. If you still cannot pair after several attempts, try temporarily disabling VPNs or firewalls on your phone, then reattempt the pairing process.
Security considerations during pairing
Pairing mode is a sensitive phase where a device exchanges credentials and trust tokens, so security should be a priority. Always pair on a secure network with a strong password and avoid using public or unsecured networks for initial setup. If your camera supports guest networks, enable that option during setup and restrict access to your main home network after the pairing is complete.
During pairing, minimize exposure by turning off cloud features you won’t use immediately and by keeping firmware up to date. If the device prompts for a QR code or a unique pairing code, ensure you are scanning the code from the official app interface and not from third-party screens. After pairing, review device permissions in the app and disable any services that aren’t essential. If your network supports it, enable network segmentation so the camera operates in a separate subnet from your primary devices.
Best practices and tips for reliable pairing
Reliability improves when you plan ahead and follow a consistent process. Always update the camera’s firmware before attempting pairing, reboot your router if you encounter stubborn connections, and keep the camera within a reasonable distance from the router during credentials entry. Use a dedicated 2.4 GHz network for smart cameras if possible, and avoid attempting to pair when the network is congested by other devices. Label new devices in the app to avoid mix-ups when multiple cameras are in use.
Document any brand-specific quirks you encounter and keep the user manuals handy for reference. After the initial pairing, enable automatic firmware updates if the option exists to prevent future compatibility issues. Consider pairing during a time of day when network traffic is lower to minimize interference and retries.
Quick check: verify pairing and test connection
Once pairing completes, perform a quick verification to ensure everything works as expected. In the app, verify the device status shows Online and that you can view a live feed. Test basic features such as motion alerts, microphone or speaker (if supported), and a sample record to confirm the camera is pushing data to the cloud or local storage. Confirm that push notifications are enabled and that you can access playback from the connected device.
If your camera stores data locally, check the SD card or storage module for integrity and ensure the clock is synchronized so timestamps are accurate. Repeat these checks after any firmware update or change to network configuration. If issues arise, revisit the troubleshooting steps and consult the brand-specific support resources; persistence and methodical checks often reveal subtle misconfigurations.
What to do after pairing: firmware and maintenance
Pairing is just the first step in a longer maintenance routine. After a successful setup, confirm you’re on the latest firmware and enable automatic updates if the device supports them. Keep the app installed on a phone with current OS software, as compatibility with the camera’s features can degrade over time otherwise. Periodically recheck your network security settings and update passwords as a security precaution. Finally, create a simple maintenance calendar to verify the camera’s health—battery levels, storage integrity, and alert settings—at regular intervals.
-
Tools & Materials
- Camera with pairing capability(Ensure it supports your chosen pairing method (button, QR, or app-based).)
- Smartphone or tablet with the companion app(Install the latest version from the official app store.)
- 2.4 GHz Wi-Fi network(Most cameras do not connect to 5 GHz networks during initial setup.)
- Power supply or charged battery(Keep the device powered during the entire pairing flow.)
- Paper and pen for notes(Helpful for jotting model numbers, LED codes, or specific steps.)
- Router near the pairing area(Reduce distance and interference during setup.)
Steps
Estimated time: 15-25 minutes
- 1
Power on and prepare
Power on the camera and open the companion app on your smartphone. Ensure the camera sits within a clear line of sight to your device and that the camera has adequate battery or is plugged in. Confirm the app recognizes the camera’s presence before proceeding.
Tip: Having the device near you at this stage minimizes signal loss during the initial handshake. - 2
Activate pairing mode on the camera
Find the pairing option on the device (button, recessed reset, or menu). Activate pairing mode by following the specific hold duration or selection required by your model until you see a pairing indicator (LED blink or color change).
Tip: If you see a reset pattern instead of pairing, try the required hold time again and consult the manual for the exact LED sequence. - 3
Connect via app prompts
In the app, select Add Device or Pair New Camera, and follow on-screen prompts. If the camera creates a temporary network, connect your phone to that network during setup, then return to the app to complete the pairing.
Tip: Keep your phone's Bluetooth and location permissions enabled as requested by the app. - 4
Provide network credentials
Enter your 2.4 GHz Wi-Fi network name and password in the app. If the device uses a QR code, scan it with the app as instructed. Confirm that the credentials are accepted by the camera.
Tip: Double-check the network name (SSID) and password; a typo here is a common cause of failures. - 5
Finalize pairing and verify
Wait for a confirmation in the app that pairing is successful. Return to the device list and verify the camera shows as Online or Connected. Run a quick live-view test to confirm streaming and basic controls.
Tip: If the connection stalls, reboot the camera and router, then retry from step 2. - 6
Configure basic settings
Set up basic preferences such as motion alerts, recording schedules, and privacy zones. name the device clearly and assign a room to help you manage multiple cameras.
Tip: Keep a simple naming scheme to avoid confusion later on.
Common Questions
What is pairing mode and why do I need it?
Pairing mode is a temporary state that allows the camera to connect with the app or network. It’s necessary to establish credentials and permissions so you can view live footage and receive alerts.
Pairing mode is a temporary state that lets the camera connect to the app. It’s needed to establish the link and start streaming.
My camera won’t enter pairing mode. What now?
Check the power and battery, verify the exact hold duration for the pairing button, and ensure the app has the necessary permissions. If needed, perform a factory reset and retry the pairing flow from the start.
If pairing won’t start, confirm power, button duration, and app permissions, then reset and try again.
Can I pair on a guest network?
Some cameras allow pairing on a guest network, but many require your home network credentials. If possible, pair on a secure private network and only switch to guest after the device is linked.
Some devices allow guest-network pairing, but many require your main network; try private networks first.
Do I need to be close to the router to pair?
Yes, staying within a reasonable range helps the initial handshake. If the signal is weak, move the camera closer during setup and then relocate it after pairing.
Being close to the router during setup helps the connection take hold.
Is pairing mode reversible or can it be turned off?
Pairing mode is generally a temporary state that ends after a successful setup. If the device remains in pairing mode, follow the manual to exit or perform a regular reboot.
Pairing mode ends after setup; if stuck, reboot and try again.
Watch Video
The Essentials
- Understand pairing mode basics before starting.
- Prepare devices and network to minimize interruptions.
- Follow brand-specific prompts for reliable pairing.
- Verify connection with a live test and adjust settings.