How to Make Camera Button Zoom: A Practical Setup Guide
Learn how to map a zoom function to your camera’s button with practical steps. Check compatibility, test in live view, and optimize zoom for motorized and digital zoom in video and stills.

By mapping a camera's programmable button to zoom control, you can quickly zoom in or out during shoots without relying on the lens ring. This guide shows you how to verify compatibility, choose a mapping approach (physical motorized zoom vs digital), and implement a safe, reversible setup suitable for video and stills.
Why remapping the zoom button can speed up shooting
For many photographers, the fastest way to adjust framing or follow action is to reach for a zoom control without shifting grip or taking eyes off the subject. Remapping a camera button to zoom can dramatically reduce micro-movements and helps maintain steady composition, especially during handheld video or fast-paced street shooting. When you learn how to make camera button zoom, you gain a reliable on-device control that you can engage with your thumb or finger without changing grip on the camera body. According to Best Camera Tips, a well-designed button mapping reduces shutter lag and keeps your attention on the shot rather than on the dial. In practice, you’ll often map two buttons: one for zooming in and one for zooming out, creating a simple two-step workflow that mirrors how you operate a dedicated zoom lever on professional cinema rigs. Begin with a conservative zoom speed to avoid abrupt jumps, then fine-tune based on your lens and shooting distance. This approach is especially helpful in documentary work, weddings, sports, and vlogging where you need rapid, controlled magnification.
Understanding zoom options on cameras
There are two broad paths to magnification: optical zoom achieved by the lens elements moving inside the barrel, and digital zoom produced by cropping or resizing the sensor’s image. Optical zoom preserves quality because it uses physical focal-length changes; digital zoom degrades image quality but can be useful in tight spaces or with limited lens options. When you’re considering how to make camera button zoom, you’ll want to decide which path to prioritize for your workflow. A number of modern cameras offer motorized or power zoom built into certain lenses, allowing you to map zoom commands to buttons or dials. Others rely on digital zoom, which you should only use sparingly in final outputs. For video, a slow, controlled zoom is often more important than a large magnification, so plan your mapping to deliver repeatable, smooth steps rather than abrupt leaps. In low-light environments, zoom performance is also tied to lens speed and stabilization; keep these factors in mind as you test different configurations. Knowing the limits of your gear will save you time when you configure the button map.
Check your camera capabilities for button remapping
Not all cameras support custom button mapping. Check your user manual for terms like Custom Controls, Function Button, My Menu, Assign Button, Fn Button, or Custom Key. Confirm that your firmware version supports this feature and update if needed. Some models allow Zoom In and Zoom Out to be assigned to two separate buttons; others require you to use a digital zoom within the menu. If your camera doesn’t support direct zoom remapping, you may still achieve a similar effect by binding a related function (such as zoom steps or a focus pull) that then triggers a zoom indirectly. Always back up current settings before making changes so you can revert if something doesn’t feel right. After mapping, perform a short test to verify the response and adjust as needed.
Hardware and software you might use
If your camera natively supports zoom remapping, great. If not, you can still implement a workaround using motorized zoom lenses, external controllers, or the camera’s own Digital Zoom feature. For motorized zoom, ensure the lens supports Power Zoom or Servo Zoom and that you can bind the motion to a button. External hardware like macro pads, wireless remotes, or Bluetooth shuttles often come with companion apps to rebinding functions; verify compatibility with your camera brand. Manufacturer software can help calibrate and save mapping configurations. In all cases, read the manual to confirm how to save or switch between profiles. Safety note: avoid mapping to critical exposure controls or autofocus if you don’t fully understand the interaction; a mis-mapping can cause unwanted exposure shifts or focus hunts. Practice with a reversible setup before using it in real shoots.
Plan your button mapping strategy
Decide on two actions: Zoom In and Zoom Out, and consider a third option such as Reset or Center. Choose two accessible buttons with clear tactile feedback. Determine if you want zoom steps (e.g., 1.5x increments) or continuous zoom while holding the button. If your camera supports speed control for zoom, set a comfortable pace for your typical shooting distance. For interviews or run-and-gun filming, map a gradual zoom with consistent speed; for street or sports work, a quicker zoom can be advantageous. Document the mapping with photos or notes including camera model, lens type, and the exact button IDs. Plan to test both static subjects and moving subjects to evaluate responsiveness. Avoid mapping the same button to multiple actions to prevent accidental changes during a take.
Safety and practical design considerations
Remapping procedures should be reversible; always save a dedicated factory-reset profile. Ensure you don’t override essential controls like AF, exposure compensation, or drive modes. When testing, do so in a controlled environment to avoid missing shots or causing camera shake. Use a stable tripod if you’ll practice zoom in challenging lighting or with longer focal lengths. Keep spare batteries charged. If the camera is in video mode, make sure the zoom speed matches your output; a fast, jerky zoom can be distracting for viewers. Maintain an orderly labeling system so you can quickly restore the original configuration if needed.
How to test and calibrate the mapping in practice
Set up a simple scene with objects at several distances and record short clips at each distance to assess zoom smoothness. Evaluate the zoom's start speed, acceleration, and stopping position. If available, adjust the zoom increment or hold duration until the motion feels natural. Test in both bright and dim lighting, as focus performance and exposure behavior can affect perceived motion quality. Perform a side-by-side comparison with the default zoom control to ensure your mapping offers a genuine improvement. Document your observations and decide whether to keep, refine, or revert the mapping.
Troubleshooting common issues and rollback
If the remapping doesn’t work after a firmware update, re-check the button ID and confirm there are no conflicting mappings. Restore factory defaults to verify the issue isn’t caused by a bad profile, then re-create the mapping step-by-step. If you observe unstable zoom or jitter, inspect the lens, check for firmware updates, and consider using a slower zoom rate. If the camera indicates an error when saving a profile, ensure you have sufficient storage space and the correct user profile selected. Always test after changes and keep a documented backup of working configurations.
Maintenance, backups, and future-proofing your setup
Maintain mappings by backing up profiles to the camera’s internal memory or an external card and documenting each button’s function. Periodically re-test after firmware upgrades or lens swaps to confirm compatibility. Store spare batteries and clean connector contacts to prevent intermittent signals. If you upgrade to a new camera body or a motorized lens, repeat your mapping process with the new gear and save a fresh profile. Regularly review your workflow to ensure the mapping continues to deliver consistent benefits without interfering with core imaging tasks.
Tools & Materials
- Camera with customizable buttons(Verify it supports mapping to zoom or a related control)
- Compatible zoom-capable lens(Motorized zoom preferred; check Power Zoom support)
- Official camera app or desktop software(Used to configure and save mappings)
- External programmable keypad or macro pad(Optional for advanced setups and backups)
- USB-C or USB-A cable(For firmware updates or direct laptop configuration)
- User manual(Keep a copy handy for reference during mapping)
- Spare batteries and charger(Ensure power during mapping and testing)
- Labels and masking tape(For clearly marking profiles and button assignments)
- Clean cloth and lens pen(Keep lens contacts clean during setup)
Steps
Estimated time: 60-90 minutes
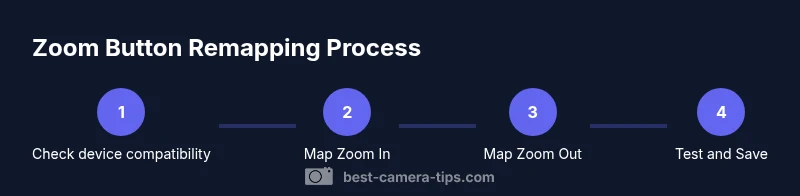
- 1
Verify compatibility and enable custom button mapping
Consult the user manual to locate Custom Controls or Fn Button settings. Update firmware if a newer version is available, and back up current configurations before changes.
Tip: Have the manual open and take screenshots of existing mappings before editing. - 2
Identify zoom control type on your lens
Determine whether your lens has motorized zoom (Power/Servo Zoom) or relies on manual optical zoom. This will influence whether you map to a physical zoom action or rely on digital zoom.
Tip: Check the lens spec sheet or manufacturer website for zoom motor details. - 3
Decide which camera button to reassign
Choose a Fn or programmable button that is easy to reach and unlikely to be pressed by accident during operation.
Tip: Prefer a button with a tactile, distinct click and good placement on the body. - 4
Access Custom Button Settings
Navigate to the camera’s Custom Controls or Button Mapping section and select the target button for remapping.
Tip: If the menu layout varies, search the index for 'Custom' or 'Controls' and refer to the manual. - 5
Assign Zoom In to Button A
From the action list, select Zoom In or an equivalent zoom step action and bind it to the chosen button. Save the profile.
Tip: Keep a quick note of what Button A does to avoid confusion later. - 6
Assign Zoom Out to Button B
Bind Zoom Out to another accessible button following the same method as Step 5. Ensure there is no overlap with other controls.
Tip: Label the button on the body or in your notes for quick recall. - 7
Adjust zoom speed and step size
If your camera supports speed control for zoom, select a comfortable pace for your typical shots (slower for close-ups, faster for action).
Tip: Start with a slow, controlled rate and test with a static scene first. - 8
Test the mapping in Live View and recording
Enter Live View and perform a short zoom sequence; verify that the response is smooth and repeatable in both video and stills modes.
Tip: Record a short clip to evaluate motion quality and consistency. - 9
Document and back up the setup
Save the mapping profile as a named preset (e.g., Video Zoom, Photo Zoom) and back it up to internal memory or an SD card.
Tip: Keep a written log of gear, firmware version, and button IDs for future reference.
Common Questions
Is my camera capable of remapping the zoom button?
Many cameras offer Custom Controls or Function Button reassignment. Check your manual, system menu, or the manufacturer app. If not supported, consider alternative methods such as digital zoom or upgrading to a model that supports mapping.
Most cameras with Custom Controls can map a zoom button. If not, use digital zoom or upgrade to a model that supports button remapping.
What if my lens does not have motorized zoom?
If your lens lacks motorized zoom, remapping can still affect digital zoom or be used to trigger a zoom sequence via software. For reliable results, pair a motorized zoom lens with a mapped button when possible.
Without motorized zoom, remapping usually uses digital zoom or software-driven zoom sequences. A motorized lens provides the smoothest results.
Can I map the same button for both zoom in and zoom out?
Generally, you’ll want two separate buttons for Zoom In and Zoom Out to avoid conflicts. Some cameras allow a hold-to-continue zoom on a single button, but this can be less predictable.
Usually not. Use two buttons or a hold-to-continue option if your camera supports it.
Will remapping affect autofocus or exposure controls?
If you map a function that overlaps with AF or exposure, it can cause unintended changes. Always avoid conflicts by choosing non-critical controls for zoom mapping.
Yes, mapping to a conflicting control can affect focus or exposure, so choose non-critical buttons.
Do I need external hardware to map the zoom button?
External hardware is optional. Many cameras offer built-in button remapping; external remotes or macro pads are only for advanced workflows or multi-camera rigs.
External hardware is optional; built-in remapping is enough for most setups.
How do I revert to factory settings if something goes wrong?
Use the camera’s reset or factory profile option to restore defaults. Then re-create mappings carefully and test in a controlled environment.
Use the reset function to revert, then rebuild mappings step by step.
Watch Video
The Essentials
- Identify your camera's custom controls first.
- Choose motorized or digital zoom mapping based on gear.
- Test and preserve original settings with backups.
- Document mappings for easy future reuse.