How to Get Started with Blink Cameras
Learn how to get started with Blink cameras, from setup and placement to notifications and maintenance. A beginner-friendly, practical guide for building a reliable home security camera setup.

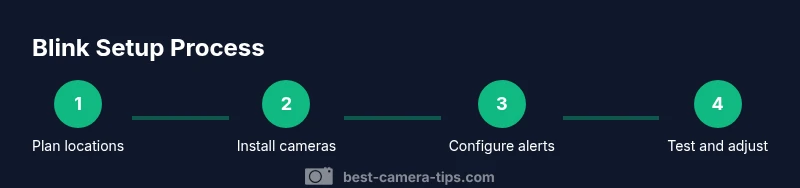
By the end of this guide, you will know how to get started with Blink cameras—from unboxing to live view and notifications. You’ll need a Blink account, a smartphone with the Blink app, a stable Wi‑Fi network, and at least one Blink camera. This step-by-step plan covers setup, placement, and basic troubleshooting. According to Best Camera Tips, Blink is a beginner-friendly entry point for home security.
Understanding Blink cameras and the ecosystem
If you’re looking to learn how to get started with blink cameras, this overview explains the core components, how the Blink platform functions, and what you typically receive in a starter kit. Blink focuses on a mobile-first experience with cloud-enabled storage and straightforward pairing, making it a popular entry point for beginners. According to Best Camera Tips, the Blink ecosystem emphasizes quick setup, simple management, and reliable motion alerts that can be tailored to fit your living space. You’ll find indoor and outdoor models designed for flexible placement, along with a central hub option for larger multi-camera setups. In practice, most new users appreciate the battery-powered options, the clean app interface, and the ability to monitor several areas from a single dashboard. This section helps you map your space, select the right models, and anticipate the kinds of mounting, power, and network considerations you’ll face as you begin.
Planning your Blink setup: cameras, locations, and power
Getting started means sketching a basic layout before you buy or mount anything. Think about primary entry points, high-traffic rooms, and outdoor approaches where you want visibility. When planning for how to get started with blink cameras, note distances from your router and whether you’ll rely on battery power or plugging in. If you choose battery-powered models, you’ll benefit from easier placement but will need to monitor battery life and schedule timely replacements. For wired or plug-in variants, identify outlets and weather considerations for outdoor placements. Create a simple map of zones you want to monitor (front door, back door, garage, yard) and mark ideal camera angles (slightly downward views for people, broader angles for broad scenes). This forethought reduces rework and helps you optimize coverage from day one.
Network and security considerations for Blink cameras
A stable network is essential for reliable Blink operation. Ensure your router provides solid coverage in the areas where you’ll place cameras, and consider separating your camera traffic from other devices to minimize congestion. Secure your Blink account with a strong password and enable two-factor authentication where available. Understand that Blink relies on a cloud service to store clips and events, so a consistent internet connection improves notification timing and video retrieval. If you plan to monitor multiple cameras, assess whether you’ll use the Blink Sync Module 2 and its capabilities for multi-camera management. Finally, review privacy settings and terms of service to align with your household policies and local regulations. Best practices emphasize keeping firmware up to date to guard against vulnerabilities and to gain the latest features.
Placement best practices for reliable coverage with Blink
Placement quality determines how well Blink cameras perform under real-world conditions. Mount cameras where they cover entry points with minimal obstructions, avoiding strong backlighting that can wash out motion sensing. For best results, place cameras at a height that deters tampering but remains within the field of view for typical activity. Keep cameras away from extreme temperatures or direct weather exposure unless you’re using specifically rated outdoor models. Test each camera’s view by temporarily marking targets with tape, then adjust angles to minimize blind spots. If you’re using indoor cameras, consider high-traffic rooms and hallways to maximize the likelihood of detecting movement. Consistent placement discipline reduces false alarms and improves the usefulness of alerts.
Everyday usage: notifications, clips, and sharing
Once cameras are in place, customize alerts to balance responsiveness with battery life and storage use. In Blink, you can set motion zones, sensitivity, and notification preferences so you’re alerted only when it matters. Regularly review clips and events to understand what triggers alerts and refine settings accordingly. If you intend to share access with others, use the app’s permissions features to grant or revoke viewing rights without sharing your account credentials. A thoughtful approach to daily use helps you stay informed without being overwhelmed by notifications, and it makes it easier to detect genuine events when they occur.
Maintenance and future-proofing your Blink setup
Keeping Blink cameras in good shape involves a few routine tasks. Check battery levels (for battery-powered models) and schedule replacements or recharges before you notice reduced performance. Periodically verify that camera firmware and the Blink app are up to date to maximize security and feature access. Revisit your placement if you notice blind spots after furniture changes or seasonal lighting shifts, and adjust motion zones as your home changes. The model you choose should align with your evolving needs; you can later expand coverage by adding more cameras or adjusting the Sync Module configuration. The Best Camera Tips team recommends treating Blink as a living system—review settings seasonally and stay current with firmware updates to maintain reliability and peace of mind.
Tools & Materials
- Blink account(Create or sign in to your Blink account)
- Blink app (iOS or Android)(Install from App Store or Google Play)
- Stable Wi-Fi network(Ensure reliable connectivity; 2.4 GHz is commonly supported)
- Blink camera(s) (indoor/outdoor, battery-powered or wired)(Select models based on location and weather exposure)
- Blink Sync Module 2 (optional for multi-camera setups)(Helps manage multiple cameras and storage options)
- Spare batteries or charging accessories(Keep on hand for battery-powered models)
Steps
Estimated time: 25-40 minutes
- 1
Unbox and identify components
Open the package and lay out each item to confirm you have cameras, mounts, batteries, and power options. Check for any damage and verify you have the model that matches your space (indoor vs outdoor). This upfront check helps prevent surprises during installation.
Tip: Keep mounting hardware organized in labeled bags for easy access. - 2
Create or sign in to your Blink account
Open the Blink app and sign in, or create a new account if you don’t have one. Follow on-screen prompts to verify your email and secure your account with two-factor authentication if available. This creates your central hub for all camera activity.
Tip: Use a strong, unique password and enable 2FA for added security. - 3
Install the Blink app on your phone
Download and install the Blink app on your smartphone from the appropriate app store. Sign in with your Blink account and grant the necessary permissions (camera, notifications, location) to enable full functionality. This app will be your primary control center.
Tip: Keep the app updated to access new features and fixes. - 4
Add your first Blink camera to the account
Within the app, choose to add a new camera and follow the guided pairing steps. Ensure the camera is powered or charged during setup. Pairing will associate the camera with your account and allow you to assign a name and location.
Tip: Have your spare batteries ready in case you need to swap during pairing. - 5
Connect camera to Wi‑Fi
Select your Wi‑Fi network in the app and enter the password. If the camera supports multiple bands, ensure you connect to a reliable 2.4 GHz network for broad coverage. After connection, the camera will appear as online in your dashboard.
Tip: Place cameras where the signal is strongest, and avoid dead zones. - 6
Mount or place cameras at chosen locations
Attach mounts to walls or place cameras on stable surfaces. Aim cameras at intended viewpoints, and avoid positions that would reveal a direct view through glass or bright light. Test the field of view and adjust as needed.
Tip: Use a level to ensure precise alignment and a wider coverage area. - 7
Configure motion detection and zones
Within the app, adjust motion sensitivity and define zones where you want alerts. This helps reduce false alerts from pets or passing cars. Save your settings and prepare a quick test to verify triggers.
Tip: Start with moderate sensitivity and refine after observing real events. - 8
Test live view and notifications
Run a live view check and simulate movement to confirm that alerts arrive promptly on your device. Review recorded clips after events to ensure quality and adjust settings if needed. This final test validates that everything is functioning as designed.
Tip: Test at different times of day to gauge lighting effects on video quality.
Common Questions
What is Blink and what comes in a starter kit?
Blink is a user-friendly home-security camera system that emphasizes quick setup and mobile access. A typical starter kit includes at least one camera, mounting hardware, batteries, and access to the Blink app for setup and notifications. Additional components like the Sync Module 2 can enhance multi-camera configurations.
Blink is a simple home-security option with cameras and an app for easy setup. A starter kit usually includes a camera and mounting hardware, plus access to the Blink app.
Do Blink cameras require a subscription?
Blink offers cloud storage options that may require a subscription depending on the features you want. Basic functionality like live view and alerts is available, while video history and advanced clips typically depend on your chosen plan.
Blink may offer cloud storage that depends on your plan; basic live view and alerts are available, but clips history depends on subscription.
Can I use Blink cameras outdoors?
Yes, Blink offers outdoor models designed to withstand weather exposure. When using outdoor cameras, ensure placements are within reach of power or battery access and are mounted in weather-protected areas as recommended by the manufacturer.
Absolutely, Blink has outdoor models. Place them in weather-protected spots and follow the mounting guidance.
How do I reset a Blink camera?
To reset a Blink camera, follow the device-specific reset procedure in the app or the manual. After resetting, you can re-pair the camera to your Blink account and reconfigure settings.
Resetting a Blink camera requires following the reset steps in the app or manual, then pairing again.
Is Blink compatible with smart home assistants?
Blink devices can be integrated with some smart home ecosystems for voice control and automations. Check the latest compatibility guides for supported assistants and any required skills or apps.
Blink can work with some smart home assistants for voice control; check current compatibility guides.
How long does Blink footage stay in the cloud?
Cloud storage duration depends on your plan and settings. Review your plan details in the app to understand how long clips are retained and how to manage storage.
Clip retention on Blink depends on your plan; check your app for specifics.
Watch Video
The Essentials
- Identify ideal camera locations before mounting.
- Create a Blink account and link your devices.
- Configure notifications to balance responsiveness and battery life.
- Test live view and adjust placement for optimal coverage.
- Keep firmware updated for security and performance.