When to Use Camera Flash: A Practical Lighting Guide
A practical, educational guide on when to use camera flash, balancing ambient light, and avoiding harsh shadows. Learn pairing flash types, setup steps, and common pitfalls for photographers of all levels.

In this guide you will learn when to use a camera flash, what settings matter, and how to avoid common flash mistakes. You'll need a compatible flash, a basic understanding of your camera’s flash modes, and a diffuser or bounce surface to soften light in various shooting conditions across different moments and environments.
Why understanding when to use camera flash matters
Photography is fundamentally about shaping light. Understanding when to use camera flash is a core decision that affects exposure, color, and mood. A well-timed flash can lift a dim subject without washing out the scene, while an ill-placed flash can create flat features, red-eye, and harsh reflections. By learning to read the scene, you’ll know when the extra light will improve the image rather than degrade it. According to Best Camera Tips, mastery starts with recognizing the moments when flash is genuinely beneficial: low ambient light, backlit subjects, or scenes with strong shadows where ambient light alone cannot reveal detail. In these cases, the flash acts as a controlled light source that you shape with distance, angle, and power. Distance matters: the farther the subject, the more power you need, and the light becomes softer as it travels. Angle matters: a 45-degree angle typically yields flattering shadows; direct, on-axis flash often looks unflattering. Diffusers and bounce strategies help tame harsh highlights and create natural-looking light.
For beginners, this means pausing before you fire and asking a few quick questions: Is there enough light to avoid noise? Will the flash introduce color shifts or ghosting? Will the subject benefit from added light or from a warmer ambiance achieved with natural light? The goal is to use flash as intentional lighting, not a default crutch. Best Camera Tips emphasizes practicing in controlled environments where you can compare results with and without flash, helping you internalize how different angles, distances, and power levels change the final image.
taggingHint”:“true”},
Tools & Materials
- Camera with hot-shoe flash or built-in flash that can be used manually(Ensure fire control and adjustable power; external speedlights offer more control.)
- Flash diffuser or bounce card(Softens light and reduces harsh shadows.)
- Bounce surface or nearby wall/ceiling(Used to create indirect lighting for a more natural look.)
- Spare batteries or portable power bank(Keeps gear ready for longer shoots.)
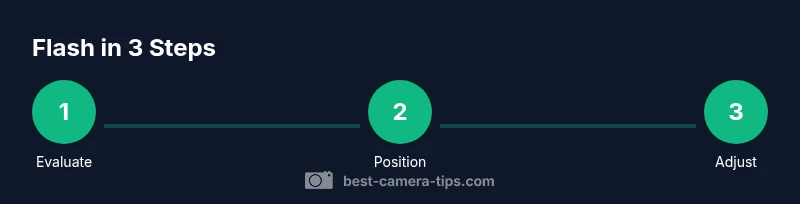
Steps
Estimated time: 30-60 minutes
- 1
Assess the scene and desired mood
Look at ambient light, subject distance, and background brightness. Decide whether flash will improve exposure and mood, or if you should rely on natural light and a higher ISO instead.
Tip: If the ambient exposure already looks balanced, consider a low-power fill flash instead of full power. - 2
Choose flash approach (TTL vs manual)
TTL (Through-The-Lens) automatically meters the scene, while manual gives you precise, repeatable power. Pick based on control needs and consistency across shots.
Tip: Start with TTL for speed, then switch to manual if you need consistent output across shots. - 3
Position the flash and set angle
Avoid direct frontal light. Place the flash at a 30–45 degree angle to the subject, or bounce off a wall/ceiling for softer shadows.
Tip: Bouncing light reduces hotspots and creates natural catchlights. - 4
Set power and camera settings
Begin with a modest power level (roughly 1/4 to 1/2 depending on distance) and adjust ISO and shutter speed to sync with your flash. Keep shutter speed within your camera’s sync speed.
Tip: Use flash exposure compensation if your shots come out under- or overexposed. - 5
Diffuse and refine light
Add a diffuser or diffuse through a bounce surface to soften highlights and ensure skin tones look natural.
Tip: Diffusion is your friend for people photography; it prevents flat, harsh lighting. - 6
Test shot and adjust WB
Take a quick test frame, evaluate lighting and color balance, and correct white balance if necessary.
Tip: A warm or cool cast can drastically affect the perceived quality of the flash light. - 7
Finalize and review results
Capture the final image set, review histogram for clipping, and iterate if needed to balance ambient and flash exposure.
Tip: Check the histogram rather than relying on the preview to judge exposure.
Common Questions
What is TTL flash and when should I use it?
TTL stands for Through-The-Lens metering. It automatically adjusts flash output, but you may need to tweak power in mixed lighting.
TTL meters through the lens and auto-adjusts power, but you might still want to tweak it for mixed lighting.
Should I use flash indoors or outdoors?
Indoors, flash can fill shadows and balance light; outdoors, use flash sparingly to prevent overpowering sunlight.
Use flash indoors to fill shadows; outdoors, rely on ambient light and use flash only for fill if needed.
How can I reduce red-eye when using flash?
Increase distance, diffuse the light, and enable red-eye reduction on your camera if available.
Move the light farther away and diffuse it to prevent red-eye.
Do I always need flash for portraits?
Not always. Use flash when ambient light is insufficient or you want catchlights, but avoid overpowering the scene.
Flash is helpful but not always necessary; judge mood and lighting first.
What are good starting settings for flash photography?
Begin with ISO 400–800, flash power around 1/4, and adjust shutter speed to sync with the flash.
Start with moderate ISO and a quarter power, then tweak from there.
Watch Video
The Essentials
- Take control of light with the flash to avoid overexposure.
- Use bounce or diffusers to soften flash light.
- Meter cautiously and adjust power before firing.
- Balance ambient light with flash for natural mood.
- Practice in varied environments to build intuition.