How to Get Camera Out of Selfie Mode: A Practical Guide
Learn step-by-step methods to exit selfie mode on iPhone and Android, disable front-camera effects, and ensure reliable control over your camera. Includes troubleshooting tips and best practices for quick switching.

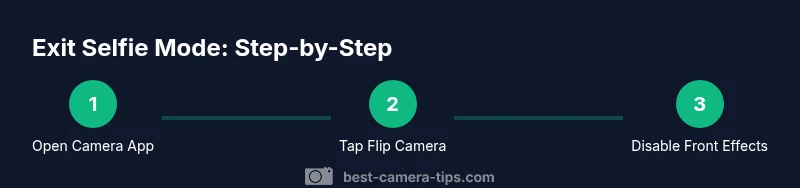
You can exit selfie mode by switching from the front-facing camera to the rear camera and turning off any beauty or portrait effects. This guide covers a quick, reliable method across iOS and Android, plus app-specific tips if a particular app keeps the front camera active. Start with the camera flip button, then check settings if needed.
What selfie mode is and why you might want to get out
If you're wondering how to get camera out of selfie mode, here's a quick primer on what selfie mode is and why exiting can improve image quality and control. Selfie mode typically uses the front-facing camera and may apply beauty filters, soft focus, or digital zoom that favors skin-smoothing and a mirrored preview. Exiting to the rear camera generally unlocks higher-resolution sensors, a wider range of focal lengths, and less aggressive processing. For landscapes, group shots, or scenes with challenging lighting, switching to the back camera often yields sharper detail and more accurate colors. By understanding the basic behavior of selfie mode, you can decide when to keep it on for convenience and when to switch for quality. This section sets the stage for practical, platform-specific steps later in the article.
Quick checks before you start
Before you begin, verify a few essentials so the exit process goes smoothly:
- You’re using the built-in Camera app or a trusted third-party camera app, not a video-call interface that locks the feed.
- The camera flip or switch button is visible in the app’s main view.
- App permissions allow camera access; if an app denies camera permission, the switch to the rear camera may be blocked.
- The lighting is adequate; poor light can make the rear camera look worse than the selfie mode.
- If you’re using beauty or portrait modes, locate and disable any enhancements that force front-camera processing.
With these checks, you’re less likely to encounter surprises when you flip to the rear lens.
Understanding camera controls across iOS and Android
Camera controls differ slightly by platform, but the core action—switching from the front to the rear camera—remains the same. On iOS devices, look for a circular arrow icon or a double-arrow button (often at the bottom-right) to flip between lenses. On Android, the switch camera icon is commonly represented by a camera with rotation arrows and may sit near the bottom or side of the screen. Some OEMs place the switch inside a quick-access toolbar. In both ecosystems, brightness, HDR, and portrait effects may adapt when you switch lenses, so if you notice a change in exposure, pause to adjust the settings. If you’re using a third-party app, the control may be located in a different area or require an extra tap; always scan the screen for a camera-switch icon when in doubt.
Step-by-step: exiting selfie mode on iPhone
- Open the Camera app and ensure you’re in Photo or Video mode. Open the app from the home screen, not from a notification or lock screen shortcut. This ensures you’re working with full control over the lens.
- Tap the flip camera button (the circular arrows icon) to switch to the rear camera. If the icon is subtle, try tapping near the bottom-right corner or switching to a different mode and returning.
- If Portrait or Beautify features are active, disable them in the control panel (Portrait Lighting, Beauty, or smoothing). These settings can obscure the switch to the rear and may be applied automatically in some modes.
- Make sure you’re not in a video-call overlay or another app that keeps the front camera active. If you are, exit the call or close the app to release the camera.
- Take a quick photo to confirm the rear lens is in use and the preview no longer mirrors your face.
- If you still see front-camera behavior, restart the Camera app or the device. A simple reboot clears temporary session locks.
Step-by-step: exiting selfie mode on Android
- Launch the Camera app as your primary photography tool. Avoid launching from a notification or a chat app, which may open in selfie mode.
- Tap the toggle switch camera button to swap to the rear lens. If the icon isn’t obvious, try switching modes (Photo to Video) and back to reveal the control.
- Turn off any front-camera effects such as Beauty, Skin smoothing, or Bokeh if you see them active. These can persist even after you flip the lens.
- Check app-specific settings if you’re using a camera app inside another program (messaging, social media, or conferencing apps). Some apps override system camera controls and force the front camera.
- Take a test shot or video to verify the rear camera is active.
- If the problem persists, restart the Camera app or the device to reset the camera stack.
When apps lock the camera in selfie mode and how to fix
Sometimes, a video call or social app will lock the front camera or push selfie mode as the default. In this case, closing the app may not be enough; you may need to force stop or restart the app, then reopen the Camera app directly from the home screen. Check in-app camera permissions and reset them if necessary. If the issue keeps returning, consider updating the camera app, system software, or the device’s firmware. Some devices also allow you to set a default camera in the system settings; adjust this so the rear camera is preferred when starting the camera from the home screen.
Troubleshooting common issues and edge cases
Edge cases include hardware-level constraints where the front sensor is malfunctioning, or software glitches that persist after updates. If you’ve followed the standard steps and the rear camera won’t engage, try a basic diagnostic: clear the Camera app cache (Android), reset settings (iOS), or reinstall the camera app if it’s a third-party option. Ensure the device isn’t in a restricted mode (Kids/Family safety settings) that could limit camera access. When the device is near full storage, the camera may behave unpredictably; free up space if needed. If you rely on advanced modes (RAW, HDR+, Pro mode), verify compatibility and update to the latest firmware.
Tips for faster switching and avoiding future confusion
- Keep the camera lens clean so the switch is visually distinct and avoids mis-taps.
- Practice the flip action in well-lit, simple scenes to reduce hesitation during real shoots.
- Create a habit of checking the active lens after every app switch or mode change.
- When using third-party apps, memorize their camera icon location, as placement can differ from the stock app.
- Consider enabling a quick-access toggle in settings for rear-camera default at launch, if your device supports it.
Why you might want to customize camera settings for selfies
Selfies aren’t one-size-fits-all. Customizing camera settings—such as aspect ratio, resolution, and exposure—helps you tailor the look to the scene and your style. For bright outdoor scenes, raise shutter speed and adjust HDR to prevent blown highlights. In low light, enable Night mode or a slower shutter with a tripod. While the rear camera generally offers higher resolution and dynamic range, the front camera’s convenience is unmatched for quick social posts; balancing ease and quality is the key. Regularly revisiting camera presets can reduce the time needed to exit selfie mode in future shots.
Tools & Materials
- Smartphone with Camera App(Any iOS or Android device)
- App permissions to camera(Ensure the app has camera permission granted)
- Optional: other apps using camera(Video-call or social apps may affect behavior)
- Charger or power source(Keep device charged during troubleshooting)
Steps
Estimated time: 5-10 minutes
- 1
Open Camera app
Launch the camera you will be using for photos or video. Ensure you’re not in another app’s camera view, which can lock the live feed. This initial step ensures you’re working with full camera controls.
Tip: If the camera opens in selfie mode from a shortcut, open the app from the home screen instead. - 2
Switch to rear camera
Tap the flip camera button to switch to the back lens. If the icon isn’t obvious, switch modes briefly (Photo/Video) and return to reveal it.
Tip: Look for a circular or two-arrow icon near the bottom-right; some devices place it in the top toolbar. - 3
Disable front-camera effects
If Portrait, Beauty, or smoothing modes are active, turn them off. Front-camera processing can persist even after you switch lenses and may ruin the shot.
Tip: Toggle off any Beautification sliders before you take test photos. - 4
Check app permissions
Ensure the camera permission is enabled for the camera app, not just the front-facing camera. Some apps require re-authorization after updates.
Tip: In iOS, go to Settings > Privacy > Camera and enable for the app; in Android, use Settings > Apps > App Permissions. - 5
Test with a photo
Take a quick photo using the rear camera to confirm you’re out of selfie mode. Review the image for exposure, color accuracy, and detail.
Tip: Test in good lighting to clearly see the difference between lenses. - 6
Restart if needed
If the rear camera remains inaccessible, close the Camera app and restart the device. This clears temporary locks and refreshes hardware connections.
Tip: Save any unsent work before rebooting and ensure your device isn’t in the middle of an update.
Common Questions
How do I switch from selfie mode to the back camera on iPhone?
Open the Camera app, then tap the flip camera button (circular arrows) to switch to the rear lens. If the button isn’t visible, try switching modes briefly and return to reveal it. Disable any beauty or portrait effects to see the rear camera clearly.
Tap the flip camera button in the Camera app to switch to the rear lens; if you don’t see it, switch modes and try again. Also turn off beauty features if you want a neutral image.
Why is my front camera staying on after I tap flip?
Some apps lock the camera to the front lens for video calls or selfies. Exit the call or close the app, then open the Camera app directly from the home screen and switch lenses. Check in-app settings to allow rear-camera use.
If the front camera stays on, exit the app or call and open the Camera app itself to switch lenses. Check the app settings for camera permissions.
What if the flip button is missing?
Try switching modes (Photo to Video) or reset the camera view by closing and reopening the app. If the device skin hides the control, update the camera app or check for system updates.
If you can’t find the flip button, switch modes or restart the app. Update your camera app if the control is hidden.
Can I disable selfie mode permanently?
Selfie mode is a standard camera feature and cannot be disabled globally across all apps. You can disable front-camera effects per-app and prefer using the rear camera by default when launching the stock camera.
You can’t disable selfie mode everywhere, but you can turn off front-camera effects and default to the rear camera when opening the stock app.
Does this affect video calls or streaming?
During calls, some apps lock the front camera by design. Exit the call or adjust the in-app camera settings to allow rear-camera usage, if supported by the app and device.
Video calls may force the front camera; you may need to end the call or change in-app settings to use the rear camera when possible.
Watch Video
The Essentials
- Flip to rear camera to exit selfie mode
- Disable any front-camera effects before shooting
- Check app permissions and restart if needed
- Test with a photo to confirm success
- Update or reset if issues persist