How to Get a Camera Out of a Feathersnap Bird Feeder: Practical Removal Guide
Learn a safe, step-by-step method to retrieve a camera stuck in a Feathersnap bird feeder. Practical safety tips, proper tools, and troubleshooting to prevent damage during removal.

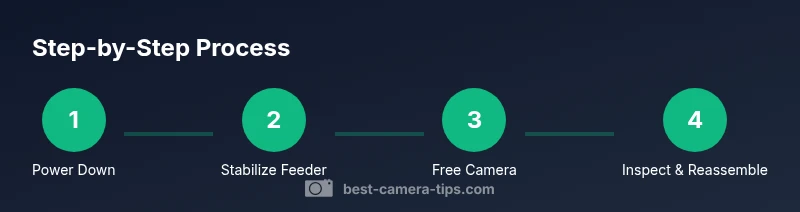
Goal: safely remove a camera from a Feathersnap bird feeder without harming the device or visiting birds. You’ll power down and disconnect, stabilize the feeder, and carefully free the camera from the housing with gentle, incremental movements. Key requirements include good lighting, a steady hand, a soft surface, and patience.
Safety First: Stop, Protect Birds, and Prepare
According to Best Camera Tips, safety is the top priority when a camera becomes lodged in a Feathersnap bird feeder. Begin by powering down the feeder and unplugging if possible. Allow any electronics to settle, and keep birds and pets away from the area. Place the feeder on a stable, non-slip surface and ensure you have ample lighting so you can inspect the housing and access points without rushing. A calm, deliberate approach reduces the risk of accidental movement that could injure birds or damage the camera or feeder.
Assess the Feeder Design and Access Points
Feathersnap feeders vary in how the camera is mounted, but most designs offer a lens or housing that can be accessed from the front or top. Look for obvious screws, clips, or latch points, and note any seals or weatherproof gaskets. Understanding the exact access point helps you plan a gentle removal path and reduces the chance of bending or cracking plastic housings. If you’re unsure, consult the user manual or Best Camera Tips guidance on handling small wildlife gear safely.
Plan Your Removal with a Calm, Methodical Approach
Before touching anything, visualize a clear path for the camera to exit without snagging on internal wiring or feeder internals. Clear the surrounding area of loose tools and keep a soft mat ready to cushion any accidental drops. Decide which tool from your toolkit will provide the gentlest contact—ideally a thin card or plastic prying tool—so you avoid scratching the camera lens or the feeder’s finish. A plan minimizes force and protects both gear and wildlife.
Gentle Access: Create Clearance Without Forcing Parts
Begin by loosening any exterior fasteners with a precise, small tool. Do not use metal pry bars or aggressive tools that can crack plastic. If there’s an obstruction, slide a plastic card or plastic “shim” between the housing and the camera to create a tiny gap. Work slowly, applying micro-movements rather than broad wrenches. The goal is to free the camera housing just enough to slide the device out along its intended path.
Free the Camera Housing and Withdraw the Device
With a stable, lighted workspace, carefully begin retracting the camera along its normal trajectory. If resistance is felt, back up slightly and re-aim to avoid twisting connectors. Keep the lens away from contact with rough surfaces; support the camera body with your gloved hand to prevent accidental drops. If there are connectors, disconnect them gently, following any manufacturer guidance to avoid shorting or pin damage.
Check Connectors, Seals, and Weatherproofing
Once the camera is free, inspect all connectors and seals for damage. Note any scratches, cracked gaskets, or moisture intrusion. If you see moisture trapped near the seal, dry it with a microfiber cloth and allow any damp components to air dry before storage or reinstallation. Replace any compromised seals to preserve weather resistance for future use.
Clean, Dry, and Inspect Before Reassembly
Avoid using excessive moisture on electronics. Use a dry microfiber cloth to wipe the camera housing and interior surfaces. Inspect the lens for smudges or fingerprints that could degrade image quality; if needed, gently clean with a lens-safe cloth. Take a quick photo of the orientation to help during reassembly and ensure you reconstruct the original mounting correctly.
Reinstall, Test, and Observe Bird Activity
Position the camera carefully back into its housing, reconnect any cables where applicable, and reseal the unit. Power up the feeder and verify that video or sensor triggers respond normally. Observe a few minutes of bird activity to ensure there are no unusual noises or movement. If anything feels off, power down again and re-check connections.
What to Do If the Camera Won’t Budge or Feeder Is Damaged
If the camera remains stuck despite careful attempts, stop and consult the manufacturer’s guidance or a professional technician. Forcing the camera can worsen damage and void warranties. Document the issue with photos to assist any service inquiry, and consider sending the feeder and camera to the manufacturer if under warranty.
Preventive Practices for Future Use
To reduce similar issues, store the camera in its protective case when not in use and inspect the feeder’s mounting area for debris before reinstallation. Keep weather seals clean and free of grit that can cause fitting resistance. Regular, gentle maintenance saves time and keeps wildlife encounters safe and enjoyable.
Tools & Materials
- Precision screwdriver set(Small Phillips or flat-head tips (1.5–2.5 mm) depending on screws)
- Plastic pry card or guitar pick(Soft edge to avoid scratching housing or lens)
- Microfiber cloth(For dusting and gentle cleaning)
- Headlamp or small flashlight(Ensure good lighting in tight spaces)
- Non-slip work surface or mat(Protects camera and feeder from drops)
- Soft gloves(Prevent fingerprints on lens and provide grip)
- Isopropyl alcohol wipes(For stubborn grime, avoid contact with lens)
- Small container or tray(Keep screws organized)
- Lens-safe cleaning solution(Only if needed for stubborn smudges)
Steps
Estimated time: Total time: 25-45 minutes
- 1
Power down and secure
Turn off the feeder and unplug from power. If it’s battery-powered, remove the battery to prevent any movement. Confirm there’s no live feed that could surprise you as you work.
Tip: Label power sources or take a quick photo of the wiring before detaching. - 2
Stabilize the workspace
Place the feeder on a stable surface and ensure it won’t roll or tip during removal. Clear the area of loose tools and position a soft mat to cushion any accidental drops.
Tip: Keep a dedicated spotlight on the access point to spot small screws or clips. - 3
Inspect exterior fasteners
Check for visible screws, clips, or latches around the camera housing. Note their type and orientation to guide your removal path and avoid misplacing parts.
Tip: Use a magnifier if screws are small or camouflaged by dirt. - 4
Create a gentle clearance
Slide a plastic card between housing and camera to create a tiny gap. Do not pry with metal tools that could gouge plastic or crack the seal.
Tip: Work in small increments and re-check alignment after each gentle nudge. - 5
Loosen the outer housing
Loosen any exterior screws and loosen clips just enough to permit slight movement. Avoid twisting the housing, which can stress internal wires.
Tip: If a stubborn clip resists, pause and reassess before forcing it. - 6
Gently retract the camera
Begin removing the camera along its natural exit path. Support the camera body with your gloved hand to prevent slips and disconnect any accessible connectors carefully.
Tip: Take photos of connector orientations for reassembly reference. - 7
Check connectors and seals
Inspect the connectors for any signs of wear and the seals for damage. Moisture around seals can degrade weatherproofing, so address any issues before storage.
Tip: Dry any moisture with a microfiber cloth and let seals air-dry before reassembly. - 8
Clean and inspect the camera
Wipe the camera housing and lens area gently. Look for scratches or cracks that could affect image quality or weather resistance.
Tip: Use lens-safe cleaning methods to avoid micro-scratches. - 9
Test power and recording
With the camera removed, power up the feeder briefly to confirm the basic functions (LED indicators, sensor triggers). Do not run it for extended periods during testing when detached.
Tip: Record a quick short test clip to verify camera integrity when reinstalled. - 10
Reinstall or replace weather seals
If seals show wear, replace them or reseal the housing before reinserting the camera. A good seal prevents moisture intrusion during rain or dew.
Tip: Keep spare seals on hand for future maintenance. - 11
Reassemble and reseat
Place the camera back into the housing following the reverse order of removal. Reconnect cables, ensure alignment, and tighten fasteners to original snugness without over-tightening.
Tip: Consult the manual for torque guidance if available. - 12
Final test and bird watch
Power up again and observe the feeder for a few minutes to ensure normal operation and absence of unusual vibrations. Watch for birds’ behavior around the newly reinstalled unit.
Tip: Start with short observation periods before returning to full operation.
Common Questions
What should I do if the camera is damaged during removal?
Stop immediately and assess the damage. If the lens or housing is cracked, avoid powering it on until inspected by a professional or the manufacturer. Document the damage with photos for warranty or service inquiries.
If you notice damage, stop and review the issue. Take photos and contact support before attempting further use.
Can I remove the camera without uninstalling the feeder?
In some models you can access the camera through the housing without removing the feeder from its mounting. If you’re unsure, use the manufacturer’s guidance and avoid forcing parts that could break seals or lens alignment.
Some models allow access without full removal; check the manual and avoid forcing anything.
Will removing the camera void my warranty?
Removal itself usually doesn’t void a warranty, but forcing parts or causing damage can. Always follow the manufacturer’s steps and keep records of the process and any replaced seals or parts.
Usually removing it carefully won’t void the warranty, but misuse could. Keep documentation.
How can I prevent future sticking or jams?
Regular cleaning of the feeder’s interior and seals helps prevent debris from causing resistance. Inspect weather seals before each reinstallation and store components in their protective cases when not in use.
Clean regularly and check seals before reinstalling to avoid jams.
What if birds are actively feeding while I work?
Pause the removal if birds are actively at the feeder. Wait for a quiet window, keep a safe distance, and resume once birds have moved away. Never chase or scare birds away aggressively.
If birds are present, pause until they settle, then continue calmly.
Should I contact the manufacturer for help?
Yes, if removal becomes risky or you suspect internal damage. Manufacturer support can provide model-specific guidance and recommend approved tools or service options.
If in doubt, contact the manufacturer for model-specific advice.
Watch Video
The Essentials
- Power down before touching any components
- Use gentle, incremental movements to free the camera
- Inspect seals and connectors for damage
- Test operation after reassembly and observe wildlife